by Lisa Cooke | Jun 13, 2014 | 01 What's New, Evernote, Organization, Research Skills, Source Citation
 Are you using Evernote for Genealogy? You’re not alone! The company announced recently that over 100 MILLION people now use Evernote to keep track of what they know and how they know it.
“When we launched the Evernote service in 2008,…there were many note takers and productivity tools around at the time but they all felt out of date; they were becoming less and less relevant to people’s lives,” explains a company press release. “We set out to redefine the meaning of productivity for modern busy people. We want Evernote to become your workspace; the place where you do all of the everyday things that keep your life moving forward.”
Evernote has sure taken the genealogy community by storm. I attend conferences around the world and it seems every single one has at least one class devoted to using Evernote for genealogy!
3 Reasons Why Evernote is Ideal for Genealogy Research:
1. You can store your research information with the source citation and any additional notes you take about the item. It’s easy to transfer online finds into Evernote and easy to copy them into your family history writing projects or websites.
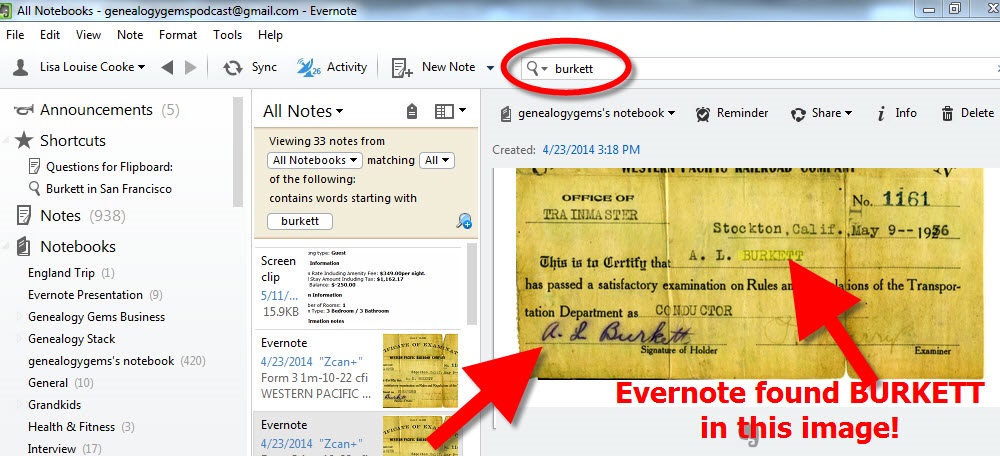
2. You can sort and retrieve data easily: When I search “Burkett” Evernote instantly and thoroughly sifts all of my notes. It locates all 33 of my notes where the surname BURKETT appears in a note, even when the name appears in an image such as this scan of my Grandfather’s Railroad examination certificate from 1936. That is thanks to the fact that Evernote applies Optical Character Recognition (OCR) to all images in your notes!
3. Your desktop version syncs with whatever you do through the Evernote app. With Evernote on your mobile device, you have constant access to your genealogy research, photos and more. Think how easy that makes your next trip to an archive or family reunion!
And here’s a tip for all of you iPhone and iPad users:
Stop searching for the Evernote app on your mobile devices desktop. Just press and hold the Home button and tell Siri “Open Evernote App!”
 Free Download: If you haven’t tried the FREE version of Evernote note-taking and data-organization software yet, download it here.
Then cut your learning curve and start using Evernote effectively RIGHT AWAY by purchasing our Evernote for Genealogists guide! The guide is available as a digital download or laminated print format, for the Mac or PC.
More Free Resources:
How to Get Started in Evernote, and the Ultimate Evernote Education
How to Add Text to a Web Clipping in Evernote
Should Evernote be my Digital Archive?
by Lisa Cooke | May 27, 2014 | 01 What's New, Family History Podcast, Organization, Photographs
Listen to the Family History: Genealogy Made Easy podcast by Lisa Louise Cooke. It’s a great series for learning the research ropes and well as refreshing your skills.
Family History: Genealogy Made Easy
with Lisa Louise Cooke
Republished May 27, 2014
[display_podcast]
Download the Show Notes for this Episode
Welcome to this step-by-step series for beginning genealogists—and more experienced ones who want to brush up or learn something new. I first ran this series in 2008-09. So many people have asked about it, I’m bringing it back in weekly segments.
Episode 33: Organize Your Genealogy Files, Part 2
In our last episode I shared how I went from disorganized procrastinator to proactive organizer after a few hard knocks. I hope you will agree now that organization doesn’t have to come naturally: it can be learned and practiced!
I also introduced you to a system that I developed about a decade ago, and have leaned on ever since to keep my computer’s hard drive organized as I have added hundreds if not thousands of source documents to it as I went about my genealogy research. Even now I can retrieve exactly the document I need quickly and easily…and you will be able to as well!
In this episode I’m going to pick up where we left off, at the GENEALOGY folder on our C: drive. So fire up your computer and rev up that mouse because we have some organizing to do!
Create the File Folders
Today it’s back to our computer’s hard drive. Open Windows Explorer. Now using your mouse you need to navigate your way to your C drive.
This system is going to be based on the surnames in your family tree. I currently have 32 surname folders on my computer. Start by creating about a dozen of the surnames folders that you tend to spend the most time on. Don’t worry about creating a folder for every surname right now. Down the road when you find a record for a surname that you don’t have a folder for you can just create the folder right then and there.
Now click on one of the surname folders that you know you have digital records for – now we’re going to create folders for each of the major categories of records that you may come across.
I’ve made a half dozen surname folders for the surnames I work on the most, and now I’m going to set up folders in the surname folder for all the different kinds of records I have.
And these folders really follow along with so many of the topics we’ve covered here on the podcast. Examples of record folders are Births, Deaths, Census, Marriages, Land, Military, Newspapers, Occupation, Wills & Estates.
So here’s what the folder structure looks like:
C: – GENEALOGY
– BILLS TREE
– LISAS TREE
– BURKETT
– BIRTHS
– CENSUS
– DEATHS
– LAND
– LOCATIONS
– MARRIAGE
– MILITARY
– NEWSPAPER
– OCCUPATIONS
– WILLS & ESTATES
– NIKOLOWSKI
– SPORAN
So now that the initial Burkett folders are set up, and I say initial because again I’ll be adding more as I do my research and find new types of records, I’m now going to set up the same 9 files in the other surname folders I created.
Name Your Files
Once you have these initial records folders created within each of your first surname folders it’s time to start filing your records.
File Naming Conventions: “1920 Russell Springfield OH” or “SOURCE 721 1920 Russell Springfield OH”
If you have digital records sitting in a folder or on your C drive or even on your computer’s desk top, now’s the time to file them in their appropriate folders. File them all now and you’ll very quickly get the knack for where things go. If you come across a record type that we haven’t created a folder for yet, go ahead and create it. But just be sure that it doesn’t fall under one of the other categories.
I strongly recommend creating a LOCATIONS folder in your GENEALOGY folder. Inside the LOCATIONS folder you would then create folders for each major location where ancestors with that surname would have lived.
If I had lots of location records for several different counties, I might create county folders. So I file all the maps, postcards, county histories and other information about Ohio in the Ohio folder, and the same goes for Indiana and California. Down the road if it turns out you have a really large number of documents, or you start finding relatives in other counties, you can always create county folders, or more detailed records folder and then file the documents accordingly.
Filing Photographs
I’ve given this a lot of thought over the years and have found that what works best for me is NOT to include photos in these files. There are genealogical RECORDS files, and records are not the same as photos.
Filing Structure:
C: – GENEALOGY
– PHOTOS
– BILLS FAMILY
– LISA FAMILY
– BURKETT
– CHARLES AND ALFREDA BURKETT
1940_Alfreda_Louise.jpg
– CHARLES AND ELLEN BURKETTE
– CONOVER AND VIOLA BURKET
Things can get very confusing very quickly with marriages and maiden names and all that. But this system addresses that in a way that’s easy to remember. It’s based on how the census works. Census records are filed by head of household, and that’s what I do for photographs. I usually include the husband and wife’s name in my folder name because often sons are named after fathers like in the case of my Burketts, and also there can be second marriages and so you’d have a folder for the ancestor and their first spouse and then that same ancestor and their second spouse.
I really like to think in terms of families, because in the end we aren’t researching an individual ancestor all by themselves. Rather we are researching an ancestor within the context of his familial relationships. And filing in this manner keeps that at the forefront of our thinking.
Photos are filed by family under the head of the household. Both male and female ancestors are filed within their parent’s folders prior to marriage, and in their own family folder under the family surname after marriage. You may occasionally have photos with several families in them with different surnames. But often times they are taken at a family’s home. And in that case I file them under the family who’s home they were taken. You can always file a copy under the other families as well if you like. I’m not trying to dictate every single possibility here, but rather give you a process and system that works for the majority of your needs, but that is customizable based on your specific needs.
Now you may also be wondering how this system for photos fits in with geo-tagging photos. I covered geo-tagging in Genealogy Gems Premium episode 25. For more information on how to become a Premium member, click here.
Well, we have covered a lot of ground in this episode, and I hope that will give this hard drive filing system a try!
by Lisa Cooke | May 20, 2014 | 01 What's New, Family History Podcast, Organization
 Family History: Genealogy Made Easy
with Lisa Louise Cooke
Republished May 20, 2014
[display_podcast]
Download the Show Notes for this Episode
Welcome to this step-by-step series for beginning genealogists—and more experienced ones who want to brush up or learn something new. I first ran this series in 2008-09. So many people have asked about it, I’m bringing it back in weekly segments.
Episode 32: Organize Your Genealogy Files, Part 1
Hard drive organization is one of the great challenges that quickly faces new genealogists—and often continues to plague experienced researchers. In today’s episode I’m going to share a system I’ve developed for organizing your computer hard drive files so that you can quickly and easily locate any document. I’ve been using this system for almost a decade and it’s never failed me. So set down your family tree, just for a little while, and put on your apron as we get ready to do some hard drive spring cleaning and organization!
Self-discipline and organization for the genealogist can be our greatest challenge. But it can lead to our greatest research victories!
Think about it. Your amazing research finds become pretty useless if you can’t locate it whenever you need it. And in fact, it has the potential to become a HUGE time and money waster because when you do need it again, you’re going to have to retrace your tracks, find it again at the original source, and pay whatever additional costs that requires.
So each time you’re tempted to toss that record in a pile on your desk or in some non-descript catch all folder on your computer’s hard drive because you’re in a hurry, just remember that in the long run it’s going to slow you WAY down when you want to retrieve it, and ultimately it’s going to dramatically hinder your overall research.
In these next few episodes I’m going to share the hard drive organization system I’ve created for use in Windows. My goal with this system is that I can locate the corresponding electronic file on my computer for any fact in my database in seconds.
Getting Started
At your computer open Windows Explorer. Now on most computers the C drive is the main drive that you store your files on. But if not just double click on the drive where you want to store your computer files.
Select the C drive by clicking on it and go up to the menu and select FILE – NEW FOLDER. In most versions of Windows, you can also just right click on the C drive and select NEW – FOLDER. You’ll see that the label for the folder will be highlighted so that you can name it – so just type GENEALOGY and press ENTER and you will now have a folder on your C drive called Genealogy. Everything’s going to go into this folder.
Overview of Computer Folders:
Setting up folders on your computer is a lot like setting up a filing system in your office. Think of the Genealogy Folder that we just created as a larger drawer in your desk. In that drawer you would put folders for all the major headings of work that you do. And each of these hanging files have a lot of folders in them with sub headings. And within each of these file folders you could even have more folders.
Well, your computer hard drive can be organized much the same way. And you can create all the folders you want.
There are general items having to do with your genealogy research such as:
- Charts and files
- Forms
- History topics
- Research trip materials
- General timelines
- Genealogy societies or organizations
- and other things that don’t pertain to a particular family in your family tree.
But the folders I want to focus in on are the ones that do apply to your family lines. So we’re going to create a folder inside the Genealogy folder called SURNAMES RESEARCHING. How to Create the SURNAMES RESEARCHING Folder:
- Click on the GENEALOGY folder to select it
- Go to the Menu and click on FILE
- Select NEW
- Select FOLDER
- Name the folder
In next week’s episode I’m going to focus on organizing my family tree which will take us into the heart of this system.
by Lisa Cooke | Mar 25, 2014 | 01 What's New, Beginner, Evernote, Organization, Research Skills
Recently I heard from Jane, a Genealogy Gems Premium subscriber in Canada, who needs a genealogy research plan! She’s researched on Ancestry.ca, 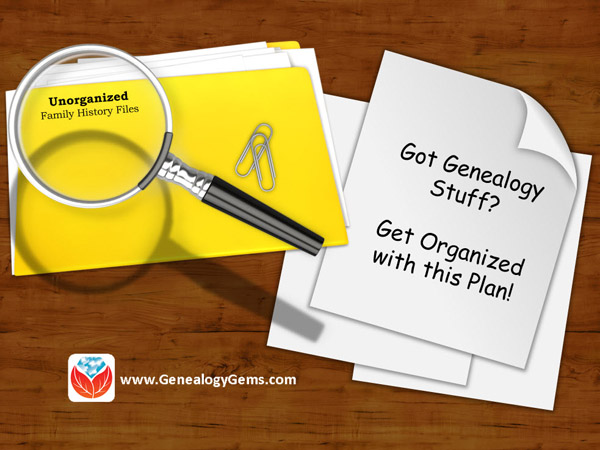 Scotland’s People, the Free English BMD Index, FamilySearch and joined her local society. But she’s not sure where to go next with her research–there just are SO many options! If this sounds familiar, check out her question and the advice I gave her:
“I often end up wandering around in circles and mazes as one thing leads to another, and another, and … I am sure you know what I am talking about. I seem to be jumping back and forth between my Dad’s family, my Mom’s family, their families, etc. until there are times that I find myself at a certain point, only to wonder ‘Where was I going with this?’ I’m now wondering if I would be best to take it one person at a time – to find out as much as I can about that person in that point of time, before going on to another. I have started trying to make notes…but find that I end up hopelessly out of order and lost. Any advice would be appreciated! Help!!!”
My Answer: A Genealogy Research Plan to Deal with the Chaos
“You are not along in this genealogical dilemma! It’s easy to let the records start to take over and lead you around. Set a goal or a genealogy research plan – define what it is you want to know. It might be something very specific about a particular ancestor, or it might just be to fill in the blanks on one particular family. Early in my research I focused on one grandparent, and working backwards, I would strive to fill in all the blanks on that person, then their parents, then their siblings. I wouldn’t “leave” that family until I felt that I had filled in as much of the family group sheet as possible. (We have sort of lost track of the “family group sheet“ in this technological age. But it is an excellent tool for keeping you on track and focused on the blanks that need to be filled.)
An additional strategy is to have a process for dealing with information that is a bit off your current track. Often we feel like we have to pursue it or we’ll lose it. I like to use Evernote (free at Evernote.com) to capture data that I’m not ready to deal with right now, but definitely want to pursue later. I create an Evernote “notebook” for that family surname, and a note book called “future research.” Drag and drop “Future Research” onto the family surname notebook which will create a “stack.” Now you can create notes and drop them into the “Future Research” notebook which is inside the applicable family. Add tags to your note like “newspaper,” “death record,” etc. and some good searchable keywords so that the note will be easy to find when you need it. Now you can capture the item, file it away, and stay focused on the task at hand. Whenever you’re ready to ask a new question, open that Future Research notebook. Use what’s there to inspire the next phase of your genealogy research plan.”
More Resources
How to Get Started in Evernote, and the Ultimate Evernote Education
Should Evernote be my Digital Archive?
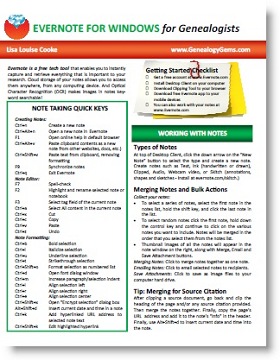
If you would like to learn more about using Evernote for genealogy, I have a quick reference guide in my store that will work wonders in keeping you organized. It’s available for both Windows and Mac, and in both PDF and laminated print format.
 Your questions are always welcome! Contact me by email, or leave a voice mail at (925) 272-4021 and you may just hear yourself on the show.
by Lisa Cooke | Jun 17, 2013 | 01 What's New, Inspiration, Memory Lane, Organization, Photographs
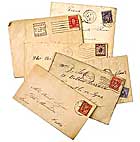 We genealogists often accumulate a lot of family “stuff:” original documents, old photographs and heirlooms. Though it’s wonderful to own them, it can be a serious challenge to keep them organized and documented.
 Sunny’s 6 Tips for Organizing Your Genealogical Items
1. Take stock of what you’ve got. Gather together all the original documents or photos, or take pictures of all your heirlooms, then review the entire collection at the same time.
2. Get rid of duplicates and stuff that doesn’t matter so much. You probably don’t really need all 10 of grandma’s quilts or those hundreds of scenic photographs from old family vacations. Rethink the 12-piece setting of china you’ll never use and grandpa’s tidy but prolific collection of nuts and bolts.
3. Carefully document and organize originals. Each kit includes supplies and instructions to help you safely identify each item. This is probably the most important step. We love our pictures, old letters and heirlooms because of the family connection. If that connection is lost, so is the value of the object.
4. Scan flat items and take digital pictures of dimensional ones. Keep these as “backups” in case the original is ever harmed. (The document and photo kits even come with Archival Gold CDs, which aren’t easy for genealogists to come by but perfect for long-term digital storage.) Use copies for reference and display, so you don’t expose your originals to everyday wear.
5. Store originals safely. The Heirloom Inventory kit includes suggestions for storing and displaying original objects. The document and photo kits include top-quality archival supplies and step-by-step illustrated instructions on how to store your stuff in them.
6. Share what you’ve got. Frame copies of your old photos and put them on the wall or a shelf. Keep copies of old documents handy to show relatives. Display your heirlooms. Use them all as conversation pieces whenever you get a chance. Tell stories about the people. Share memories that help other relatives understand why these items matter to you. That will help ensure that these items will live on in the family lore.
 Free Download: If you haven’t tried the FREE version of Evernote note-taking and data-organization software yet, download it here.