 Recently Karen wrote in to say, “I’m taking the Evernote challenge!” (Good for you!) She has this question about using the web clipper when using Evernote for family history:
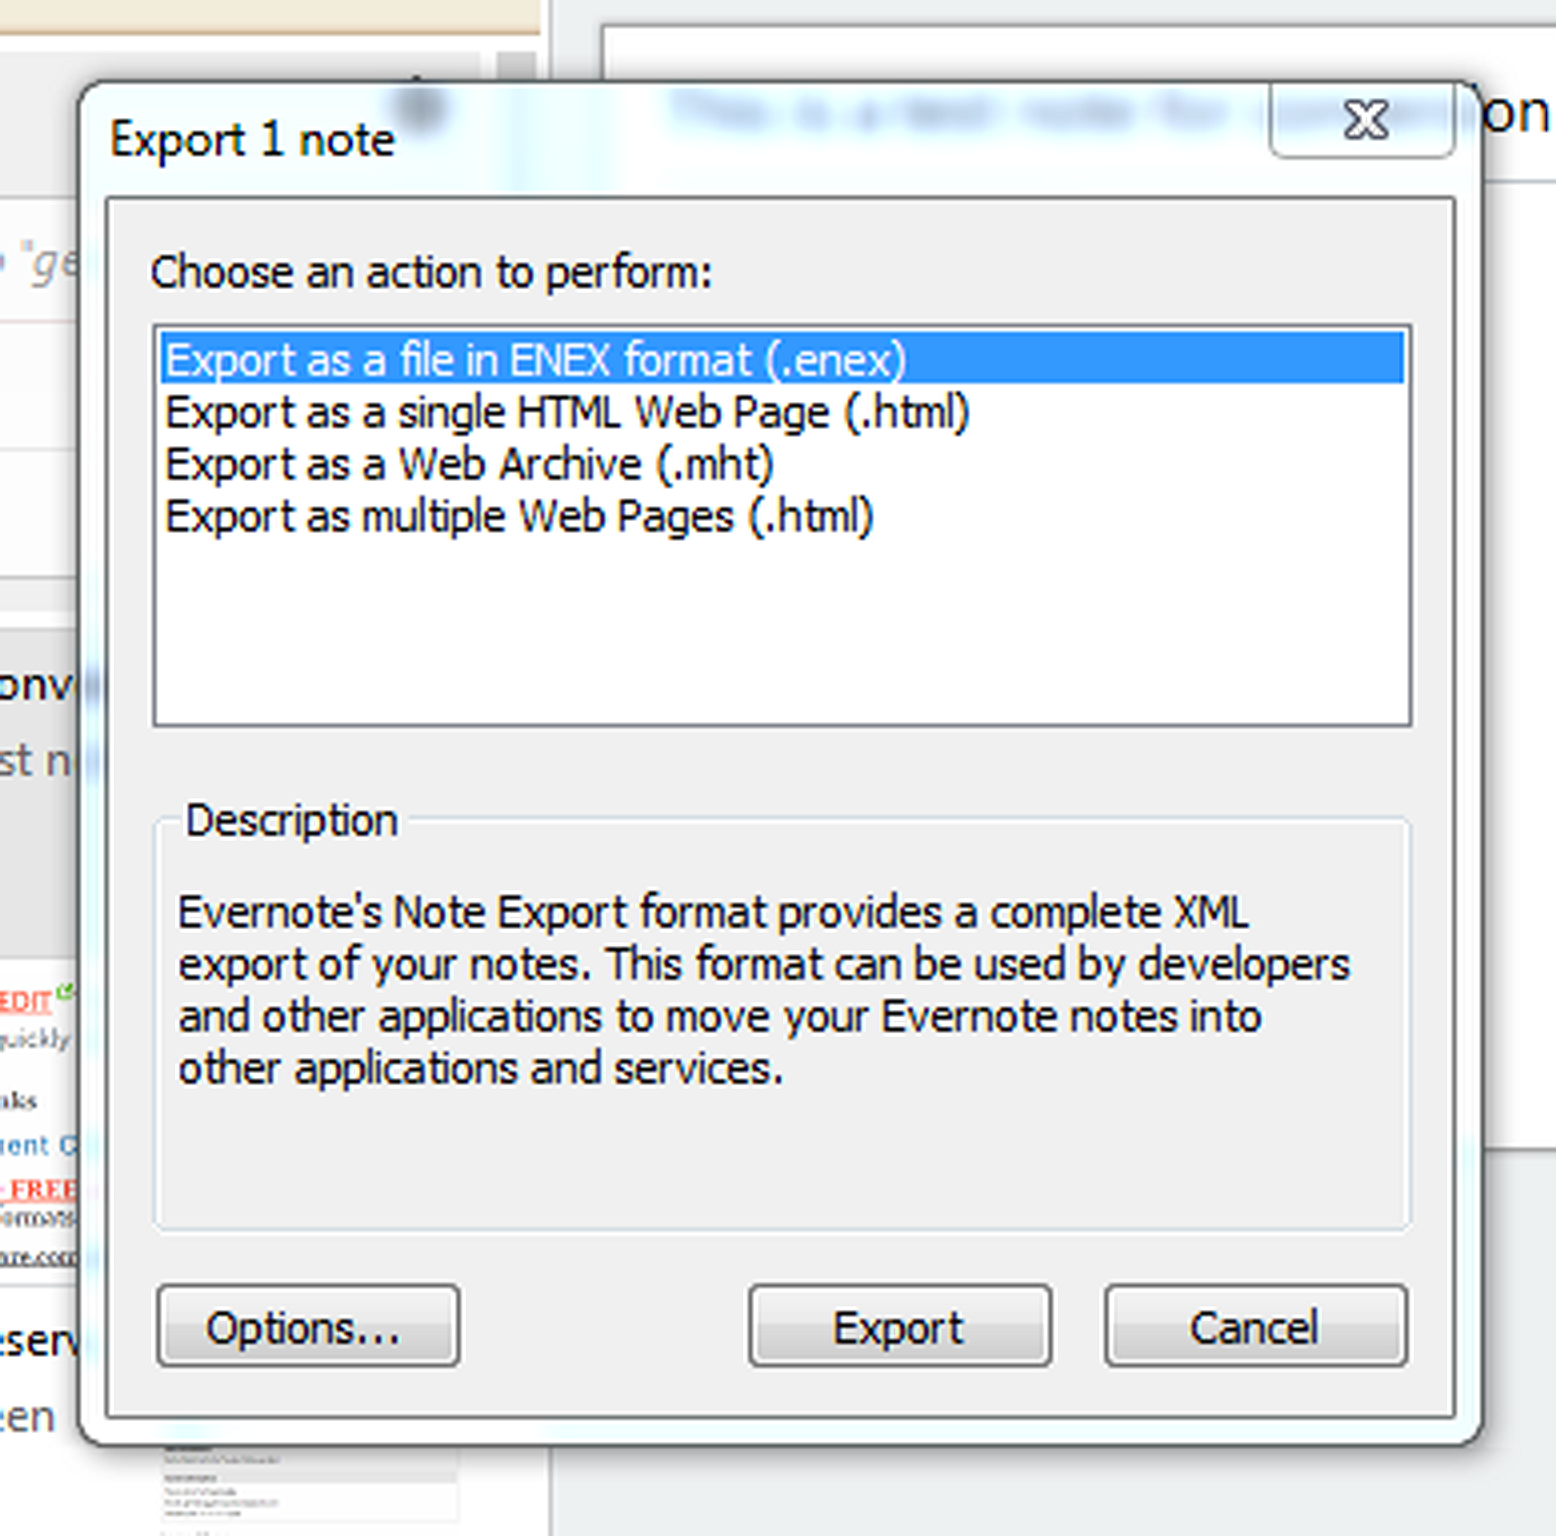
Q: How do I get a clip out of Evernote and into my regular file system on my hard drive? I’ve tried the export feature, but it it only gives me a choice of exporting as a .enex or .mht or .html file. I don’t see a way of saving it as a pdf, docx, rtf, xls or jpg.
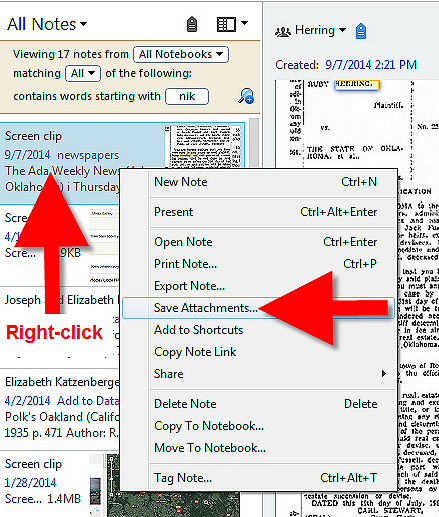
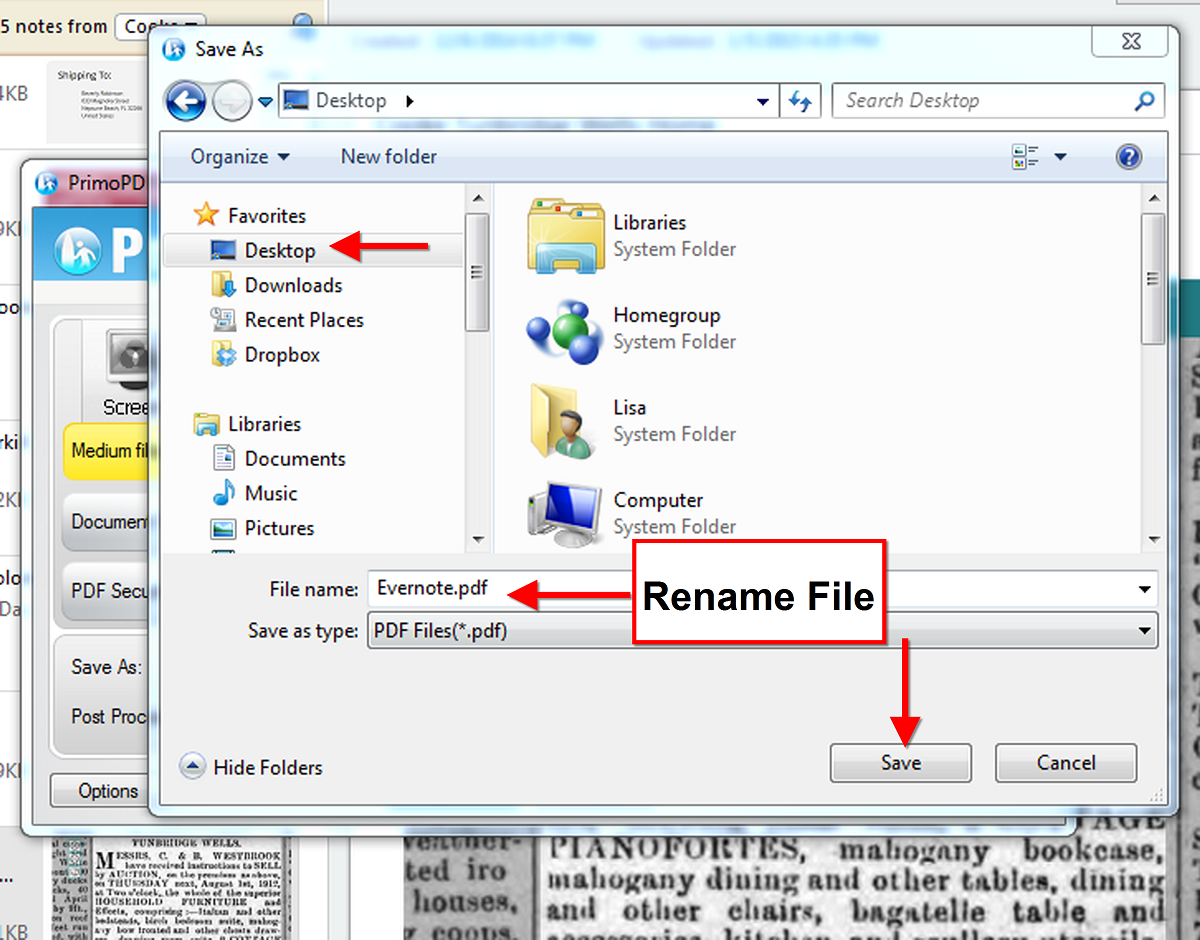
A: There are multiple options for saving a web clipping. I’m giving you an image for each, so scroll down to see:
1. Right-click on the clipping in your search results list (the center column) and select “Save Attachment.” Select the folder on your hard drive where you want to save it and click OK. The clipping will be saved as a .PNG image file. (.PNG is a “lossless” image file which means it’s not compressed the way a .JPG is. It will be a higher quality and larger image file than a .JPG but still commonly supported by most software programs and photo editors.
2. Pull up an individual note in the right hand pane of your dashboard, and right-click on it. Select “SAVE AS” and save the .PNG file to your hard drive.
3. For non-image (clippings, photos, etc) notes such as text notes, you would have to export as XML and then convert that to .docx which is not the simplest transaction. If it was just a single note, the simplest solution is to highlight the text, copy and paste into Word.
Resources
How to Get Started in Evernote, and the Ultimate Evernote Education
Genealogy Gems Premium Evernote videos like:
- How the Genealogist can Remember Everything with Evernote (Beginner);
- How to Organize Your Research with Evernote (Intermediate);
- Making Evernote Effortless (Intermediate)
- Collaborative Genealogy with Evernote (Intermediate);
- Using Evernote to Create a Research Plan (Advanced).
Not a Premium member yet? The Evernote video series alone makes Premium membership worth the low annual fee, but you get SO much more! Learn more here.


