by mbarker | Sep 29, 2018 | 01 What's New, Archive Lady, Preservation |
Preserving old albums means figuring out what to do with everything inside. What if items are dirty or mildewed? How can you safely store related memorabilia? The Archive Lady Melissa Barker tackles these common and important questions.
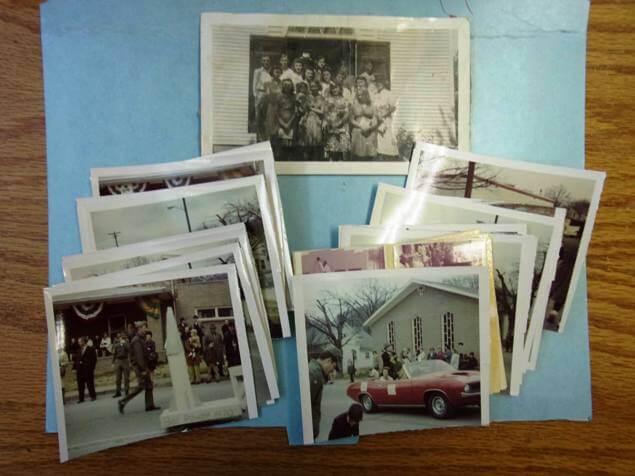
Recently Donna wrote in to tell us about a fantastic trove of family heirlooms she’s recently acquired—and to ask us how to take care of them. Here’s what she wants to know: “I’ve recently been given a huge amount of letters (WWII), photos, medals, etc. from my grandparent’s estate. I have two question/subjects that I’m asking about:
I’ve read a lot of things concerning preservation and have started doing that. But, I’ve never read what to do with items…specifically pictures in old fold out ‘albums’ where the album itself appears to have possible mold mildew or dirt. Do I slide out the pictures and while scanning them, [then] take some kind of bleach or other solution to the things on it? Do I just take pictures of the original and toss it? (I’d hate to do that.) I don’t want to compromise the collection because of one bad item, but I also want to preserve these things for the next generations.
Also, when putting things (letters, for example) into buffered folders and then placing them in archival boxes, can you put other media into the same archival box? For example: pictures, letters, and the dreaded newspaper clipping—all in their own folder, but in the same archival box? Or should each “type” of item have a dedicated box? Since V-Mail letters, airmail, and regular letters might be typed, written in ink or pencil, and/or images (v-mail) printed out, can they go into separate folders but in the same archival box?”
Donna concludes, “I’m trying hard to find these answers. I am assuming that since things are divided out, they will be okay in the same box. I am treating my grandfather’s ribbons and some coins this way…putting them in divided/sectioned clamshell boxes where each divided area has a different medium or item. Basically, I guess I’m worried about whether items physically separated but in the same container will still affect each other.”
7 Steps for Preserving Old Photo Albums and Scrapbooks
Donna asks some great questions about records preservation. It sounds like she has some true treasures in her collection and it is understandable that she would want to use the proper methods to keep them protected for generations to come.
Here are 7 steps you can take to preserve your old, deteriorating photo albums and scrapbooks:
1. The molding photograph that Donna has in the fold out album is something that should be dealt with immediately. Remove the photograph from the album if possible.
2. Take the album and place it in outside in direct sunlight for about 30 minutes, which should kill the mold.
3. Then using a damp cloth, clean the album and let it dry. This should have removed any mold that was on the album. Never use any chemicals, like bleach, on any items you are trying to preserve.
4. Digitize the photograph and then place it back in the original album. It is important to keep the photo and the fold out album together for provenance.
5. Place the album with the photograph into an archival sleeve and then into an archival file folder.
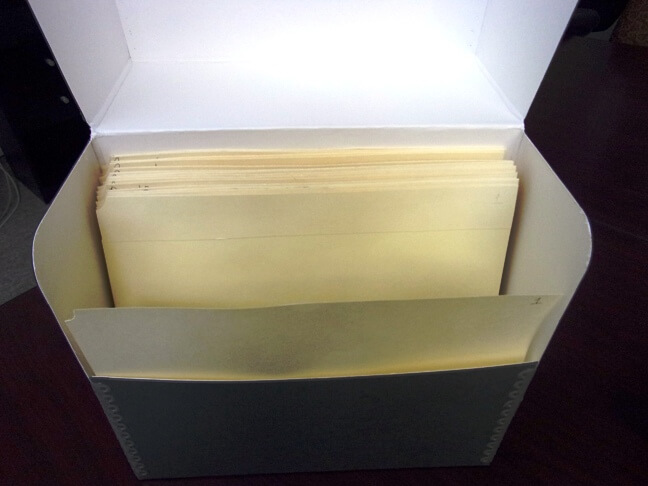
6. The folder can then be placed into an archival box.
7. It is important to store all photographs in a cool, dark and dry place. Humidity and moisture will cause more mold and damage. The temperature should also be a consistent temperature. Fluctuating temperatures can damage photographs.
Donna asks about putting several different items into the same archival box. It is perfectly acceptable to put different items in the same archival box. Photographs, old letters, and newspaper clippings can be stored in the same box as long as they are not touching each other and are in their own file folder. It is also acceptable to place small artifacts in the same box as long as it does not fold or lay on the file folders where the other documents are located. Be sure to not overcrowd the box which could cause damage to what is stored inside the box.
Taking the steps needed to preserve our precious family papers and heirlooms is what we should all be doing. The next generation will be glad that we did!
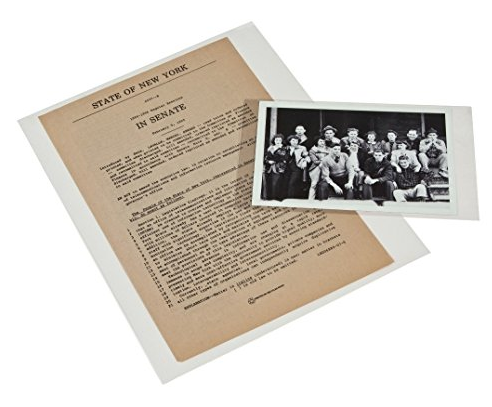
Images are courtesy of Melissa Barker and the Houston County, TN Archives.
Keep reading: How to archive family history documents
Keep up the good work preserving your own old albums and other family documents. If you found this helpful, I also recommend you read my article “How to archive family history documents,” in which I answer another Genealogy Gems fan’s question about safely preserving precious original family paperwork.
About the Author: Melissa Barker is a Certified Archives Records Manager, the Houston County, Tennessee Archivist and author of the popular blog A Genealogist in the Archives and an advice columnist. She has been researching her own family history for the past 27 years.
by mbarker | Jun 27, 2018 | 01 What's New, Archive Lady, Organization |
Preserving old family letters is one of the best things you can do to be sure their precious content is available to future generations. Follow these easy steps from The Archive Lady, Melissa Barker, to organize and preserve the old correspondence in your family history archive.
Writing letters has become a thing of the past! If you are fortunate enough to have a collection of old family letters, you have a true treasure.
In addition to digitizing them, physically preserving them is one of the best things you can do to save the genealogical information contained in those old family letters. Here are some simple steps to preserve the old letters that you may have.
Preserving Old Letters in 4 Easy Steps
1. Arrange letters chronologically.
You can go by the date on the letter itself or by the postmark date on the envelope.
It is important to put your old letters in chronological order because sometimes there is information in those letters that continue from letter to letter and you want to make sure you read them in the order originally written.
If you have groups of letters from different events such as WWII letters, college letters, or vacation letters, you could group them together and then organize each grouping by date.
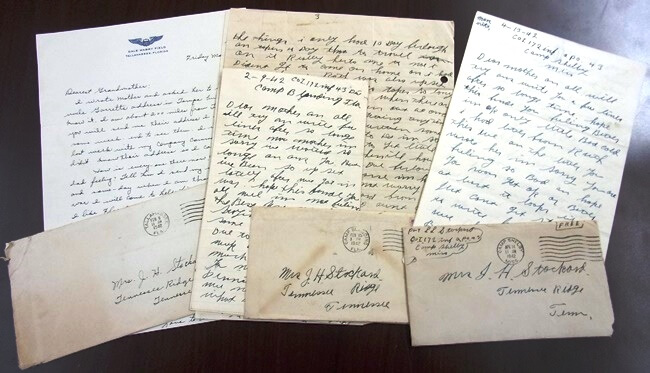
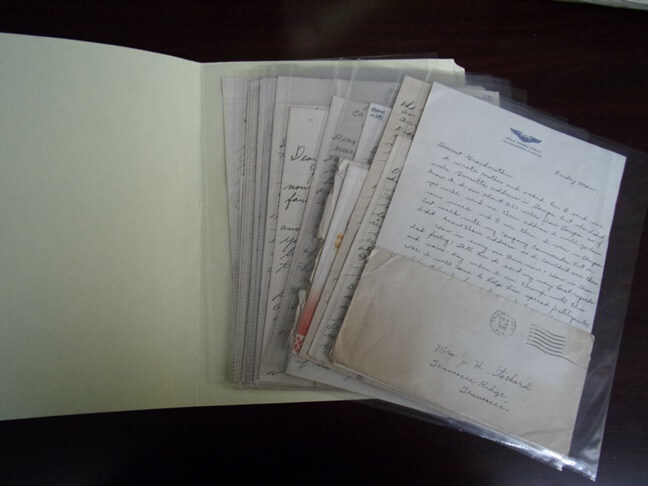
(Courtesy Houston County, TN. Archives.) Old letters like these need careful preservation.
2. Unfold old letters.
Once you have put your letters in chronological order, it’s time to do some preservation work.
I am asked all the time about letters and whether to leave them folded and in their envelopes. I can tell you that all archivists remove the letters from the envelopes and archive them unfolded. The creases made by folding and unfolding letters can cause damage and eventually those creases get weak and can cause the letters to tear into pieces. It is always best to unfold old family letters.
3. Encapsulate the old letters.
The term encapsulates means “to enclose something or to completely cover something.”
Now that you have unfolded and flattened your letters, you will want to encapsulate them in archival safe sleeves that can be purchased at any online archival supply store. Look for reputable preservation supply companies like Gaylord.
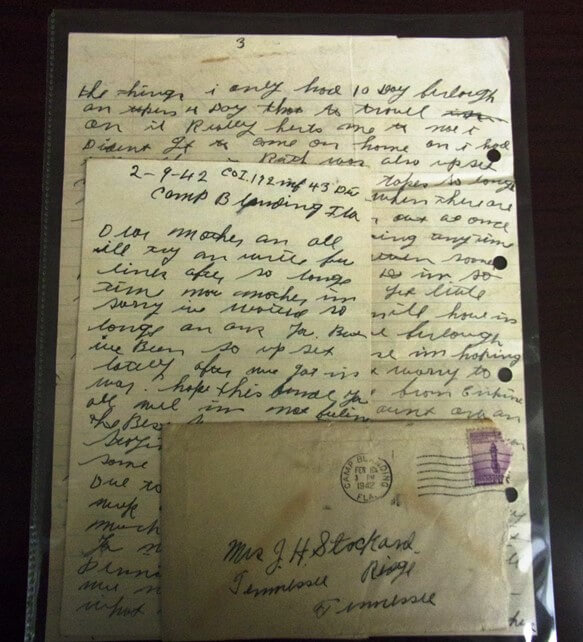
An encapsulated letter
Be sure to put the envelope with the letter in the same sleeve so that it doesn’t get lost or mixed up with another letter that it doesn’t belong to. When you’re working with many letters in a collection, the letter can easily be separated from the envelope. But envelopes may include crucial details such as dates, the identity and address of the writer, and interesting postmarks, so you want to keep them together.
4. Filing and storing old letters.
After you have put your letters in chronological order, unfolded them and encapsulated them, it is now time to file and store them.
Archivists prefer to put their encapsulated letters into archival file folders and then into archival boxes, being sure to keep the chronological order intact. (Click here for Gaylord’s Family Archives Document Preservation Kit, complete with archival folders and an archival box.)
This process gives you three layers of protection for your letters to ensure they are completely preserved and protected from bugs, dust, and anything else that could get to them and damage them. Following these guidelines to preserving your family letters will ensure they are protected and saved for you to enjoy and for your future descendants to enjoy!
Next step: Digitize your old family letters.
Old letters can fall prey to many unfortunate situations. Ink can fade and paper can crumble. If this happens, the messages on your old letters may eventually be lost, despite your best efforts. It’s also possible that the entire file folder full of the original letters could be lost, damaged, or even destroyed!
Digitizing your old family letters lets you digitally preserve the content for future generations. It’s the best way to added another layer of protection. Duplication is a fundamental key to preservation.
In the free Genealogy Gems Podcast episode 144, host and producer Lisa Louise Cooke talks with The Family Curator Denise Levenick about digitizing and organizing your family history. Click here to hear their conversation and start preserving your own family letters and other original documents.

You’ll Never Regret Preserving Your Old Family Letters
As you can seem it’s actually pretty easy to preserve your old family letters. I encourage you to get started today so that you’ll never have regrets in the future.
About the Author:
Melissa Barker is a Certified Archives Records Manager, the Houston County, Tennessee Archivist and author of the popular blog A Genealogist in the Archives and an advice columnist. She has been researching her own family history for the past 27 years.
Images courtesy of Melissa Barker and Houston County, TN Archives.
Disclosure: As an Amazon Associate, Genealogy Gems earns from qualifying purchases. This article contains affiliate links and Genealogy Gems will be compensated if you make a purchase after clicking on these links (at no additional cost to you). Thank you for supporting Genealogy Gems!
by mbarker | Jun 6, 2018 | 01 What's New, Archives, Court Records
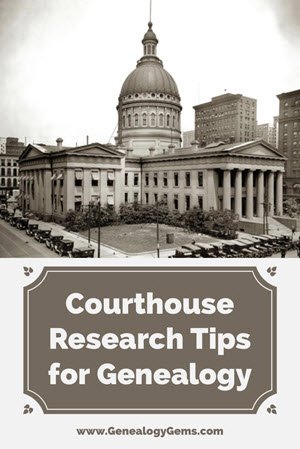
Got a research trip coming up soon? These courthouse research tips for genealogists from The Archive Lady, Melissa Barker, will help you get organized before you hit the road. That way, you’ll be prepared to use your time well at your ancestor’s courthouse–to explore all those original records that may reveal your family history.
3 courthouse research tips for genealogists
Courthouses are one of my favorite places to conduct my genealogy research. Many of our courthouses have a wealth of genealogical records and information.
Courthouses may not have the word “archive” on the building but they are a type of archive. Here are some tips that will help you be successful the next time you are doing genealogy research at a local courthouse.
1. Scout the logistics
Call ahead to find out the days and hours of operation. This is the most important tip I can give anyone about researching in courthouses. In most courthouses, there are different offices for different types of records. Each office has their own phone number and can be contacted concerning hours of operation. Also, ask what days and times are best for a genealogist to visit their office to do research.
Ask about the availability of parking at the courthouse. Many of our courthouse campuses have limited parking for patrons. This problem is often made worse on days when court is in session and many people arrive to participate in court actions. Arriving at the courthouse and ready to do research, you do not want to discover that the only place to park is a block away or at the distant parking garage.
2. Locate records ahead of time
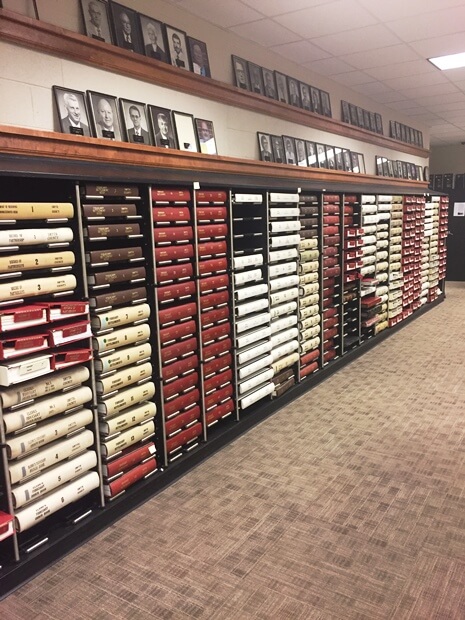
Ask about the availability and location of records. It might be a no-brainer that the deed records will be found in the Register of Deeds office. But are the oldest deed books there–the ones you need? Many times, courthouse offices run out of room for the old records and will transfer them to the county archives, which may not be located in the courthouse. It is important to know what records are available in the office where you wish to do genealogy research. If the older records have been sent to the archives or some other facility, you want to know that before you get to the courthouse.
3. Be patient
Whether you are visiting the courthouse or working with them through phone calls and emails, patience is a key element. As a genealogist, I know the urgency we all feel in trying to locate our ancestor’s records. Many times, we are experiencing great momentum in our genealogy research and we do not want to be hindered in our quest for that one piece of information we are seeking. If you walk into an office and they are very busy, please be patient if the staff member asks you to wait before they can get those old dusty books from the back room. If you have emailed or telephoned an office and they have told you they will get back with you, be patient and wait for that response.
The records that can be found in courthouses can be essential to our genealogy research. Implementing these tips will help you be more successful when doing research at the local courthouse.
Ready to get serious about courthouse research?
Check out this excellent article on researching wills and probate records by Margaret Linford. Her tips will help you understand what’s in these courthouse essentials, where to find them–and what to do with your bored non-researching travel companions!
About the Author: Melissa Barker is a Certified Archives Records Manager, the Houston County, Tennessee Archivist and author of the popular blog A Genealogist in the Archives and an advice columnist. She has been researching her own family history for the past 27 years.
by mbarker | May 30, 2018 | 01 What's New, Archives, Mobile
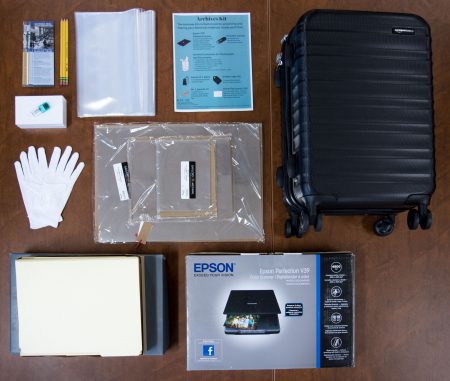
Using rolling suitcases that contain items to help community-based historians begin building a local archive, the archivists hope to teach archival skills to those who are building an archive in their community. Included in the archiving kits are items like portable scanners, gloves, archival sleeves, archival file folders, soft #2 pencils and instructions on how to use these items when working with historical and genealogical records.
Josephine McRobbie, community archivist at the Southern Historical Collection at the Wilson Special Collections Library, says in this press release, “When community members learn these skills and gain familiarity with common tools and equipment like acid-free folders to portable audio recorders, it is empowering and builds their sense of identity as historians and community archivists.” McRobbie and her colleagues want people to know that “telling the stories of their lives in their own community are well within reach and that the rewards can be tremendous. Simply making good records of what is gathered, and keeping everything in a cool, dry place, will go a long way toward preserving stories for future generations.”
The project is only in its first year and in the second and third year they are planning on refining the program. They will assess the work done to date and create new kits based on user feedback. They will also share their experience with additional community partners and with the archival profession. Keep an eye out for the “Archivist in a Backpack” project in your area!
Create your own portable archiving kit
You can create your own “archivist backpack” for whenever you have opportunities to preserve family history documents, photos, memorabilia and even memories. These opportunities can come up suddenly when visiting a relative’s house, attending a family reunion or stopping by a local historical or genealogical society. Here are some suggestions on what to include in your archiving-on-the-go kit:
- Soft archival gloves for handling fragile items without getting them dirty;
- Soft #2 Pencils for identifying photos and other items (Use on the backs, preferably along the edge, and if pencil markings won’t adhere to the photograph, you can use an Identi-Pen);
- A portable scanner to quickly scan photos or documents;
- Your favorite digital camera to snap pictures or record interviews (your smartphone may be just as good or better than a digital camera and easier to carry);
- A thumb drive with plenty of room on it to copy digital files between computers or devices;
- Your laptop, to organize files, type notes, etc. (make sure it holds its charge well, as sometimes you’re not able to plug in while you’re working).
The Archive Lady
Melissa is a Certified Archives Records Manager, the Houston County, Tennessee Archivist and author of the popular blog A Genealogist in the Archives and an advice columnist. She has been researching her own family history for the past 27 years.
Disclosure: As an Amazon Associate, Genealogy Gems earns from qualifying purchases you make when clicking from the links we provide. It doesn’t cost you anything extra but it helps support our free blog and podcast. Thank you for supporting Genealogy Gems!
by mbarker | May 21, 2018 | 01 What's New, Archive Lady |
Did you know that some museums also house archives? Yes, that’s right! Museums aren’t just for artifacts and historical objects. They sometimes house documents, photographs, and ephemera. Here’s how to learn about archives at your favorite museums (big or small) and how to gain access to archival material that may reveal your family history.
Many genealogists don’t know that many of our wonderful museums have both a “front room” and a “back room.” The front room is filled with displays and exhibits that we all love to walk through and see. There could be multiple rooms filled with artifacts on display in glass cases for the visitor to enjoy. But the back room is where the archived records are located. This back room is not seen by the public but most of the time, it is there. There are shelves filled with historical and genealogical records that the genealogist shouldn’t miss out on.
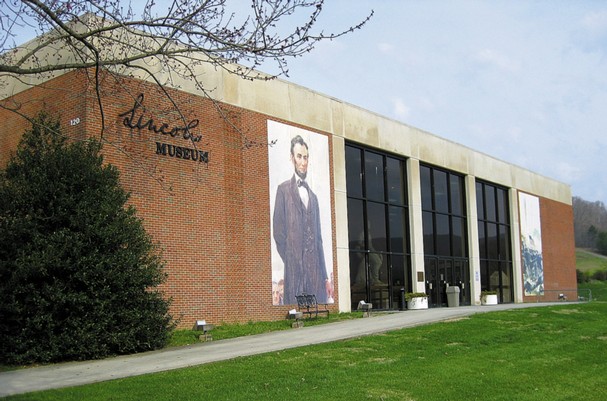
For instance, at the Lincoln Memorial University Museum in Harrogate, Tennessee, they have the second largest collection of Abraham Lincoln artifacts and memorabilia in the United States in their museum. They also have a back room filled with historical and genealogical records that genealogists can access for genealogy research!
A fantastic find in a museum archive
Genealogy Gems Contributing Editor Sunny Morton shares this example of a family history treasure found buried in a museum’s archive:
“My mom Cheryl McClellan (a professional genealogy librarian who was interviewed by Lisa Louise Cooke in the Genealogy Gems Premium Podcast episode #125), visited the Steelworks Center of the West in Pueblo, Colorado with her siblings to get a better sense of the industry that employed her family there.
Imagine her glee when she discovered that the museum has an archive! According to its website, the collections include ‘over 100,000 photographs, more than 150 films, 30,000 maps and drawings, hundreds of ledgers, and internal publications such as Camp and Plant, The Industrial Bulletin, and The Blast. These are in addition to the core collection of approximately 6,000 cubic feet of records documenting CF&I’s steel production, iron and coal mining, geological records, labor relations, land and water resources, employee records, invoices and work orders, executive memoranda, correspondence, and much more, documenting every aspect of the company’s rich history.’
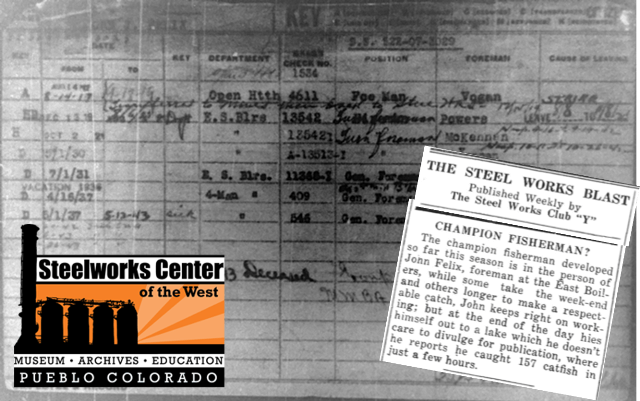
Unfortunately, my mom didn’t have time to stay and explore the archive in-depth. But she started corresponding with the archivist, who sent her priceless documents relating to her grandfather, John Felix. Among these was a copy of his original application for employment, his employee service record and a clipping from an employee newsletter about his exploits as a fisherman:
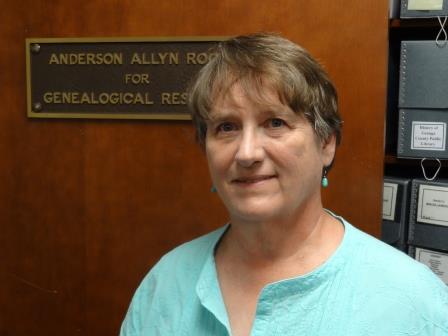
Sunny’s Mom: Cheryl McClellan,
Professional Genealogy Librarian
How to find museums with archives
You can look for museums with archives in them in a few different ways:
- When visiting a local museum, ask the curator or museum director if they have any records available for research in their collections.
- Go to the websites of museums–especially historical museums–you may have visited in the past. See whether they mention having an archive or research room.
- Google the name of your ancestor’s town (or a bigger city nearby), along with the state name, and add the search term museum.
- Contact a librarian, archivist, or the Chamber of Commerce in your ancestor’s town.
- Use the free website, ArchiveGrid, to locate archival collections at museums. On the home page, you’ll find a map that looks something like this:
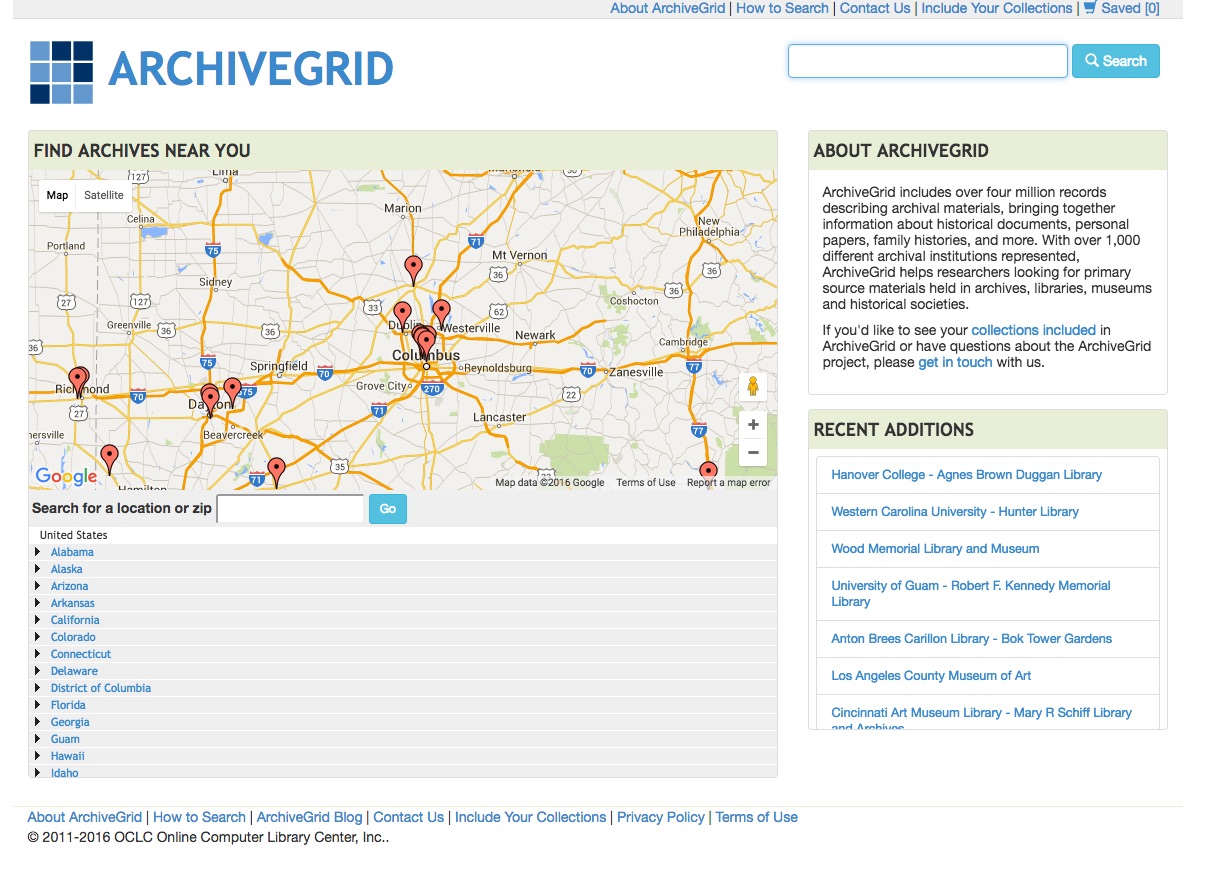
Use the map view to identify archival collections, some of which may be housed in museums, near your ancestors’ home. Hover over the red markers to see the names of institutions. Click on them to find contact information and search their collections. Once you have located the museum, contact them by phone or email and ask them about their archived records. If you can’t visit in person–or you can’t stay long enough to really search their collections–start corresponding with the archivist, as Sunny’s mom did. You may need to be patient: many archivists only work part-time and stay quite busy. But your patience may be rewarded beautifully!
As genealogists, we will search anywhere and everywhere for records about our ancestors to help tell their life story: archives, libraries, historical societies, genealogical societies, and museums! So, the next time you travel to where your ancestors came from, check and see if there is a museum. If there is one, stop by and ask if they have a “back room” with archived records. You just might be pleasantly surprised.
The Archive Lady Melissa Barker appears regularly on the Genealogy Gems Premium Podcast, available to Genealogy Gems Premium eLearning members. Internationally-renowned genealogy educator and podcast pioneer Lisa Louise Cooke hosts and produces the Premium Podcast, weaving together inspiring stories, research strategies and exclusive interviews. (You can also check out the free monthly Genealogy Gems Podcast, with over 2.5 million downloads worldwide and plenty of inspiration and information that can help your family history research.)
Melissa is a Certified Archives Records Manager, the Houston County, Tennessee Archivist and author of the popular blog A Genealogist in the Archives and an advice columnist. She has been researching her own family history for the past 27 years.

