Blog

Getting Genealogy Organized for Genealogy Gems Premium Members
Getting genealogy organized is just one of the topics we cover here at Genealogy Gems, and Premium Members have exclusive access to podcast and video content to help you accomplish that goal.
We’ve put together a step-by-step plan for getting the most out of Premium Membership, and going from unorganized to organized in nothing flat!

A new Gem’s reader recently sent us the following email:
Dear Lisa,
I have recently joined Genealogy Gems as a Premium member and wanted to ask if there is a good place to get started.
I have a ton of family information collected, but as yet have not figured out a plan of attack.
I was wondering if you could guide me in which podcasts, premium podcasts, and videos would be good ones to start with. I need to put this information into some semblance of order so that I can move constructively on it, as well as to be able to share the family history with others and have it make sense. Thanks, Gerri.
Getting Genealogy Organized with Premium Content
We are so glad to have you as a Genealogy Gems Premium Member. Welcome!

The best place to start is by digging into these blog posts that I highly recommend:
- The Beginning Genealogist’s Biggest Mistake and How to Fix It
- Which Way Do I Go Now? Organize a Genealogy Research Plan
- 6 Tips: How to Organize Your Family History
- How to Get Organized and Put Your Family History Household in Order
- Hard Drive Organization Part 1 and Part 2
- Use Evernote to Create a Research Plan
- Podcast episode 114: Paper Organization
- Family History: Genealogy Made Easy Podcast episodes 31 & 32: Organizing Your Genealogy Files.
Getting genealogy organized is one of the most overwhelming tasks new and seasoned genealogists deal with. Whether you’re new to Premium Membership or a long time member, make sure you have a solid basic structure for your genealogy organization, as it is the backbone of everything that follows. That basic structure for getting genealogy organized might look like this:
A Quick Plan for Getting Genealogy Organized
- Assess what you have.
- Pick a genealogy database software program. We recommend RootsMagic.
- Set-up a few 3-ring binders with acid free sheet protectors so you have a place to put documents and other important things.
- Set-up a basic folder and file structure for your hard drive based on the Premium videos Hard Drive Organization.
- Have a back-up plan for your precious family history files. We recommend BackBlaze as a way to automatically back-up your computer files.
- Sign-up for our free newsletter (if you haven’t already) to stay up-to-date on all the latest records and techniques.
- Don’t wait to be fully organized before you begin. Stay motivated by scheduling “fun” research time, as well as organization time.
- Make appointments with yourself to stay on track, and listen to the Genealogy Gems Premium Podcast while you organize.
- Regularly tap into all of the Genealogy Gems resources like what’s new in books and guides.
Like us on our Facebook page to see more genealogy ideas
Become a Genealogy Gems Premium Member
If you are not a Genealogy Gems Premium Member, take a look at what you are missing! Premium Members are able to listen to our Premium podcasts packed with even more tips and techniques for all things genealogy. You also have access to my most popular training videos.
BONUS e-book:
 For a limited time, new members will receive
this exclusive digital PDF e-book,
a collection of my most popular
articles from Family Tree Magazine!
(the e-book will be emailed to you
within 24 hours of purchase)

RootsTech 2017 Open for Registration
It’s that time of year again! RootsTech 2017 is officially open for registration.

Each year, eager genealogists around the world excitedly wait to get the message that RootsTech registration is officially open. Well, here is your special announcement: As of September 15th, registration for RootsTech 2017 is now open!
What is RootsTech?
RootsTech is an annual family history and technology conference in Salt Lake City, Utah. Speakers and attendees from all over the globe descend on the Salt Lake Valley to learn and share innovative and new tools in genealogy.
In 2016, the event attracted more than 28,000 attendees in-person from all 50 US states and 30+ countries. RootsTech 2017 will be held February 8–11 at the Salt Palace Convention Center in Salt Lake City, Utah. The popular Innovator Summit and free Family Discovery Day are also open for registration. The website for registration can be found at RootsTech.org. Early bird pricing is $159.00, so don’t delay! Early bird discount pricing is available for a limited time on 4-day passes at just $159 and $189 for the RootsTech plus Innovator Summit pass. Passes for the Getting Started track start at $49 for a single day and $69 for a limited 3-day pass. All passes include access to the popular expo hall and morning keynote sessions.
The 4-day conference will offer over 200 lectures from top instructors in the field, including four of our Genealogy Gems team members, Lisa Louise Cooke, Sunny Morton, Amie Bowser Tennant, and Diahan Southard.
In addition to lectures, some hands-on computer labs and interactive activities can also be enjoyed.
Other Events at RootsTech 2017
RootsTech is for everyone, young and old. The expo hall and other entertainment events are just the beginning!
You and your entire family may enjoy Family Discovery Day. This event takes place on Saturday, February 11, 2017 and is designed for families and members of The Church of Jesus Christ of Latter-day Saints. This is a free and fun day event including messages from Church leaders, engaging classes for all ages, and evening entertainment. Family Discovery Day attendees will also have access to all the interactive activities and exhibitors in the RootsTech expo hall. Registration is required.
If you make it out to RootsTech in February, be sure to come by the booth and see us. As always, we have some really special things planned as we do a little celebrating of some of our Genealogy Gems milestones. Stay tuned!
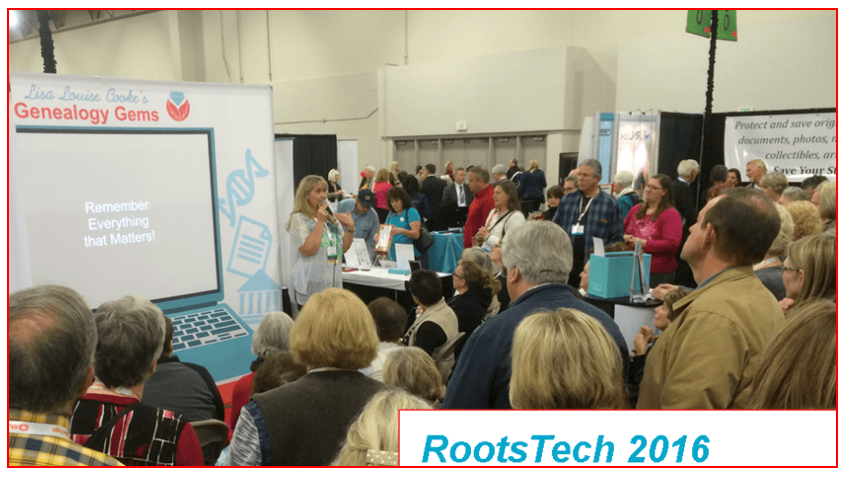

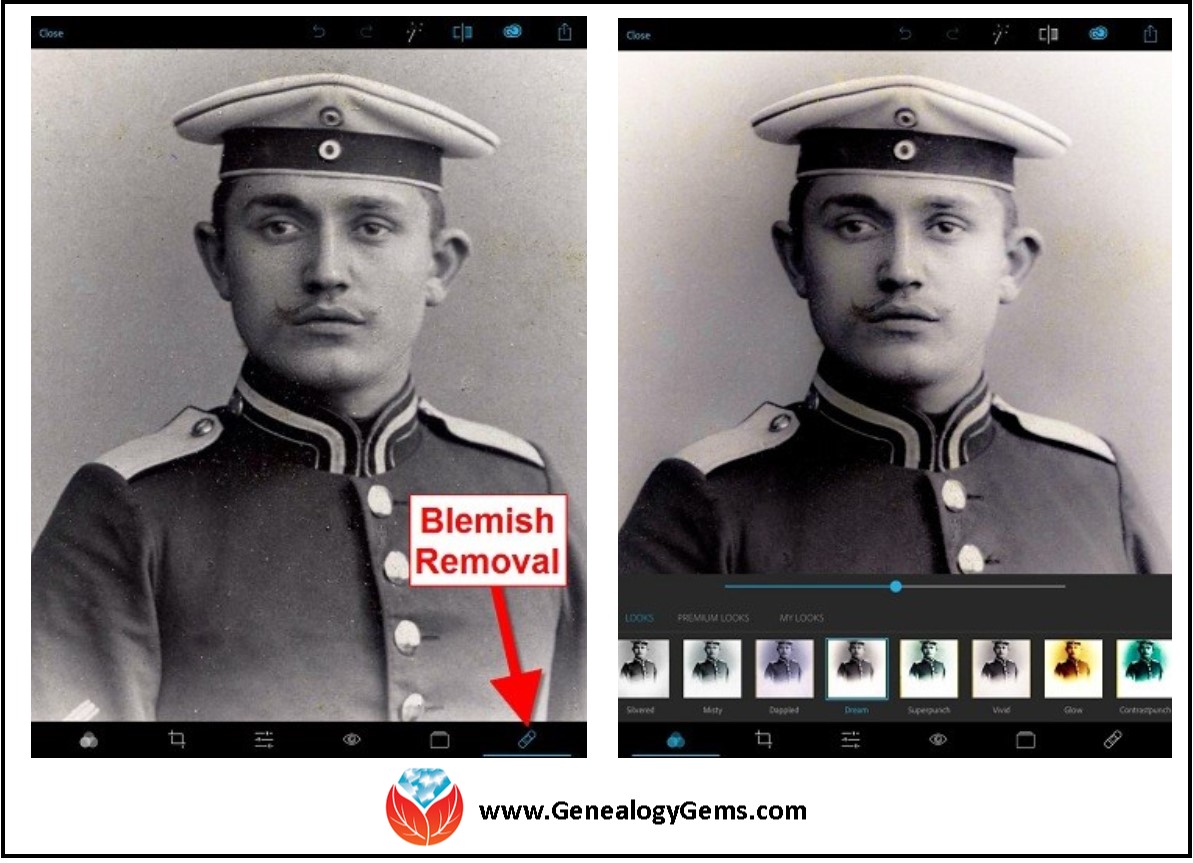
Photo Editing Apps and Software for Family History
Every where we go, we are snapping pictures. Whether you are interested in capturing your current family history or want to preserve the past through pictures, photo editing apps and software are a must! Read more to learn what software and apps are out there for the active genealogist who loves to take pictures.
A Gems reader recently asked if we have any suggestions on photo editing software and apps for family history. Our Genealogy Gems team members are each active in their personal family history and are quite savvy when it comes to some of the best photo editing apps and software out there.
Lisa Louise Cooke’s Favorite Photo Editing Software and Apps
Adobe Photoshop Elements is an ideal editor for entry-level photographers, image editors and hobbyists. You’ll find most of the features of the more expensive professional version, but with fewer and simpler options. It allows you to create, edit, organize, and share your images to social media sites. Use the built-in Guides to quickly accomplish your goals.
Adobe’s Photoshop Express app can be downloaded to your mobile device for free from Google Play (for Android) or the Apple Store (for iPhones.)
In her book Mobile Genealogy: How to Use Your Tablet and Smartphone for Family History Research, Lisa explains how the Blemish tool can be used to restore old family photos.
Using the Photo Express Photo Editing App for Photo Restoration
If you want to restore old family photos, this app is now also capable of doing a lovely job with the new Blemish Removal tool. The app allows you to access your photos straight from Dropbox, as well as Adobe Creative Cloud, and Facebook. You can copy the old photos you want to edit to a dedicated folder in Dropbox. Remember, always leave your master digital photos where they are on your computer, and make sure your computer is backed up. (The Genealogy Gems Podcast uses and recommends Backblaze.)
How to add photos to Adobe Photoshop Express:
- On the computer where your photos are stored, go into Dropbox (either your Dropbox desktop application, or sign in to your account at www.dropbox.com)
- Create a folder called “Photos for Editing”
- Save copies of the photos you want to edit into the folder you created, leaving the originals where they are on your hard drive
- On your tablet, tap the Adobe Photoshop Express app
- Tap Dropbox. (See the chapter on File Sharing and Storage for more information on Dropbox)
- Tap the “Photos for Editing” folder
- Tap the photo you want to edit
- The photo is now on your screen and ready to edit and embellish
- When editing is complete, tap Close, then Save

Above is a photo of Lisa’s great-grandfather. On the left is the original scan, and on the right is restoration with the Blemish Removal tool (the icon looks like a band-aid.) After the touch up, Lisa applied the Dream filter which provided a bit more clarity and softened the rough spots in the background. Dream is one of the many free “Looks” available in the app, in addition to “Premium Looks” filters that you can purchase. She loves the fact that if she finds a certain combination of filters is working well, she can save it under “My Looks.” This saves time in the future because with one tap, you can apply your own special mix.
Amie’s Favorite Photo Editing Software and Apps
Amie says:
“One of my favorite photo editing tools is Pixlr Express. It is easy to use without having to read through the ‘instructions.’ It is a web-based tool or a mobile app. It makes correcting and enhancing my old photos a breeze.”
Using Pixlr Express
Pixlr Express is a web-based tool and a mobile app. Resize, rotate, filter, correct, and even add borders and text. Pixlr Express is free to use, which is always a plus. On your laptop, simply go to www.pixlr.com/express. Click on Browse.

Choose the photo you wish to edit. The example below is a cute little picture of Amie’s dad in the fourth grade.
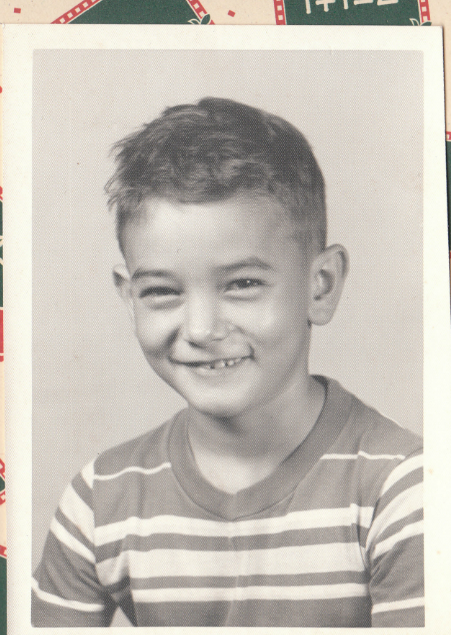
It could use some more color definition, maybe a new border to clean up the edges, and a caption on the front so that when shared, others will know who it is. To begin doing these edits, first click Adjustment.
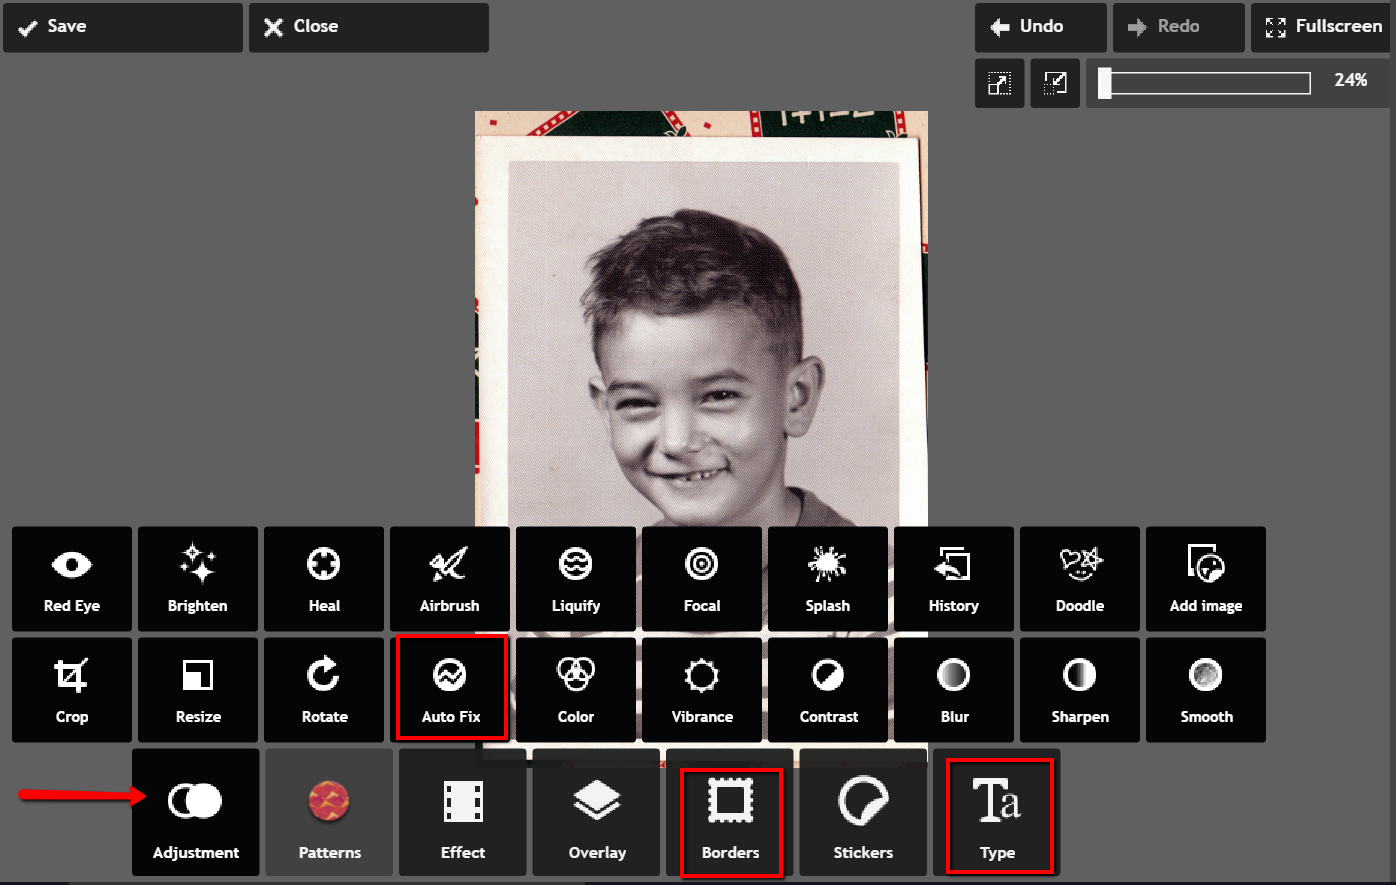
From the icons that pop-up, choose Auto Fix. It really looks great with just the click of one button! Add a fun border if you wish and click Type to add the text you want. Here’s the finished product in less than 3 minutes:
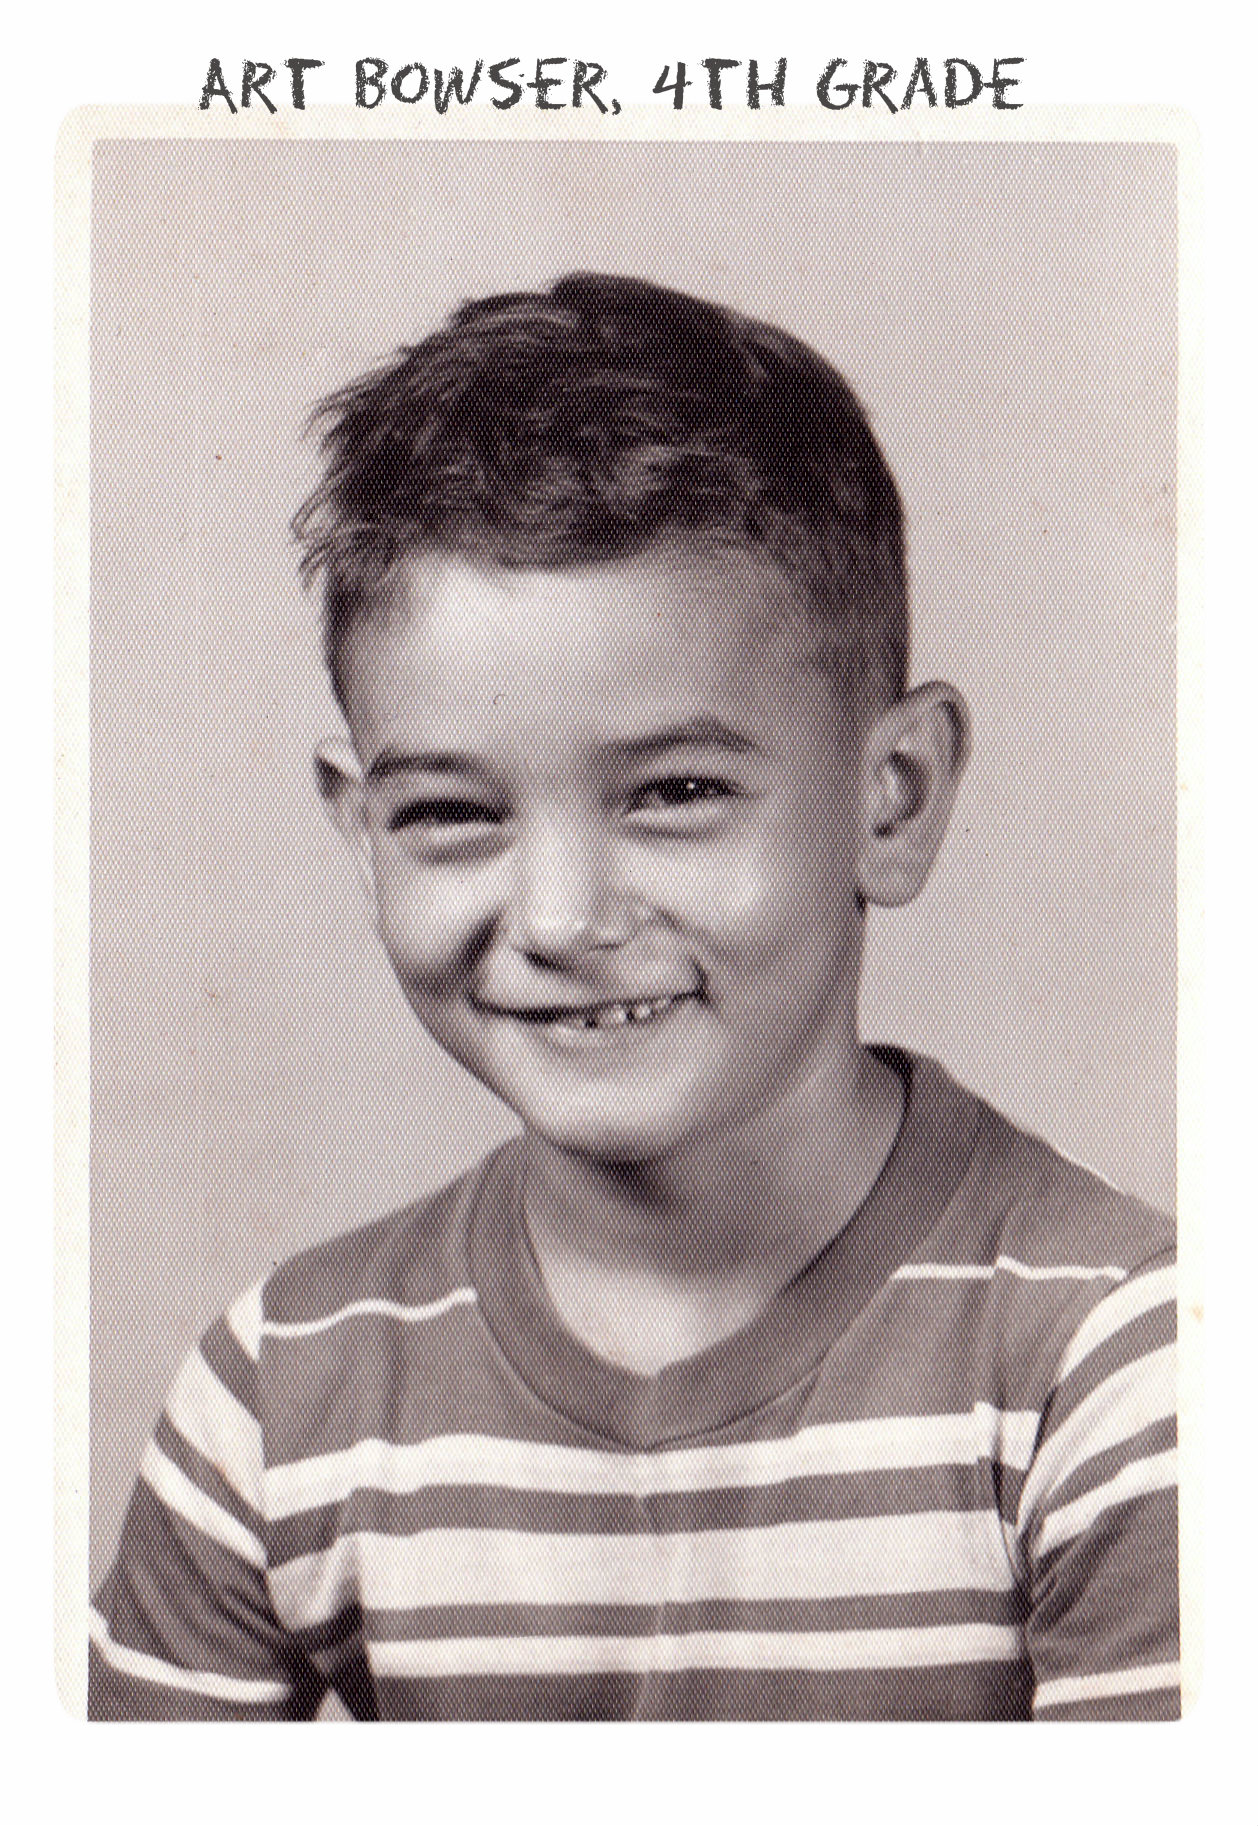 Don’t you just love it!
Enlisting the Help of Others
In some cases, our old photos are in seriously bad shape. We could pay to have a professional doctor it up, but I enlist the help of others at one of my favorite Facebook groups. Photo Restoration Free Service group on Facebook is dedicated to fixing images for free. Many of the people offering their talents are truly amazing. One man in particular caught my attention and gave me permission to use a before and after shot of his work. Thank you to Balazs and others who gave their permission for the before and after screenshot you see here.
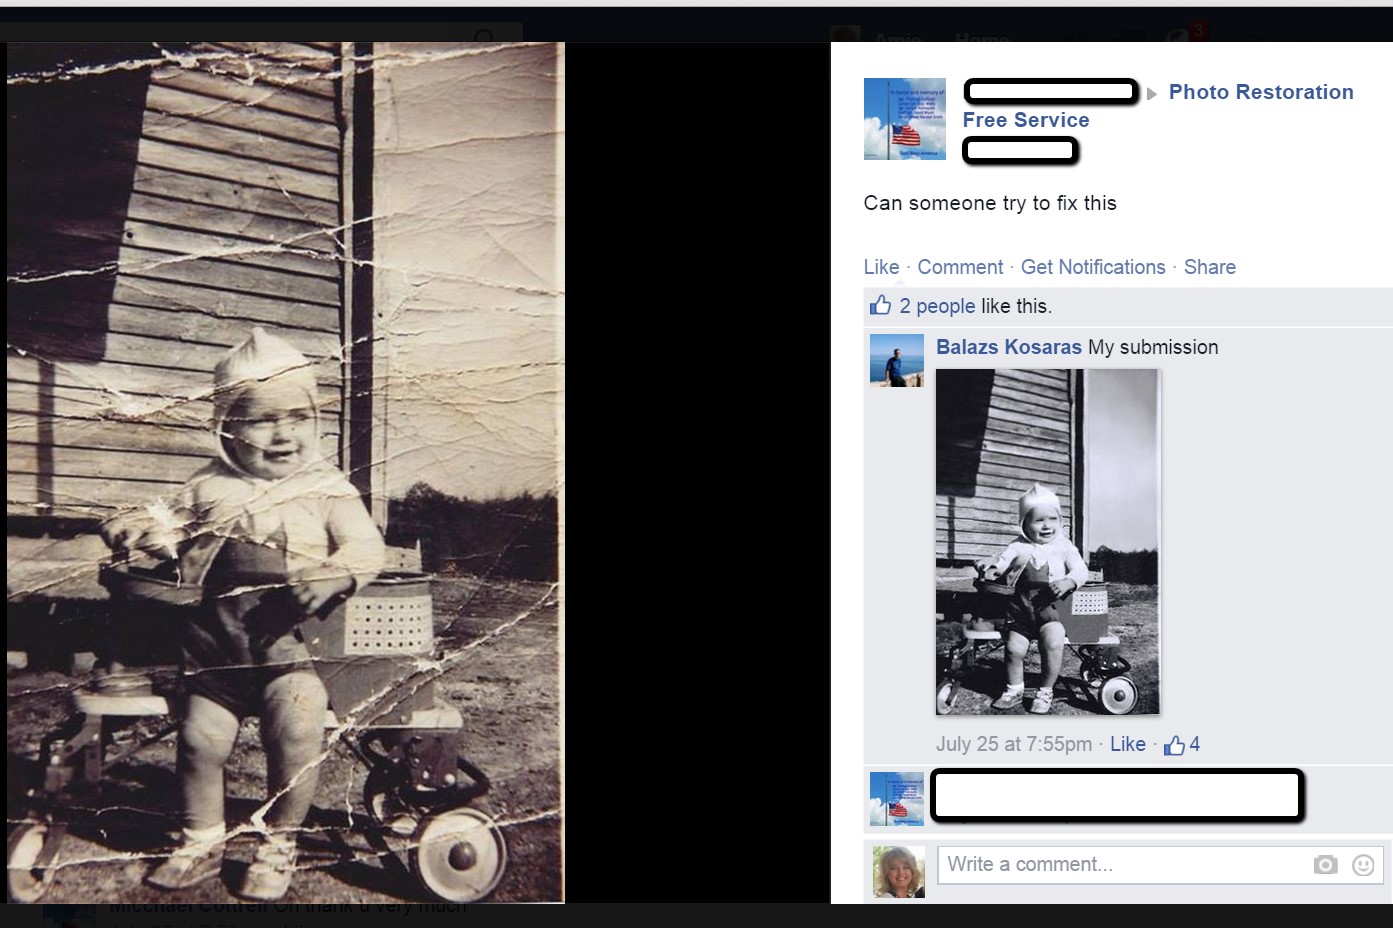
What are your favorite photo editing apps? Do you use a different app for your mobile device? We’d love to hear from you and what you are doing to make the most of your treasured family photos. Please leave a comment in the comment section below.
Sunny’s Tips for Restoration of Digital Documents
It’s not only the pictures of ancestors we sometimes need to restore, but it can also be those hard-to-read images of documents. When dealing with this problem, Sunny says:
“I do most editing on my laptop. This is where the nearest free software is and the default photo editor for Microsoft 2010. Most of the time, I just want to tweak the lighting: brighten up a scanned image or heighten the contrast in the image. To do this quickly, I open the image, then click Edit Pictures > Brightness and Contrast. In the Before/After images shown here, I just adjusted the midtones (+22) to make the gray areas lighter, then upped the contrast (+43).”
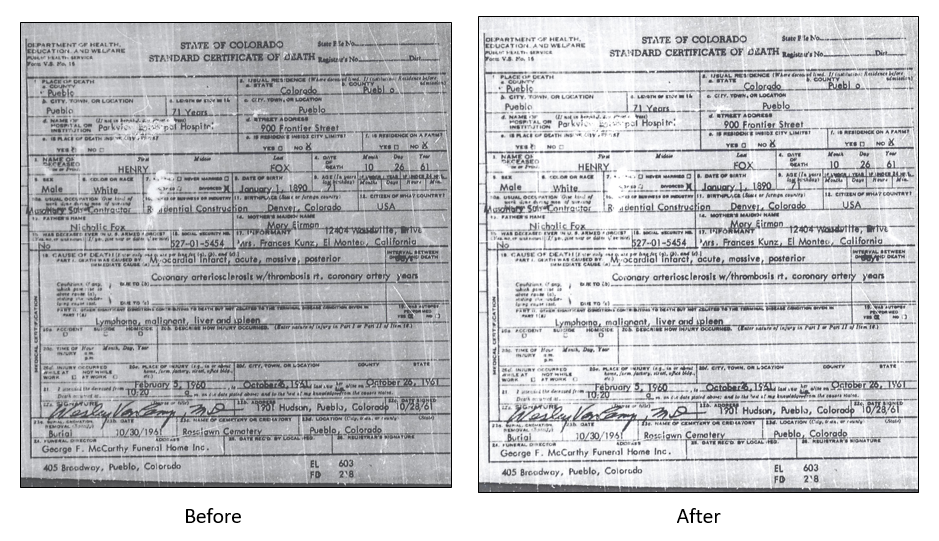
With so many photo editing apps available, it is hard to know what is going to work best for your needs. We hope that our experiences might help you to decide! We would love to see some of your before and after photos of a remarkable restoration. Will you share with us on our Facebook page? We’d love to hear from you!
More Gems on Photo Restoration and Preserving
“I Lost My Photos on My Phone!!” Here’s What You Need to Do
Tips for Digitizing Old Home Movies and Photographs
How to Use Google Image Search to Identify Old Photos on Smartphones and Tablets – Free Video


