Blog

What Ancestry’s Retirement of Family Tree Maker Software Means for You
I think this is a long post, but this is an extremely important topic. I hope you will invest the time to read it through to the end.
I travel the world presenting sessions on a wide range of genealogy topics. One of the presentations that is most near and dear to my heart is called Future Technology and Genealogy – 5 Strategies You Need. In it I not only outline 5 strategies that genealogists can use to cope and thrive in an ever-changing technological world, but I share 3 major areas that I believe genealogists should be aware of as we move into the future. One of those is the desktop moving to the Cloud.
Certainly Adobe and Microsoft have already moved that direction by discontinuing physical software sales and moving to a Cloud based subscription service. But the desktop moving to the Cloud has been a more subtle transition in the genealogy space. Today, however, our industry was hit between the eyes with this new reality.
 Ancestry has announced the “retirement” of one of the cornerstone products in genealogy, the Family Tree Maker desktop software.
I couldn’t help but think that Ancestry was striving to paint a picture of Family Tree Maker as Charles Coburn (in black and white of course) in his classic double-breasted suit, gold watch in hand, walking off into the sunset in a Jean Arthur movie. Perhaps it would be more accurate to visualize him being pushed out. Let’s start with the announcment that Ancestry released on their blog late Tuesday December 8, 2015, and then we’ll probe deeper:
“Ancestry to Retire Family Tree Maker Software
By Kendall Hulet
Ancestry is proud to have made a significant investment this year to bring valuable new content and records to the Ancestry site. In 2015, we’ve made 220 million searchable historical records from Mexico available, more than 170 million pages from the largest collection of U.S. will and probate records, among others. We’ve also introduced new features such as Ancestry Academy and major advancements for AncestryDNA.
We remain dedicated to helping people gain new levels of understanding about their lives, and who and what led to them, harnessing the information found in family trees, historical records and genetics. As a company, we’re also continually evaluating ways to focus our efforts to provide the most impact and best product experience for our users through our core offerings.
True to this focus, we’ve taken a hard look at the declining desktop software market and the impact this has on being able to continue to provide product enhancements and support that our users need. With that, we’ve made the tough decision to stop selling Family Tree Maker as of December 31, 2015.
Our subscription business and website, on the other hand, continue to grow and we are doubling down our efforts to make that experience even better for our Ancestry community.
Ancestry will continue to support current owners of Family Tree Maker through January 1, 2017. During this time, all features of the software, including TreeSync™, will continue to work, and Member Services will be available to assist with user questions. We will also address major software bugs that may occur, as well as compatibility updates.
These changes are never easy, but by focusing our efforts, we can concentrate on continuing to build great products for our loyal Ancestry community.
If you have inquiries regarding Family Tree Maker, please reach out to our Member Services team. We’ll also provide updates on our blog as needed leading up to January 1, 2017.”
What this Means for Genealogists
In reality, I would wager to guess that this move is a cold, calculated business strategy, not a warm and sentimental retirement. And that’s OK. Business is good. If Ancestry didn’t do well in business, we wouldn’t have such easy and convenient access to all those records.
Discontinuing Family Tree Maker is a strategic move. The goal is it to get everyone from family history “dabblers” to seasoned genealogists to enter their family tree data directly onto a family tree housed on the Ancestry website. This puts them in the drivers seat.
It is keenly important to understand what is really happening so that you can make the wisest decisions possible for the life of your genealogical research. Our family trees are not Ancestry’s responsibility, or anyone elses for that matter. They are our responsibilities, and we need to be as calculated and ruthless in protecting them as any savvy CEO.
We must understand that it is more profitable for Ancestry to quit producing software CDs, and all that packaging to put the CDs in. It’s more profitable to stop employing and paying employees to ship all those CDs. Digital content is more profitable and easier for a company to control. But is that the whole story?
Absolutely not. Information is King, and it is valuable. Your genealogical information is financially valuable to genealogy companies. (Read Ancestry’s Terms of Service to refresh yourself on what they can do with your information.) Think AncestryDNA is only about your ancestry? You must understand that it is not. Aggregated data is sold in the marketplace to other companies. (Read this article at Wired.com about one partnership Ancestry has with the Google-owned biotech company Calico.)
Not to say it is not a worthwhile effort on your part to get your DNA tested – it certainly may be. But that DNA data has dollar signs written all over it. It is valuable. But today isn’t about DNA, so let’s get back to Family Tree Maker and your tree. How do you, the genealogist, retain control in this environment? Take on a “genealogist-protected approach” to your data.
The Genealogist-Protected Approach
Step 1: Purchase a new genealogy software database program and load it on your computer. I recommend and use RootstMagic software. RootsMagic is excellent, reliable and extremely well supported. Click here to read how they are ready to help you in our transition.
Step 2: Back up your entire computer with a Cloud-based backup service. This is critical to protecting and retaining control of your data. I recommend and use Backblaze. (Here’s an article I wrote that will give you a compelling reason not to skip this step.)
Full disclosure: RootsMagic and Backblaze are sponsors of the free Genealogy Gems Podcast. This is primarily because I use the products myself and have been impressed and satisfied with their products. Regardless of which products you choose, just be sure you put the Genealogist-Protected Approach into action.
I have stated numerous times in presentations, on the podcast, and here on the blog that I view family trees on Ancestry and other websites as “cousin bait” not primary family tree storage. Rather than upload my entire tree, I upload that for which I want to generate “genealogical leads.” My master tree and master database file is on my computer in RootsMagic, backed up by Backblaze.
You might be one of the many genealogists who has thoroughly enjoyed having your entire tree on Ancestry, and wonder now how you can get a software program that fully synchronizes with Ancestry. To address this issue, first go back and read the section above under “What this means for genealogists.” Remember, data is BIG business. The truth is that it is not financially beneficial to Ancestry to allow that to happen. They want to be where you house your master family tree. I don’t blame them. But, in my opinion, that’s not in my family tree’s best interest. Therefore, I follow the steps outlined above, and upload a gedcom of what I want circulating publicly in order to generate “leads”: hints and cousin connections.
 I believe it is generally going to get harder and harder to retain control over our privacy and our data. We don’t know what the future holds for computer software. But no matter what happens, we as genealogists will still be 100% responsible for what happens to our family trees and our data. There’s no whining in
  genealogy. And last I heard they still produce paper and pencils.

Volunteers in the Spotlight: New FGS Officers Elected
 Congratulations to these genealogy volunteers, who have been elected as board members for the Federation of Genealogical Societies. If your own society could use a boost, keep reading!
The Federation of Genealogical Societies (FGS) recently elected volunteer board members who will start a new term on January 1, 2016. FGS is an organization that links the genealogical community by helping societies and researchers strengthen and grow through online resources, FGS FORUM magazine, and its annual national 4-day conference.
FGS President D. Joshua Taylor says, “I am looking forward to welcoming these old and new faces to the FGS Leadership team. FGS would not be able to fulfill its mission without its terrific volunteers who give so much of their time and energy to the organization.” The lineup of new and re-elected FGS officers and directors is:
- Ed Donakey (Utah) — Vice-President of Development
- Janice A. Fritisch (Illinois) — Director
- Caroline M. Pointer (Texas) — Vice-President of Membership
- Shellee A. Moorehead (Rhode Island) — Treasurer
- Richard L. Cassell (Washington) — Director
- Mark Olsen (Utah) — Director
- Cari A. Taplin (Texas) — Director
 FGS recently partnered with us here at Genealogy Gems to share our new Genealogy Gems for Societies memberships. Genealogy Gems for Societies provides societies with top-quality, affordable programming, and newsletter content. For a full year, member societies receive a license to show any or all of Lisa’s Premium videos at their society meetings. They have permission to reprint content from more than 1000 articles from our website in their newsletters, too!
Genealogy Gems for Societies gives society volunteers much-needed support to help them attract and retain members. Other benefits apply, too–and FGS member societies get a discount! Click here to learn more about Genealogy Gems for Societies.
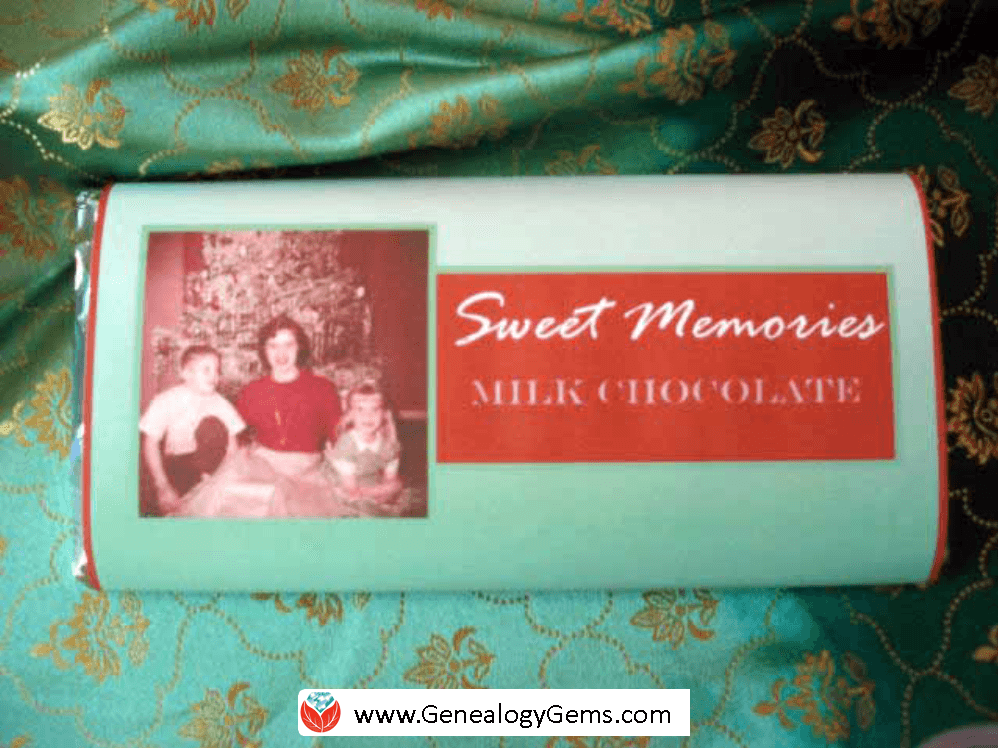
DIY Heritage Stocking Stuffer: Make Sweet Memories by Wrapping Them Around Chocolate
Are you looking for a fun, easy and downright delicious way to share some family history this Christmas? What better way to entice your family to have an interest in the family tree than wrapping that history around a luscious chocolate bar?
DIY: Stuff Their Heritage in Their Stocking
I firmly believe that family history should not sit on a shelf, but should be seen, touched, felt and even tasted!
Sometimes when a passionate genealogist shares the family history discoveries they have made, their relatives are less than enthusiastic to hear about it. (Sound familiar? I know I’ve experience this phenomenon.) This lack of interest may be more about the delivery of the information rather than the information itself. The trick is to serve up the family tree in an appealing and fun way.
That’s why a few years ago I designed these customized candy bars which I call Sweet Memories. They’re basically your favorite chocolate bar wrapped in a custom label with your own sweet family history memory on it. What could be better than that?!
They are really simple to make. The candy bars themselves are store bought. All you need is a computer, printer and some paper and you can whip some up in an hour or so.
What I especially love about these customized delectable delights is the conversation they stimulate. I loved seeing the surprises on the faces of my family, and then the reminiscing that soon followed. They loved seeing the old photos and the clever list of “ingredients” that provided insight into the character of their ancestors.
Don’t feel like you have to do exactly what I did on mine. Instead of a list of ingredients you could include a short funny story, favorite family quotes, or little-known fun facts about the ancestors in the photo. Use your imagination and have fun!
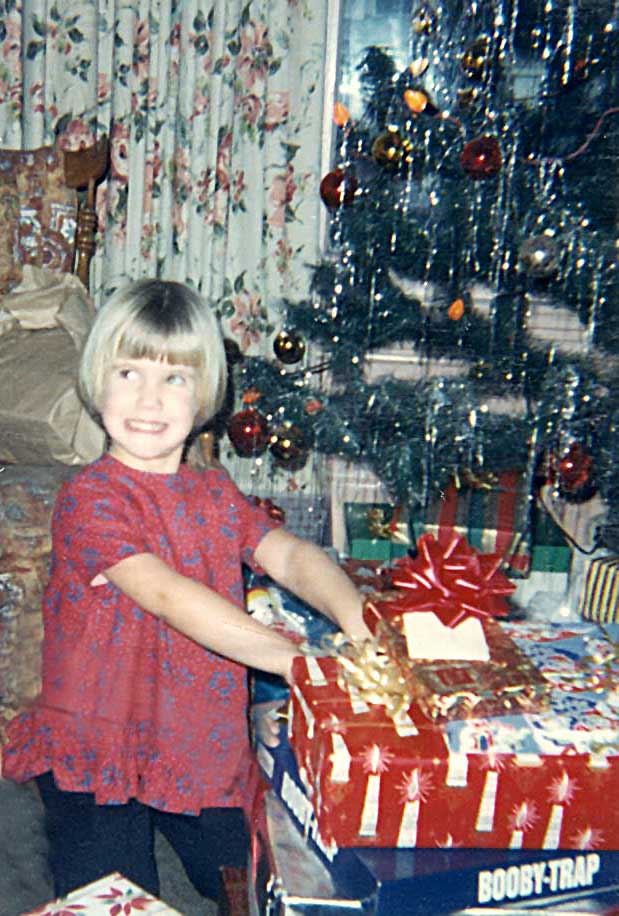
Me having fun at Christmas in 1966. Did you have the Booby-Trap game too? (Leave a comment)
Keep reading because after the step-by-step instructions below, I’ll share some more design ideas.
How to Make “Sweet Memories” DIY Stocking Stuffer Candy Bars
Here’s how to make your own custom labels and turn plain chocolate bars into wonderful holiday gifts for your loved ones.
Start by gathering up the following supplies:
- A 3.67 oz approximately sized Chocolate Bar wrapped in foil with a paper wrapper. (Dove and Cadbury are some of my favorites. Hmmmm!)
- Bright white printer paper
- Computer and printer
- A software publishing program that you can create your label in, like Microsoft Publisher. (Or try using a word processing programming using the text box feature.)
- Double sided tape (I use Scotch Brand Double Sided Photo Safe tape available here.)
- Scissors
- Scanned family photos, especially old holiday photos
These instructions are for creating the labels in Microsoft Publisher, but you could also do it in PowerPoint or any other design type software or app.
1. Create a Rectangle
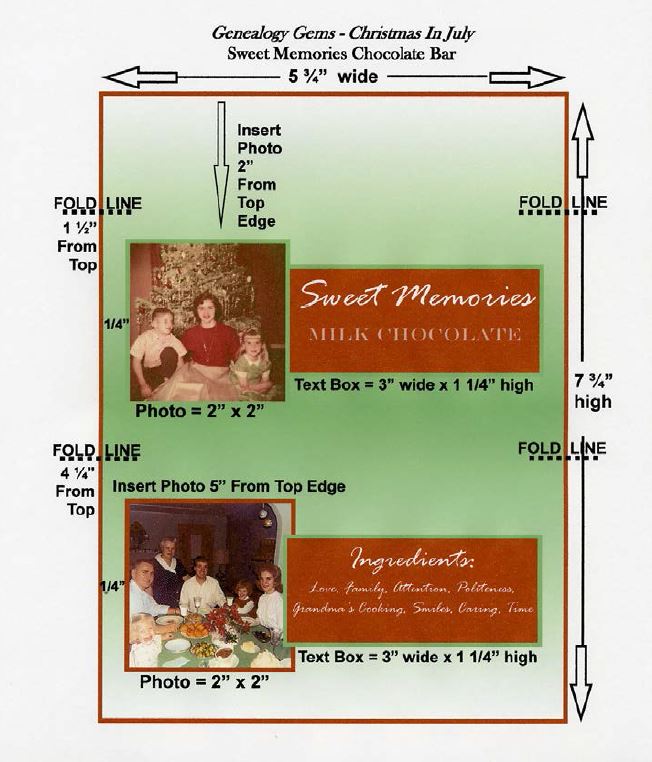
On the blank page, create a 7 ¾” high and 5 ¾” wide rectangle using the Shape tool. This just gives you a nice outline to work in.
2. Add a Background
An easy way to add an interesting background is to scan a piece of scrapbook paper that you like. The scrapbook paper could be textured or have a repeating design. But you could also choose a favorite digital image.
Use the INSERT IMAGE function to get the image onto your page. Next, resize it to fit just over the rectangle that you created.
Another other option for the background is to select the rectangle and use the FORMAT FILL COLOR function to color the box with the color of your choice. I used green and then chose a gradient that went from light to dark for added interest.
3. Add an Old Photo(s)
You can add any digitized photo that you like. Dig through your old family photo albums to find Christmas photos from the past, or simply feature an ancestor or family. You can use the same photo for all your stocking stuffers, or surprise each member of your family with a candy bar featuring a different ancestor.
Use INSERT IMAGE to add your photos and resize them to fit.
For the front side image, I measured down approximately two inches from the top of the label, and that is where the top of the photo was placed. I set it ¼” from the left edge. Both photos are about 2” x 2”.
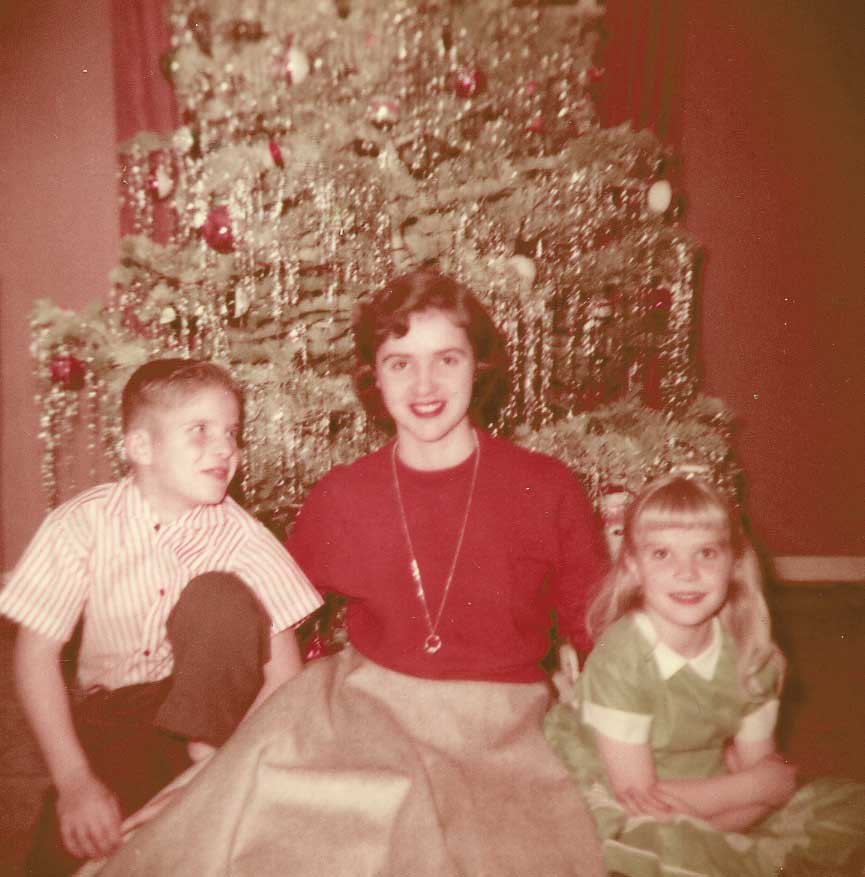
My uncle, mom and aunt in 1956. I used this photo for the front side of my stocking stuffer candy bar label.
4. Adding Photos to the Back of the Label
The backside photo begins 5” from the top of the label and is set ¼” from the left edge.
You may also want to include a small text box that states the date and location of the photos and the names of the people.
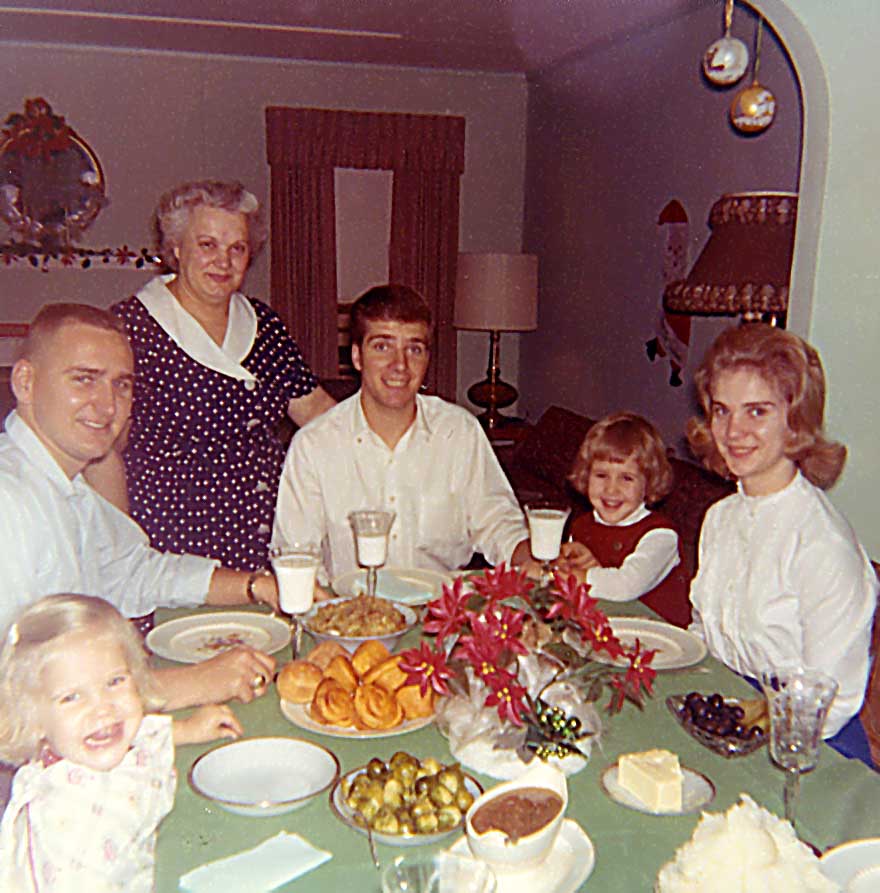
Christmas Dinner at Grandma’s House (I’m in the bottom left corner, mouth wide open as usual.) I featured this photo on the backside of my label.
5. Add Descriptive Text
The last step is to insert the text boxes.
Both the “Sweet Memories” text box and the “Ingredients” text box that I included are about 3” wide and 1 1/4” high. You can format them with the borders and colors that you want.
In my example, you’ll see that I took the color cues from the colors in the photos – the crimson red and soft green. Many apps have a color picker feature that will allow you to get an exact match.
 6. Add the Ingredients List
Every food item has an ingredients label on it, and this bar is no exception. I had some fun with the ingredients list and played up the family theme. I thought about my memories of my Grandmother and the values and elements she poured into each holiday. So my ingredients list reads:
- Love,
- Family,
- Attention,
- Politeness,
- Grandma’s Cooking,
- Smiles,
- Caring
- and Time.
Feel free to reflect your own family values in the list.
7. Print Your Label
Once you’ve got everything laid out on the screen the way you want it, it’s time to print.
From the menu, click FILE then PRINT and then click the PROPERTIES button. From this window be sure to select “high resolution paper” or “high brightness” as the media type, and select HIGH for the print quality to make sure you get the best, most professional looking label.
Print the label, then carefully cut it out.
8. Fold the Label to Fit
Follow the folding guidelines shown above, but keep in mind that your candy bar is going to dictate your actual fold lines.
The first fold line for my standard size Cadbury chocolate bar (which you can buy in bulk here) was 1 ½” from the top of the label and the second fold line is 4 ¼” from the top of the label.
(Disclosure: Genealogy Gems is a participant in the Amazon Services LLC Associates Program, an affiliate advertising program designed to provide a means for sites to earn advertising fees by advertising and linking to Amazon.com. Thank you for supporting articles like these by using our links.)
9. Tape the Label Closed
Remove the original wrapper of the chocolate bar, being sure to keep the foil wrapper in place and undisturbed. Use a small piece of double sided tape to stick the label to itself on the backside snugly.
And there you have it, your own custom family history themed chocolate bar! It’s ready to tuck into a Christmas stocking, use at your next family reunion, or at any other time you want to tickle someone’s sweet tooth and share memories.
More DIY Stocking Stuffer Design ideas
I promised you more examples of these Sweet Memories candy bars. Here are some from my Genealogy Gems Podcast listeners.
I love the vignette styling Judy gave her family history photos.
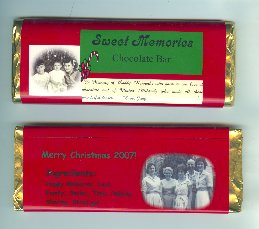
Genealogy Gems Podcast listener Judy shared her version of the Sweet Memories stocking stuffer candy bar.
And this listener took this DIY idea and used it to create candy bar treats for her family reunion. What makes these SO unique is that she used a family heirloom crocheted blanket for her background image. (How clever is that?!) She spread the blanket over the bed of a scanner to make a digital image of that she could use on the label.
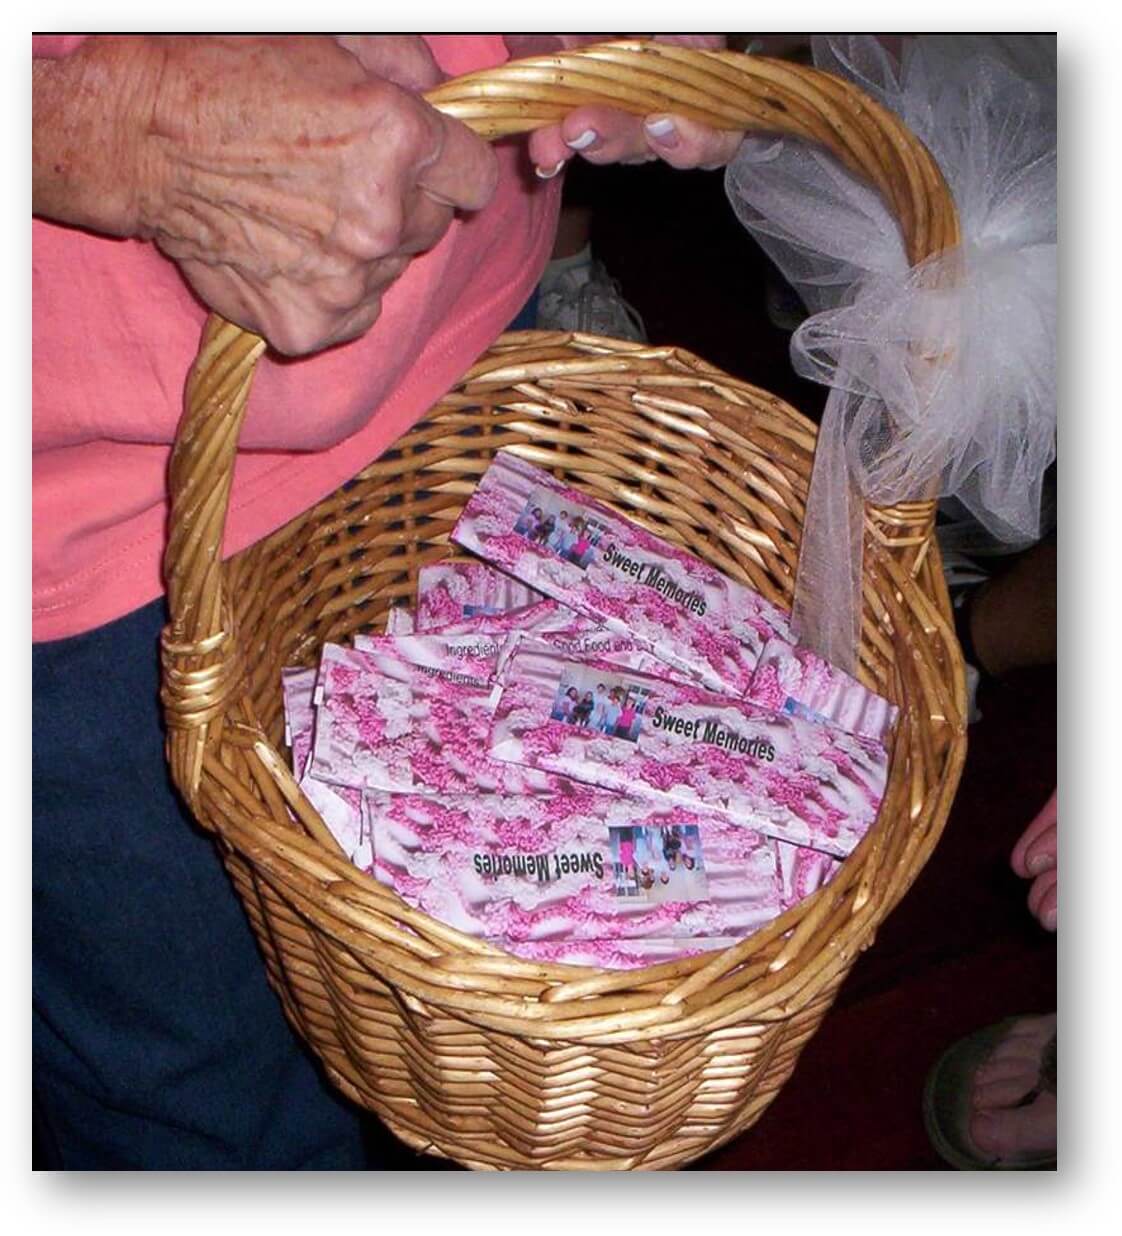
Click here for more family reunion ideas.
Get more DIY project here at Genealogy Gems. You’ll also find great heritage crafting ideas–including photo displays and heritage quilts–on my Pinterest boards. If you enjoyed this idea I’ll hope you’ll share via Pinterest or Facebook. Did you like this idea and do you have other suggestions for a new spin on it or a favorite DIY family history project? I’d love to hear it so please leave a comment below.


