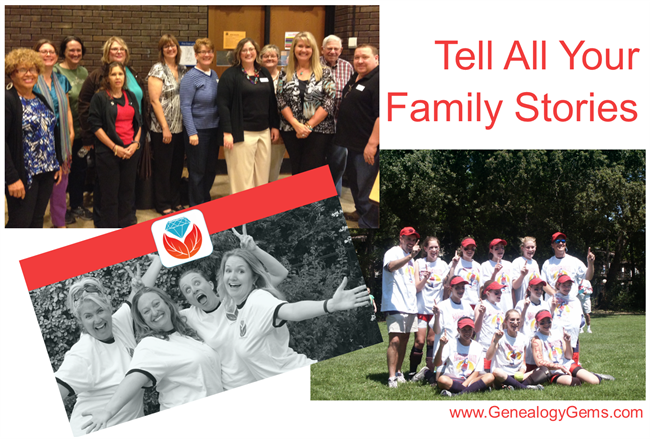
You probably have more families than you think. I know I do.
I’m a pretty lucky lady. My business is a family business. All three of my daughters and my husband work with me to create Genealogy Gems. But our company family also includes Sunny Morton, our Editor and Book Club Guru, and Your DNA Guide Diahan Southard. As we capture memories throughout the year for generations to come, it makes sense to capture all the families we a part of: businesses, teams, churches, and yes, even genealogy societies.
This year has been an important one for the Genealogy Gems family. It’s our 10th year serving people around the world who yearn to learn more about their family history. So, I temporarily set aside my workload this last weekend and devoted some important time to recording our history.
I turned to my favorite video tool, Animoto, to pull it all together. It took some time to sift through all the photos and notes I’ve collected over the years, but I loved the nostalgia of seeing it all again and looking back on how far we’ve come. It still blows me away how much easier it is to make a video these days with this new technology. A video like this would have taken me 8-10 hours just ten years ago. But Animoto literally took minutes, and automatically applies the transitions, music, background, and makes sure it all times out together perfectly.
Here’s what I came up with:
There’s no better use of your time than telling the story of the families that mean most to you. Every single one has a story, and I can’t think of a better person to tell that story than you! You can get a free trial of Animoto here, and get started right away. There doesn’t even have to be a reason or an occasion – these videos can be treasured and enjoyed anytime. Show your families how much you care. And when you do, share the link in the comments, won’t you?
(Full disclosure: This post contains affiliate links and I will be compensated if you make a purchase after clicking on my links. Thank you for supporting the free Genealogy Gems blog and podcast!)
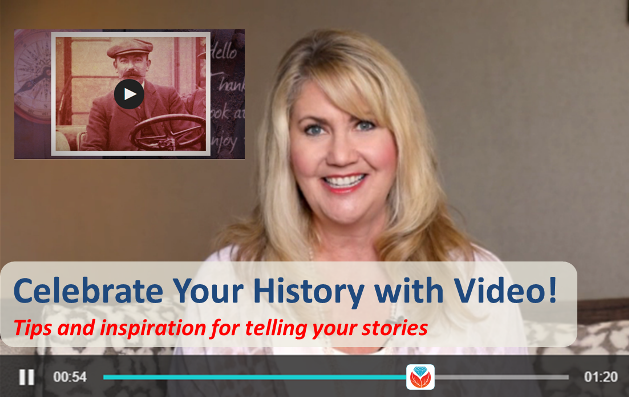
Celebrate your stories with video–whether it’s your family history, the story of your business, or an event or pastime you want to share. Check out 5 weeks of great video ideas from Animoto, including my own family history video on an ancestor’s immigration story.
This year marks a big milestone for Genealogy Gems: we turned 10 years old! My favorite video creation tool, Animoto, also marks a decade this summer. We’re celebrating with them–and what better way than with video?
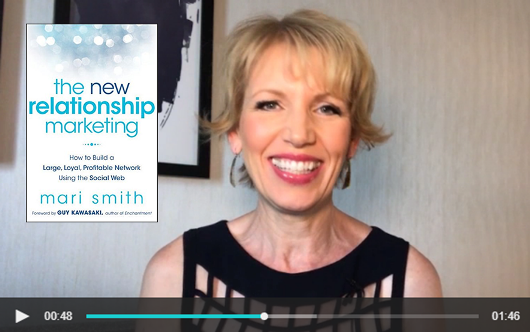
Last week Animoto celebrated relationships with Facebook expert and author of Relationship Marketing, Mari Smith. She inspired everyone to create a video celebrating relationships — whether it’s a video about your family or friends, a video showing appreciation for a client, or a video celebrating another bond that’s important to you.
This week, I’m honored to have been invited by the good folks at Animoto to share why our histories are so important and offer up the video I created that I hope will inspire others. Click here to watch that short can you buy medication online video (it’s the first one). Of course they also asked me to share a celebratory video of my own! On the same page, check out a short video I created about the Cooke family coming to Canada. You’ll also find other videos celebrating the story of a business, birth of a child, history of a product and a photographer’s love of his craft. It’s amazing how many topics we can celebrate powerfully with a short video!
Which family history story will you tell with video and Animoto? Join the party and show your Genealogy Gems pride by sharing them on Facebook, Instagram, or Twitter using the hashtags #CelebrateWithVideo and #GenealogyGemsPodcast.
Let us help you make a family history video with these detailed how-tos:
Thanks for clicking here to check out Animoto’s subscription service for creating professional-quality videos. When you use this affiliate link and make a purchase, I will be compensated. I appreciate you using these links because that compensation helps make the Genealogy Gems blog possible.
Here’s how to make a family history interview video. We’ll walk you through an easy and quick process that will result in a professional quality video that you’ll be proud to share with your family and generations to come.
My husband Bill does not enjoy being on camera, and if I add an interview to the scenario, I have an even bigger challenge on my hands. Does that sound like anyone in your family?
Getting a family member to sit down and answer questions about their life or an ancestor they remember can be an uphill battle, but the climb is worth it. Each one of us has a very unique view of the world. Even though we may remember the same person, our memories and feelings will be distinctly individual, and therefore are worth capturing.
Father’s Day is just around the corner, and we have a new granddaughter joining our family next month. Now seemed like the perfect time to quickly cobble together an interview video with Bill sharing his memories about his dad. I shared some old photos with him and captured his memories. Take a look:
Maybe you’ve been thinking to yourself, ‘Right now just isn’t a good time.’ But guess what! ‘Right now’ is always the ideal time to capture the memories of living relatives. Don’t wait for the opportune moment to present itself, because it might never come. Right now is the perfect time for you to ask questions and record memories that might otherwise have been lost forever.
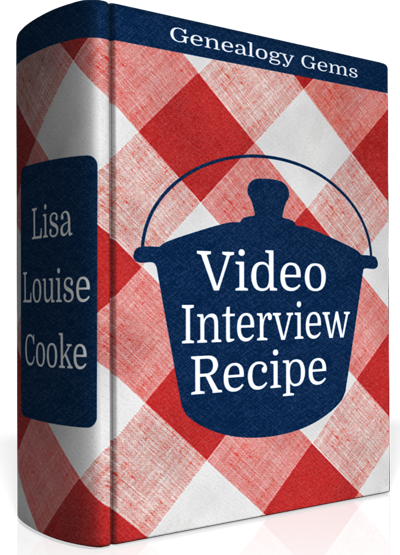
If you’ve got a few extra minutes to prep for a more polished interview, follow my recipe for creating a video your family will savor for generations to come.
Even though we may remember the same person, our memories and feelings will be distinctly individual, and therefore are worth capturing.
Ingredients for a Family History Interview Video
(Note: I only endorse products that I love and that’s why I’ve accepted Animoto as a sponsor. That means I was compensated for this post. This post also contains affiliate links and I will be compensated if you make a purchase after clicking on my links. Thank you, because they help support the free Genealogy Gems Podcast.)
To create a video like mine, which in total took me about 1 hour from start to finish to create, you’ll need:
a smart phone or tablet (I used my iPhone 7 Plus to capture video of Bill answering my questions. The iPhone has a terrific camera built in, but any mobile device with a camera will do.)
old family photos (I saved mine to a Dropbox folder that I could access on my iPad)
an Animoto slideshow subscription (test drive Animoto with a free trial if you want to get the feel of it before subscribing.)
a short list of questions pertaining to the photos
a willing interviewee (that was my hubby, although I use the term “willing” loosely here)
Pull together everything before you bring in your interviewee. That way, they won’t start off the interview bored or frustrated while you get things ready. We definitely want to get this off on the right foot!
Setting the Stage
Find a comfortable chair for your interviewee and then place it in front of an attractive background in the room. To get a feeling of depth and a nice focus on my subject, I placed my chair in the center of the room so that the background was in the distance. This setup puts the focus on the person you are interviewing and not the items right behind him.
Lighting can make a big difference in the feel of your video, but it doesn’t have to be fancy. Notice that I kept the background fairly unlit, and then turned on a nice soft lamp on one side of Bill. On the other side, out of camera view, I brought in a second light so that both sides of his face would be lit.
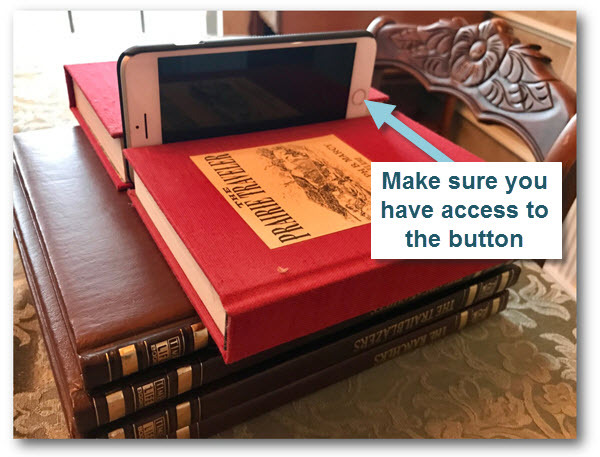
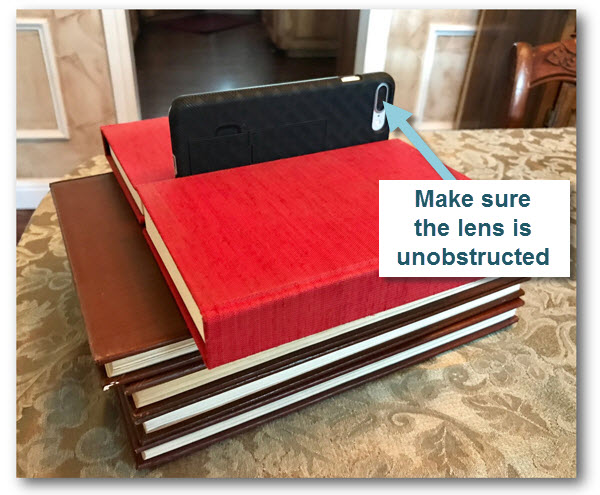
Set up a small, portable tripod on our coffee table in front of my subject and mounted my smartphone (I like this one, which was less than $12). If you don’t have a tripod, just stack up a couple of books on the table to get to the right height, and then use a book on either side of the camera to keep it stable.
The video viewer side facing you as the interviewer
The lens side facing your interviewee
Position a chair for yourself behind the camera, and off to one side. Stay within reaching distance of your camera so that you can turn it on and off between questions. You will want to be off to one side so that your subject is looking at you and not the camera when they answer your questions during filming.
‘Right now’ is always the ideal time
to capture the memories of living relatives.
Start the Interview
Bring your subject in, and get them comfortable in their chair. Have a glass of water nearby for them. Chat with them for a moment about how they are doing, the weather, or whatever else comes to mind (except family history – save that for the video) to sort of warm them up. Explain that they don’t need to worry about the camera, but instead should just focus on talking to you.
To ensure an easy to understand video, encourage them to repeat back the question in their answer because your audio won’t be part of the interview. For example:
You: “What was your mom like when you were a child?” (showing a photo of them and their mom)
Them (OK) : “She took great pride in her home, and she insisted we take our shoes off before entering.”
Them (BETTER) : “When I was young, my mom took great pride in her home, and she insisted that we take our shoes off before entering.”
Folks usually get the hang of it after a couple of tries. Finally, ask them to wait just a beat before they begin talking and to avoid talking over you. Again, the goal is to only capture the audio of the interviewee.
Armed with your list of questions, bring out the first family photo (I did this on an iPad where I had the photos saved in my Dropbox app). On your phone, tap the Camera app to open it, set it to Video, and pressed the big round record button. Move back to your off camera position, and show the first photo and ask your question. Don’t worry about the beginning or the end of the Q&A being messy with getting situated because you will trim that off later in Animoto. After they complete their answer, press the button on the screen to stop recording. It is much easier to work with short video clips rather than one long continuous recording for a number of reasons:
It’s easier to move small video clips from your phone to your computer
Video clips up to 450 MB can be uploaded to Animoto (that’s typically just a little over 4 continuous minutes of video)
One question per clip makes it much easier to move them around in your project to get the exact order you want
It’s easier to interject photos between clips when the questions are individual video clips
Pull up the next photo, press Record, and ask your second question. Repeat for each question and answer. If you go longer than about 20 minutes total, it’s a good idea to stop and ask them how they are doing. Ask if they are agreeable to continuing. Be sensitive to their time and comfort. Remember, people before genealogy.
Post Production of Your Family History Interview Video
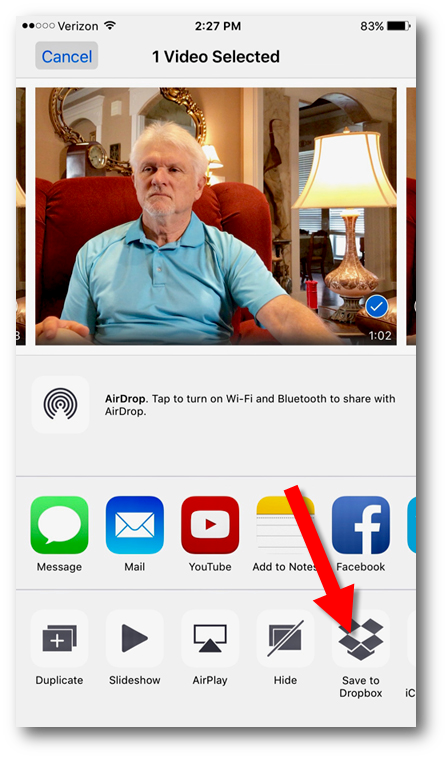
Step 1: In the Camera app, tap Share and Save to Dropbox
As a podcaster, pre- and post-production takes up much more of my time than recording. But with Animoto, your post-production time will be really quick. Here are the steps to creating your finished video:
Step 1: In the Camera app, Share your videos to your computer via a cloud sharing service.
Step 2: On your computer go here to Animoto, sign in and click the Create button to start a new Slideshow video project. (For 10 seconds or shorter video clips you can create your video right on your phone in the Animoto app. But in the case of this type of interview, answers will be longer and you’ll want to use the website.)
Step 3: Select a Style and the Song that will play in the background.
Step 4: On the project page, click Add pics & videos, and upload the video clips and photos. Adjust the length of each video clip as desired, eliminating unwanted portions.
Step 5: Arrange the content in the desired order. I chose to show the answer first, and follow it up with the photo.
Step 6: Add Text if desired. You can add text to photos, or individual ‘title cards’ at the beginning, middle, and end of your video.
Step 7: Click Preview to review your video and make any needed adjustments.
Step 7: Preview one last time and click Produce to render your finished video.
Step 8: Download a copy of the video to your computer, and make sure your computer is backed up! (I use Backblaze.) The ability to download HD quality videos from Animoto for archiving is a HUGE reason why I love it so much.
I’ve got three quick tutorial videos here for you to watch if you feel like you need some help with your first project.
Remember, people before genealogy.
Need more inspiration?
I’ve been having a blast creating Animoto videos about my husband’s family. It’s been a great way to get my non-genealogist husband involved and really interested in family history. Here are two more videos I created about his family:
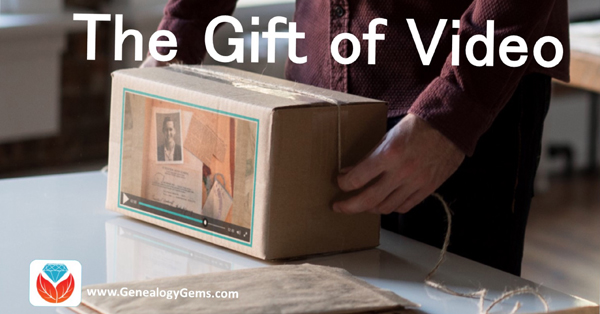
Are you having a hard time coming up with the perfect gift for someone special on your list? The gift of video gives all year round, and doesn’t require you to buy the correct size. Make your video about family history, or the memories of the recipient, and get ready for hugs and smiles of appreciation for your thoughtfulness.
Do you remember the first Christmas that you realized it was better to give than to receive? It’s an amazing feeling when your heart swells at the thought of snagging the perfect present for the people you love the most. But if you’re like me, there are always one or two relatives who present daunting challenges. Perhaps it’s the elder members of your tribe who seem to want for nothing; or a Aunt who quietly returns everything.
My challenge this year is my Dad. He seems to want for nothing, and having an Amazon Wish List isn’t even on his radar. Last year Dad passed his high school scrapbook on to me. It’s brimming with some of his fondest memories: his Boy Scout membership card, newspaper clippings of his football prowess, and the cardboard glasses he wore to his very first 3D movie. I’m pretty sure his heart was swelling when he handed this treasure chest of beloved memories to his daughter, the family historian.
And that’s when I was struck with an inspiration: give it back to him in the form of a video.
Video: Gift Perfection
Here’s why video makes a perfect gift:
It doesn’t take up precious space on the shelf
It can be enjoyed from any computing or mobile device again and again
It can be shared easily with others
If you have been in search of the perfect holiday gift, follow along with me, and give the gift of video.
Creating a Video Gift
If you’re short on time, consider making a video of an old family scrapbook. All you will need is a smartphone and 30-60 minutes. Pull a scrapbook off the shelf, and dust it off because it’s about to get a new life!
Step 1 – Photograph the album
You could use a flatbed scanner to scan each page and the individual items you want to highlight. But you can save a ton of time by putting your smartphone or tablet to use. For me, this was the ideal solution also because so many of the items in the scrapbook had become loose, and I wanted to be able to show the pages as they were originally laid out. By setting the book on a table I could just snap photos rather than turning it upside down on the scanner glass. And don’t worry about snapping the perfect pics because we’ll get them all snazzy in step 3.
Save the images to a free cloud service like Dropbox so that you can easily retrieve them on your home computer.
Step 2 – Head to Animoto.com
(Full disclosure: This post contains affiliate links and I will be compensated if you make a purchase after clicking on my links. I appreciate you using these links because that compensation helps make the Genealogy Gems blog possible. Thank you!)
Although Animoto does have an mobile app, I like using the web version on my computer which provides the advantage of a bigger screen. Click here to go to Animoto, and sign in to your account. Then, just click the Create button to start a new video project.
Choose a Video Style, which will include a music soundtrack. If the music isn’t quite what you had in mind, click Change Song and pick from a robust list of tunes. Animoto’s secret sauce optimizes and paces your slides to jive with the music. If the music is faster, the slides are faster, and if it’s slower, yep, the slides are slower. In the end though, you always have the final choice in the pacing of your slides and your entire video. Need a little extra time? Then just add a second music sound track.
Step 3 – Add Your Photos
Now it’s time to add your photos. Click Add Image, select Dropbox, and navigate your way to the folder where you saved your photos. Click the first one in the list, and then holding down the Shift key on your keyboard, click the last photo in the list, and click the Choose button. There you go: you’ve added all your images in one fell swoop! Imagine the time you saved over adding one item at a time.
I snapped all the full page photos first, and then I went back and snapped some of particular items I wanted to highlight with closeup images. That meant that when I added my photos they weren’t in exactly the right order. Thankfully, all I had to do was drag and drop them in the desired order. Easy peasy!
Edit your photos within Animoto.
Another reason I adore using Animoto is that I can do all my editing right there in the dashboard. With a few clicks you can apply a quick crop, slight rotation, and image enhancement with a great result. (Image right)
You even have the option to add video clips with Animoto. So if I had a fancy to add my original video of turning the pages of the scrapbook (above) I would just drag and drop it onto the timeline. And it is that ability to drag images and video from your hard drive straight into Animoto that makes it so quick and easy to use.
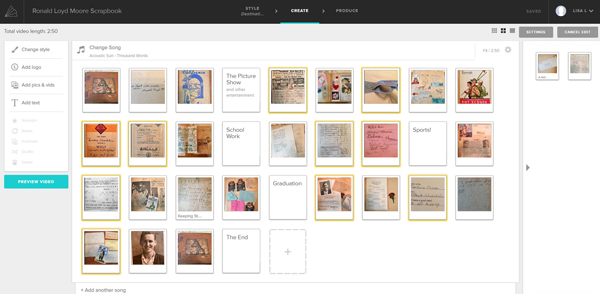
Step 4 – Add Title Slides
Although my Dad’s scrapbook really speaks for itself, I decided to add a few title cards to help guide the viewer like:
The Picture Show
School Work
Sports
Graduation
And title cards are great for “The End” and any other message or credits you want to add.
If you want to add text within your project, click to select the item that your text will follow, then click Add Text from the menu, and it will appear immediately after the previous item. To add text at the end, just click the plus sign in the last box and again type your text. And remember, nothing is set in stone. If you change your mind you can drag the text to a new location, edit it, or delete it all together.
Step 5 – Preview & Publish Your Video
At any time during the process you can click the Preview Video button to see your work. If you like what you see, then click the Produce button in the Preview window to create the final product. And speaking of final products, here’s mine:
Learn More
Are you ready to start creating memorable videos for the loved ones on your list? Click here to learn even more and give Animoto a whirl. (And just think: no wrapping required. You’re welcome!)
In this blog and video series I’m showing you how you can create captivating videos about your family history quickly and easily with Animoto.
In the First Episode
In episode 1 we laid a foundation for the family history video that you are going to create. Doing this will save you time and ensure a cohesive, well-told story. We also:
defined your audience
identified and outlined the story that you want to tell
collected the content that you will include in your video
If you missed episode 1, you can watch it below:
Get a Free Animoto.com Account
The first thing to do is to go to Animoto here and sign up for a free trial account, which gives you the full power of Animoto Pro. No credit card is required. This trial period is the perfect opportunity to test drive Animoto and see just how easy it is to use. As I’ve said before, if you can click, drag, and drop, you can make videos with Animoto.
The videos you create during the trial will be watermarked, but still downloadable and shareable. If you decide to use Animoto beyond the trial period, there are several pricing plan options. You can purchase as little as one month for around $16 (check their site for current pricing). If you’ve done your prep work like we did in episode 1, you can create several videos in that time period.
OK, I know you’re anxious to get going, so let’s create a video!
Create!
It’s super easy. Once you’re signed into your account, click the Create button.
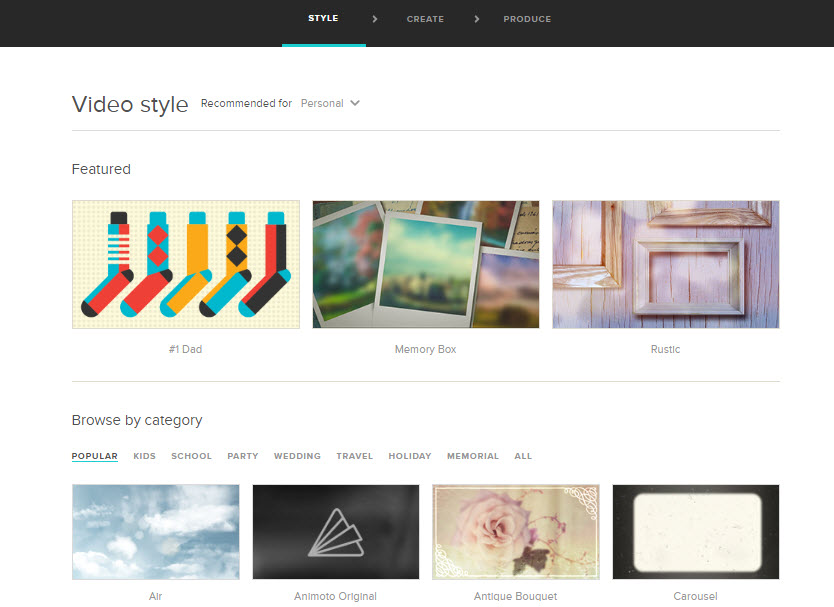
Style
First up, select a style that fits your story. Here are some of my favorites for family history:
Memory Box
Antique Bouquet
Remembrance
Vintage Voyage
Rustic
You’ll notice that some styles have a Premium banner. Those require a Premium subscription. However, if you’ve opted for a Personal level subscription you still have lots of wonderful styles to choose from.
Click on a style that catches your fancy and watch a preview of what it will look like. When you find the one you want, click the Create Video button on that style page. This will load the Video Creator.
Music
The style you chose will include a song, but you can change that if you want to. To select a new song, click Change Song, and you can pick a song from the Animoto library.
You can also upload your own music mp3 file from your computer. (Remember to keep copyright in mind, and make sure you have the rights to use the song.)
But wait, you can add more than music! You can also upload an audio file, such as a family history interview, or even an mp3 file that you created that includes both music and words.
Adding Pictures & Video
Now it’s time to add your photos, images, and video clips. Of course that’s easy because in episode 1 of this series you created an outline for your story, and you copied the files you wanted to use to illustrate that story into a folder on your computer. So you’re all set to go!
There are two ways to add files. From the menu, click AddPics & Vids, or on the timeline click the plus sign in the empty box. In the pop up window you’ll find lots of options for imagery, including stock photos from Animoto. But for now, let’s add the images you put in the folder on your drive (see episode 1).
Under Your Computer click Upload Pictures and Video. Navigate your way to your content folder on your computer’s hard drive. Click to select the first image, and then you can select them all by holding down the shift key on your keyboard, and clicking the last image in the folder. Press Enter on your keyboard to add them to your project.
You can rearrange the order of your images and videos by dragging and dropping them with your mouse. If you decide to eliminate an image, simply click to select it and from the menu click Delete.
Text
Next, we’re going to add text to your videos, creating title cards. Again you can do this from the menu, or just click the plus sign in the empty box on the timeline, and then click Add Text.
In the pop up box you’ll type a title (or the main text) and then you have the option to add a subtitle. This is where the outline we created in Video 1 comes in so handy! When you’re done, click Save. And don’t worry because you can always go back and change any text at any time.
Title cards are great for the beginning and ending of your video and also for transitioning to different parts of the story.
Simply click and drag the cards into the order that you want them.
You can also add text captions to each of your images. Hover your mouse over the image and click Caption under the image. In the pop up window containing your image, click to place your cursor in the text area, type in the desired text, and then click Save.
Spotlighting an Item
You may have a few images or title cards that you want the “camera” to spend a little more time on, thereby spotlighting it. To create that effect, just click to the select the image or title card, and then click Spotlight in the menu. I particularly like to Spotlight title cards so that the viewer has plenty of time to read them.
Previewing
So let’s see how this looks so far, and to do that we’re going to click PreviewVideo. You can preview your video at any time during the production process.
A low resolution version of your family history video will be created in about 15 seconds. Then you can watch and see what little tweaks and changes you want to make. Click Continue Editing to head back to the timeline and keep working.
Next Steps
I hope you’re getting excited about your video projects. Next time we get together, we’re going to bring our projects down the homestretch and produce them into glorious shareable videos.

 (Note: I only endorse products that I love and that’s why I’ve accepted Animoto as a sponsor. That means I was compensated for this post. This post also contains affiliate links and I will be compensated if you make a purchase after clicking on my links. Thank you, because they help support the free Genealogy Gems Podcast.)
 Find a comfortable chair for your interviewee and then place it in front of an attractive background in the room. To get a feeling of depth and a nice focus on my subject, I placed my chair in the center of the room so that the background was in the distance. This setup puts the focus on the person you are interviewing and not the items right behind him.