Inherited Genealogy Files: Adding Source Citations to an Inherited Family Tree
Adding Source Citations is our third post in the Inherited Genealogy Files series, and in this post, we answer a listener’s question.

We recently received this letter from a Genealogy Gems Podcast listener, Cristy. She says:
Thank you for your tip about starting from the present and working backwards. I was having a hard time knowing where to start. I had inherited a tree passed from my mom and my great-grandmother, that when combined with the information my husband’s aunt gave me [I had a] tree with almost 1200 names. But the information from my great-grandmother and my aunt does not have any sources and all of my mom’s sources got lost in our various moves over the years. She only had her old school database that just had the facts and no sources.
I determined that a genealogy book my mom used as a source for one of our lines [had been] copied [from] an older genealogy line that has been proven incorrect. So, my goal has been to re-find my mom’s sources and document everything. I didn’t know where to start. I have now made a second tree in my database keeping the original as a place to start and only putting what I have proved using actual sources and attaching the documentation as I go. Your episode on the Genealogical Proof Standard was really helpful. It will be a big help as I clean up my tree.
Finding Source Citations for Your Inherited Family Tree
Let’s first give a brief definition of source citation.
Source Citation: the information that tells your reader where you obtained a particular piece of genealogical data.
For example, a family tree should include a source citation for the birth date and place, the death date and place, and the marriage date and place…and that’s just the start.
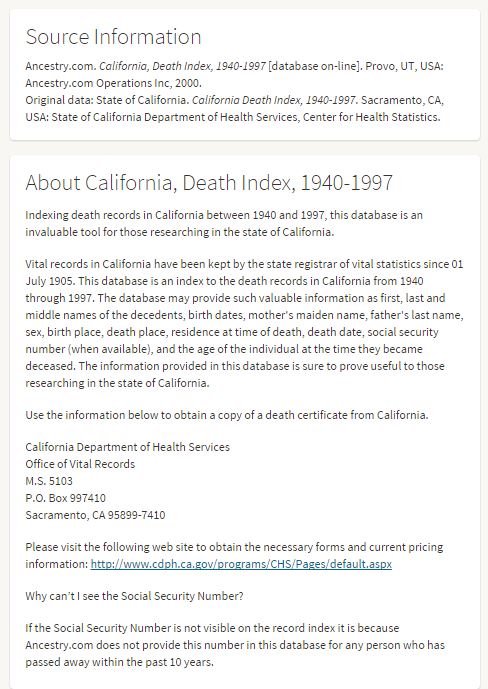
Finding source citations is really easy if you are using FamilySearch. Let’s say I used a death record I found online at FamilySearch as the proof of my ancestors death date. What is so wonderful about using FamilySearch.org for finding records is that it includes a source citation for you to copy and paste. Take a look.
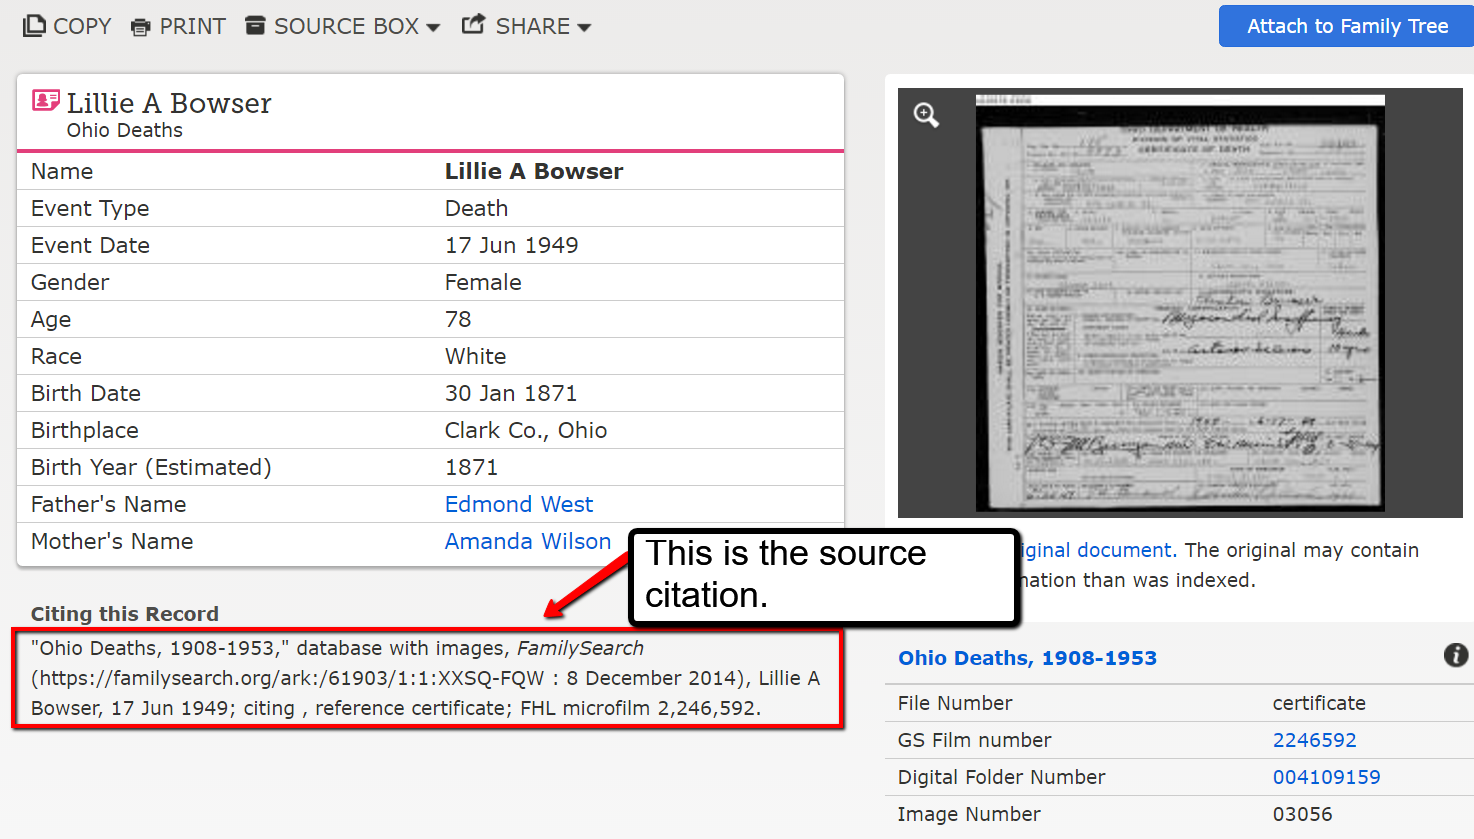
You can highlight the source citation text and copy it into your genealogy software. A bonus is knowing that FamilySearch is free and easy to use.
Adding Source Citations for Genealogy to RootsMagic Software
As I mentioned above, you can take the source citation you found on FamilySearch and copy and paste it into your genealogy software. RootsMagic is the genealogy software we here at The Genealogy Gems Podcast use (and we are proud that they sponsor our free Genealogy Gems Podcast.) It is an easy-to-use and effective software for both PC and Mac users. (To learn more about using RootsMagic, read here.)
Using RootsMagic, let’s add a source citation to an event in a family tree:
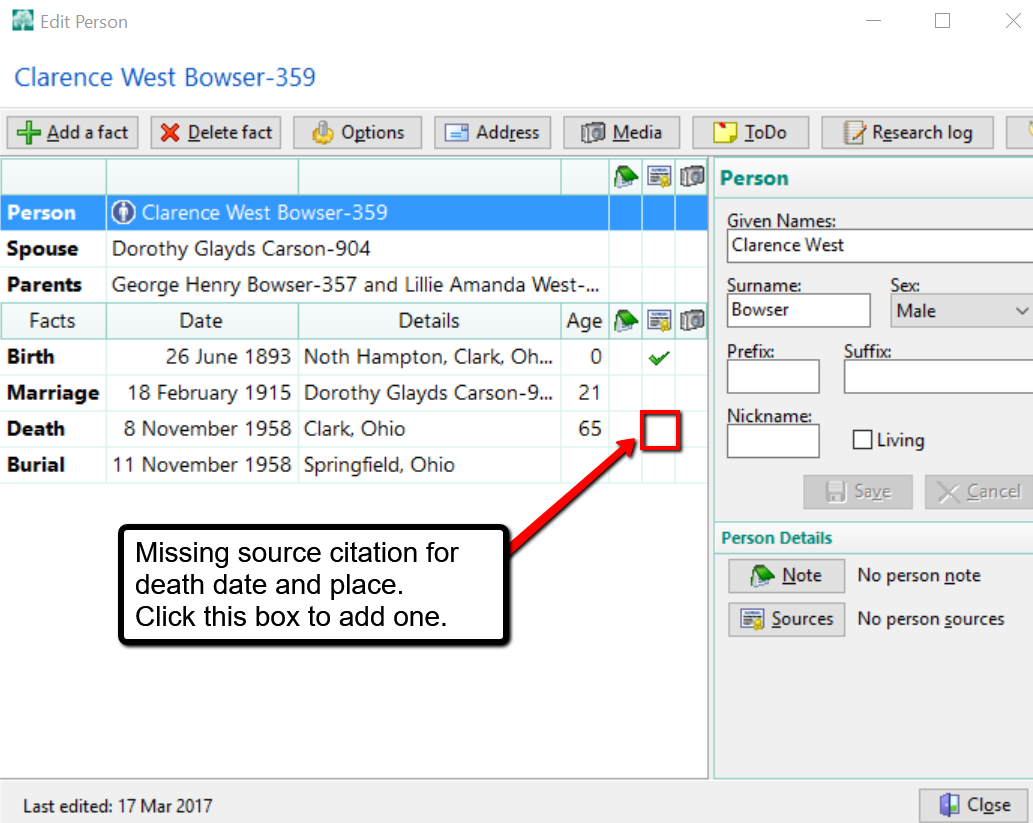
In this example above, we have double clicked on Clarence’s name and opened up the Edit Person window. We would like to add a source citation for Clarence Bowser’s death date and place. In the line for death, we click on the box in the source citation column. The source citation column is indicated by that little icon that looks like a record.
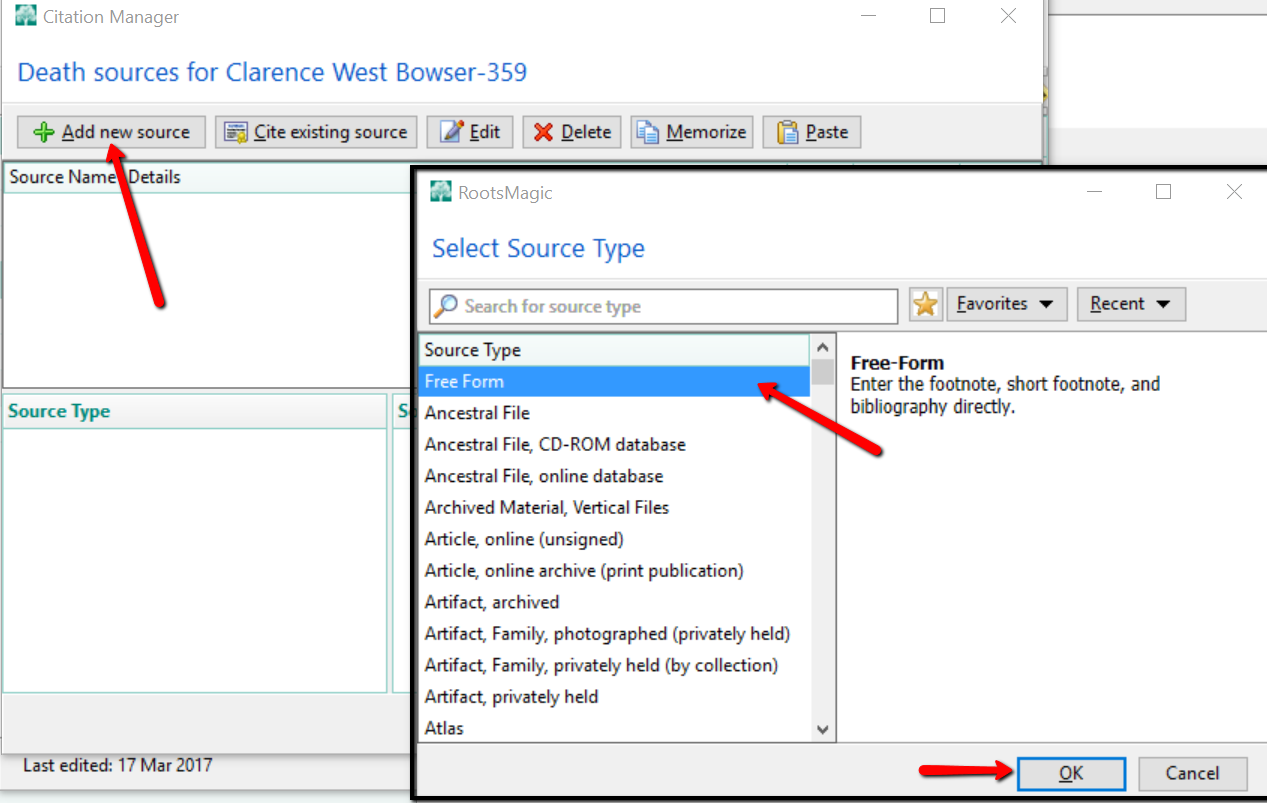
At the pop-up window, we click Add new source and from the options, choose Free Form and click OK.
Now, let’s assume you copied the following source citation from a record you found at FamilySearch.org:
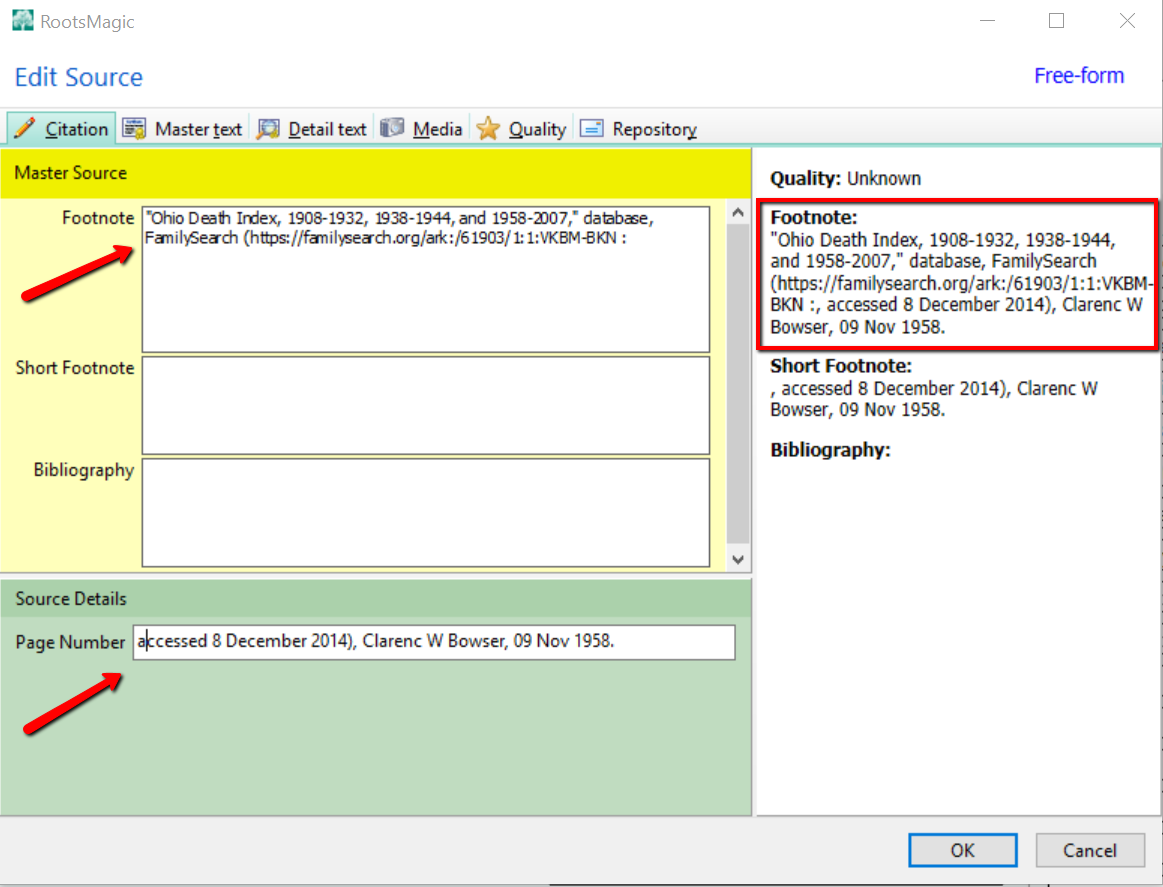
“Ohio Death Index, 1908-1932, 1938-1944, and 1958-2007,” database, FamilySearch (https://familysearch.org/ark:/61903/1:1:VKBM-BKN : accessed 8 December 2014), Clarence W Bowser, 09 Nov 1958.
The first part of the citation is the title of the collection and the location you found it. “Ohio Death Index, 1908-1932, 1938-1944, and 1958-2007,” database, FamilySearch (https://familysearch.org/ark:/61903/1:1:VKBM-BKN. That front half of the citation is going to go in the Footnote area of the next pop-up window. The remainder of the citation you copied is going to go in the Page field. Then click, OK.
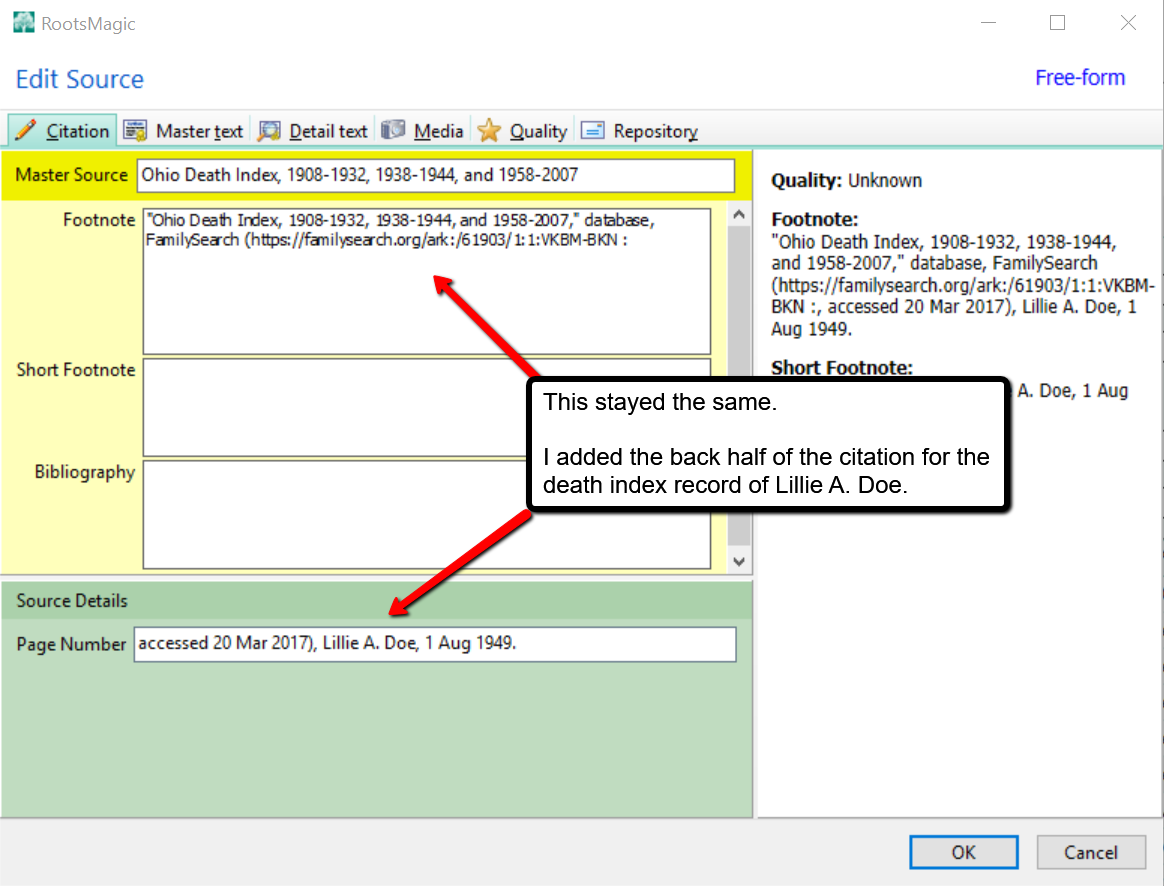
Notice, the entire footnote at the right of the screen looks like the one you copied from FamilySearch. You may wonder why on earth we separated the citation. Because, RootsMagic is going to remember you have a source citation from Ohio Death Index, 1908-1932, 1938-1944, and 1958-2007. The next time you find an ancestor’s death record in this index, you will not need to click Add new source. Rather, you will click Cite existing source, and choose the Ohio Death Index, 1908-1932, 1938-1944, and 1958-2007.
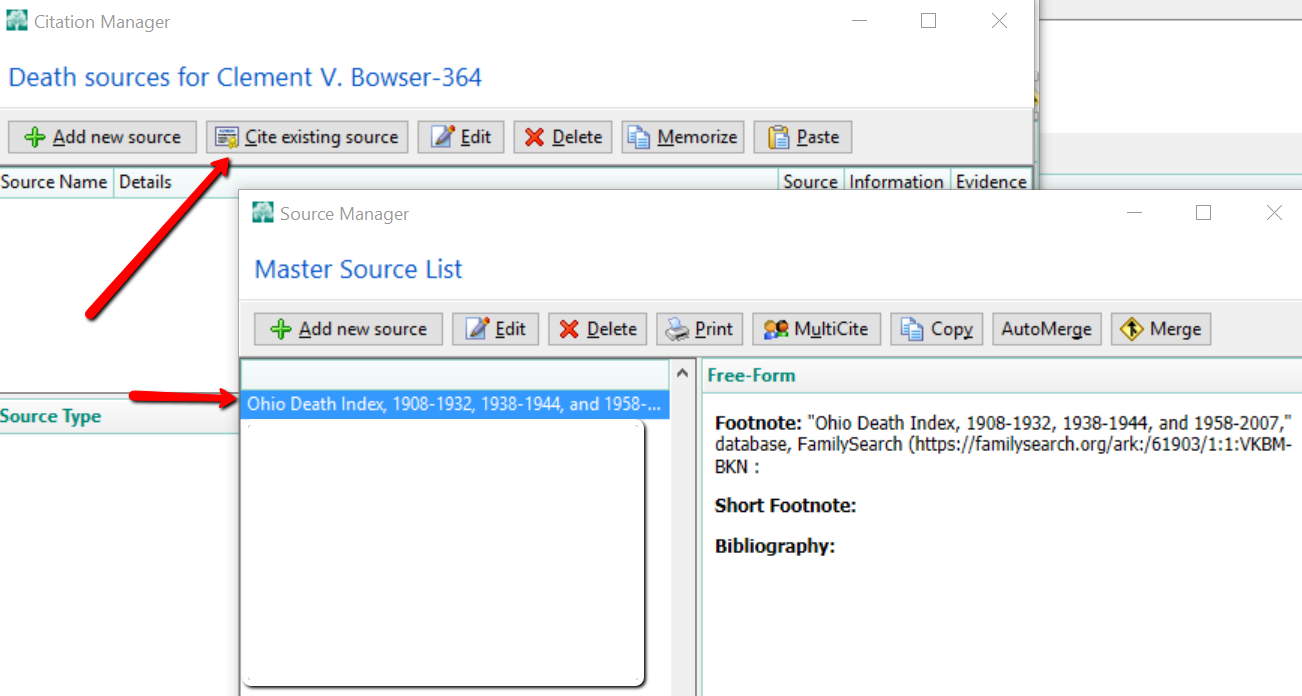
At the next screen, the Footnote field will already be filled out for you. All you need to do is fill in the Page field with the back-half of the new source.
More on Adding Source Citations for Genealogy
 In addition to keeping your source citations on a genealogy software program, you may wish to clip the citation and add it to Evernote. Lisa Louise Cooke explains just how to do this in her article titled, “Cite Your Sources from FamilySearch with the Evernote Web Clipper.”
You can get loads more tips and tricks in our helpful Evernote for Windows for Genealogists quick reference guide (also available for Mac users). Also, get a quick overview about this amazing product from this video clip on our YouTube Channel.

 We had made an assumption that the headphones should allow me to hear myself while talking and assumed that somehow they weren’t working correctly, even though everything else about them was working perfectly. And it was frustrating, a feeling eerily like searching the census for a family or an old newspaper for an obituary and not finding them when you’re convinced they should be there like everyone else!