I started creating family history books a decade ago. These 6 strategies helped me share my genealogy research findings in books that made fascinating, affordable and easy-to-mail gifts.
My Dilemma: How to Share My Family History
Several years ago, I began sharing my family history research with my relatives. We don’t live close to them, so I had to mail whatever I shared.
Initially, I sent CDs full of digitized photos and documents, but they just didn’t get looked at like I had hoped. Individual items on CDs didn’t easily or smoothly tell a story.
Also, I think some of my relatives found the technology a bit intimidating back then. And many people just don’t care for viewing photos, documents or stories on a computer screen.
The Solution
I found that the solution to sharing with all family members was a good old fashioned book!
Books are still hard to beat for telling a story in words and pictures in an extremely easy to use way. Self-publishing little hardbound family history books helped me break up my research sharing into digestible chunks. And the best part? My family actually opened and read them them cover to cover.

Cover of the family history book I created about my Grandma.
But where to begin the family story, and where to end it? It’s tempting to tell the story of one generation in each book. But even this can become an overwhelming project, with an end product that is not as meaningful for your readers (lots of dates and names, without a lot of room for stories or photos).
I wanted my family to get to know our ancestors intimately. For me, that meant focusing on one person or one event instead of entire generations or families.
Where to Start
I started with my favorite ancestor: my grandmother.
I’ve transcribed many years of her diaries, which are full of her stories about years spent in nurse’s training. Those journal entries taught me so much and led me to some great discoveries about her life. They also dovetail beautifully with my collection of photos from that period.
So I decided that my starting point would be her graduation from high school and her decision to enter the nursing field.
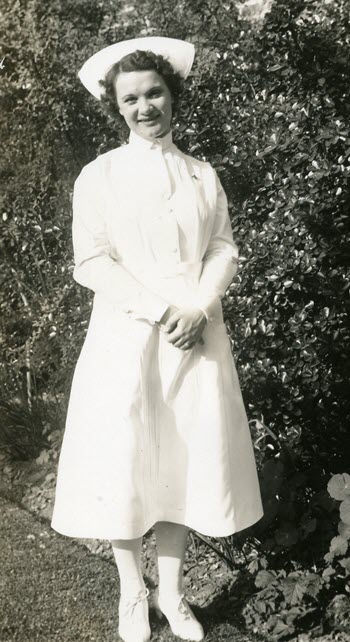
Grandma was proud to be a nurse and I’m proud to tell her story.
By the time I had pulled everything together from 1930 to 1933, I had more than enough for a nice size book: “A Nurse in Training.”
Tips to Create Family History Books
It’s really important to create your book with your “customer” in mind: your family member who will be reading the book. So here are my top tips for making your book fascinating to your reader:
#1. Convey an overall theme
Review all the available material that you have. That will give you a sense of what stories you can tell and, hopefully, a sense of your ancestors’ goals, experiences and emotions.
In the case of “A Nurse In Training,” I wanted to communicate my grandmother as a young woman, taking on a new adventure away from home. Both funny times and deeply challenging times formed the foundation of this warm, caring woman’s successful career. And she just happened to meet her husband at the same time!
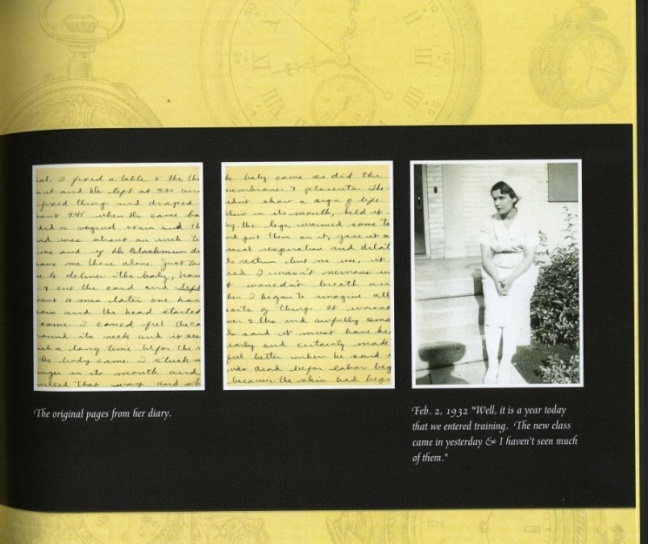
A page from “A Nurse in Training.”
You don’t need every scrap of research and every photo to get this theme across. It’s your job to be a sharp editor to pick out the critical pieces.
#2. Make it readable in one sitting.
Like it or not, if the book takes too long read, your relatives won’t. Strive to create a book that doesn’t look intimidating.
I create books that are 20 double-sided pages. People will be willing to pick up a thinner book off the coffee table. And if it’s well done, they’ll find that they’ve suddenly finished the entire book without once thinking of putting it down! Hopefully they’ll walk away with a real sense of having gotten to know that ancestor.
#3. Fill it with the best of what you have.
This goes back to conveying the theme and being a tough editor.
My grandma had many funny stories, but there just wasn’t room for all of them. I picked only the best of the best. Anyone who reads the book should hopefully come away with the fact that my grandma had a sense of humor and could laugh at herself.
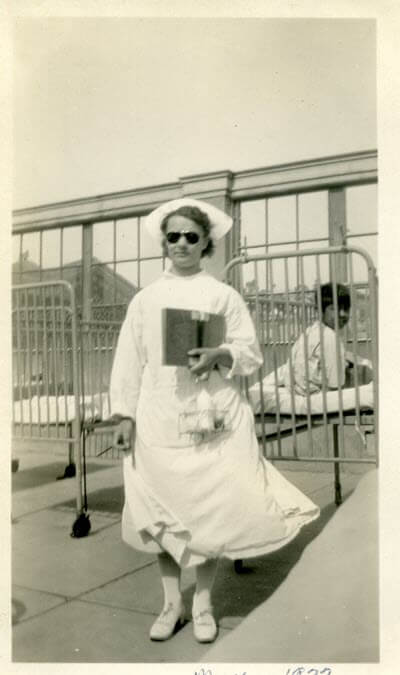
Grandma working the TB ward at San Francisco Hospital in 1933
I made sure some of the most compelling stories were at the beginning: if you can capture their interest in the first three pages, you’ll have them hooked for the entire book.
#4. Pack it with photos and graphics.
A picture is definitely worth a thousand words. And since words in a small book will be limited, photographs will be your best friend.
If you’re lacking in family photos, consult my Genealogy Gems Podcast episodes for countless ideas for finding appropriate images.
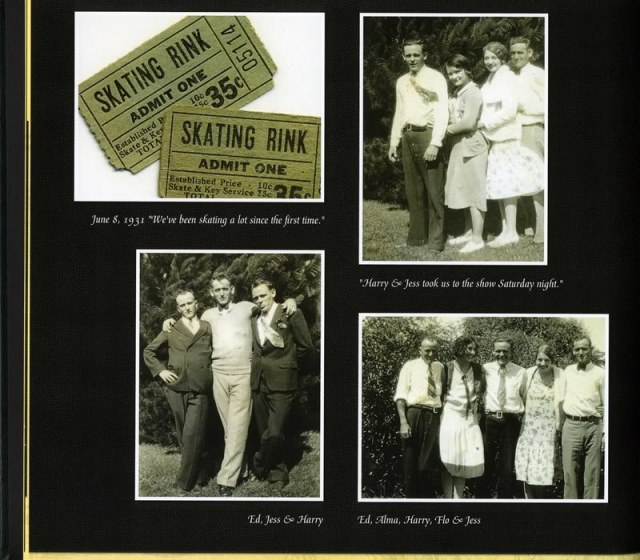
In A Nurse In Training, I included scanned images of skating rink tickets, programs and announcements from my grandma’s scrapbook and journal pages in my grandmother’s own hand. These types of items really add texture and interest to a book, and help the reader to see that you’ve really done your homework.
#5. Keep it in chronological order.
This seems obvious, but it’s easy to get side-tracked and start going back and forth in time. Believe me, for the reader’s sake, use dates and keep things in chronological order.
You as the researcher know this information backwards and forwards, but this is probably your reader’s first exposure to it. Be gentle with them and keep it straightforward and simple. Your reader will thank you.
#6. Choose quality!
High-quality glossy pages, good image quality and a hard cover binding all shout to the reader, “I’m worth your time! Read me!”
For example, I found a drawing of Dameron Hospital, which was part of my grandma’s story, but it was a low quality image and didn’t look good in the book. As much as I wanted to include it, I ended up leaving it out, and I’m glad I did. It wasn’t critical to my theme, and there were other ways to illustrate the hospital setting for the reader.
From Book to Movie: Create Your Own Family History Videos
My “Nurse in Training” book eventually became the basis for my very first family history videos. Watch them here–and see how I turned her own words into an illustrated narrative:
 Next Step: Turn Your Family History Book Into a Movie
I created these before do-it-yourself video services like Animoto made it so easy. (And I think that’s why I appreciate them so much!)
If you’d like to put an ancestor’s story into video format but you’re not sure how, try writing it up as a short book first. By the time you’re finished, you’ll have an excellent start on your “screenplay.” You’ll also have a great little book to send loved ones as a gift. (If you do eventually turn that story into a short video, they’ll love it even more, because they’ll already know the story that they will see come alive on the screen.)
Click here to learn step-by-step how to create your own family history video.
How do I get a book and how much does it cost?
Online print on demand services like Shutterfly and Lulu Press offer books like these. Prices vary depending on number of pages etc but are affordable and comparable to purchasing a book at a book store.
I love this idea. Thanks.
Ive thought about creating a book but didn’t really know where to start. These are great tips! Thank you!
I’m so glad I could help. 🙂
Great ideas THX!
Thank you. Easy read, great suggestions and very helpful advice.
Thank you Cheryl!
I just finished a short book on my father’s life (1917 – 1991). That experience and the guidelines here will help me with my next project: my mother’s life story (1919 – 2002).
Thank you Ken!
I love this idea!! I’m an adoptee who has recently found my birth family. During my search I found various ancestors that I really feel in love with. Writing some books about them will be a great way to introduce them to my family.
What a lovely idea! And congratulations!
I loved hearing your grandmother’s story. It’s very possible she was working at Dameron when I was born there in 1950! My mom was also a nurse in Stockton but about 10 years “behind” your grandmother. Thanks for bringing back memories of my mom and of growing up in Stockton.
Oh gosh, yes she was working the maternity ward then. Small world! Thanks for stopping by the blog.
Great ideas. I’m spending my time writing family history books also. I do both: short, read at one setting books and long,multi-generational ones. Someone in the family needs to do this. I hope this idea catches on.