Live show air date: April 23, 2020
Episode 6 Video and Show Notes
Join me for Elevenses with Lisa, the online video series where we take a break, visit and learn. Click to watch below, and scroll down for all the details from Episode 6.
From You:
Elevenses with Lisa is about connecting with each other and sharing ideas around family history. Margaret shared a wonderful story revolving around the recent discovery she made about the historical significance of a teacup collection that at first glance just appears to be a mis-matched lot.
Margaret’s “Bridge Tea” Cups
From Margaret in San Jose, CA:
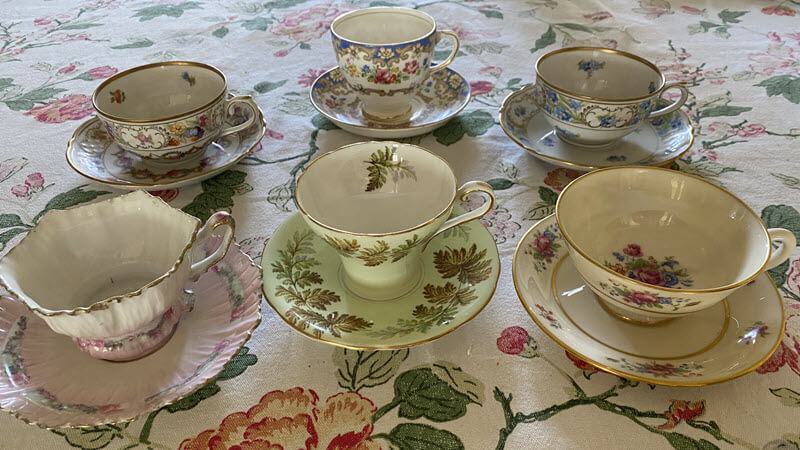
I inherited these 6 teacups from my Mom, who only told me they were “wedding gifts.” I always thought them odd gifts for newlyweds. Why not a toaster?
Nevertheless, I loved dusting them as a kid, because to me there was nothing more thrilling than a matched set of anything, and the cups and saucers are so intricately decorated to complement each other.
I am in a True Tales/Memoir writing group and I recently read one of my stories aloud (virtually of course) about an ancestor honored at two Bridge Teas to celebrate her engagement. A member spoke up about the tradition at Bridge Teas for each attendee to bring a different matching teacup and saucer as an engagement present to the bride. I suddenly realized my Mom’s teacups were not odd wedding presents. They were given to her at a Bridge Tea by her girlfriends! I look at the six teacup sets now and see a circle of friends, each personality as unique as their teacup, symbols of friendship.
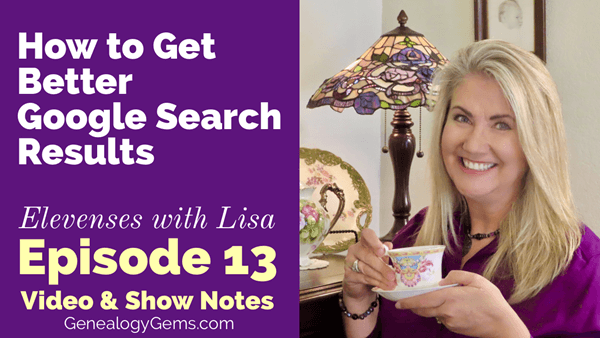
Tech Tip:
Google can’t always find what you’re searching for, and a few days ago they launched a new message that tells you that.
Now, if you run a search and Google can’t find what it determines to be a good match, you will see a prominent message at the top of the search results page that says “no good results available.”
While a message like that can be discouraging at first glance, you shouldn’t stop there. This message doesn’t say that what you are looking for doesn’t exist. It is only saying that Google can’t find it.
There could be several reasons for this, and the search results page will likely contain clues. By following the clues and incorporating the strategies I discuss in my book The Genealogist’s Google Toolbox, there is a very good chance that you can indeed find (with Google’s help) what you are in search of.
Here’s the example I showed in this episode. I was searching for the name of the musical group that Bill’s grandpa performed with in the 1940s, the Centennial Syncopators (seen below in the only photograph I have of the group.) The original was a sepia tone photo, but I love this version that I colorized at MyHeritage (image below.)
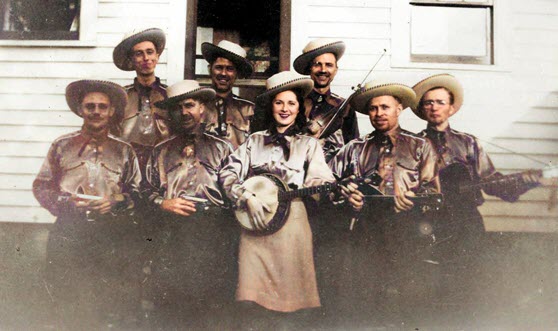
Centennial Syncopators musical group. (Salem, Oregon, circa 1940) Grandpa Mansfield is in the back row on the far right.
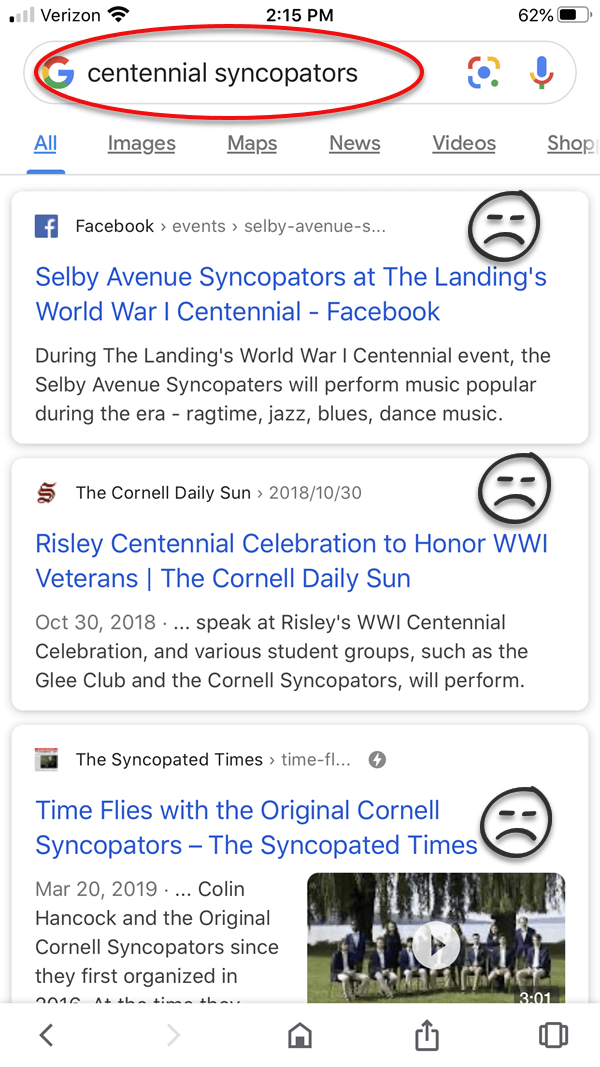
I was typing quickly on my phone, and as you can see in the image below, I have typos in the first word of my search.
Google indicated that “It looks like there aren’t any great matches for your search.” Google offered a few suggestions for alternative ways to search to try and get better results. Generally speaking, these are helpful suggestions. But as is so often the case, they really didn’t help with the very specific, genealogically-driven research that I was doing.

New Google Message: “No good results.”
Correcting the spelling was important to try, but it didn’t yield any better results.
Google Search – fixed spelling, but still not great results.
Instead of following the suggestions, I used the method I describe in my book. In this case I incorporated a simple search operator – quotation marks – and it made all the difference.
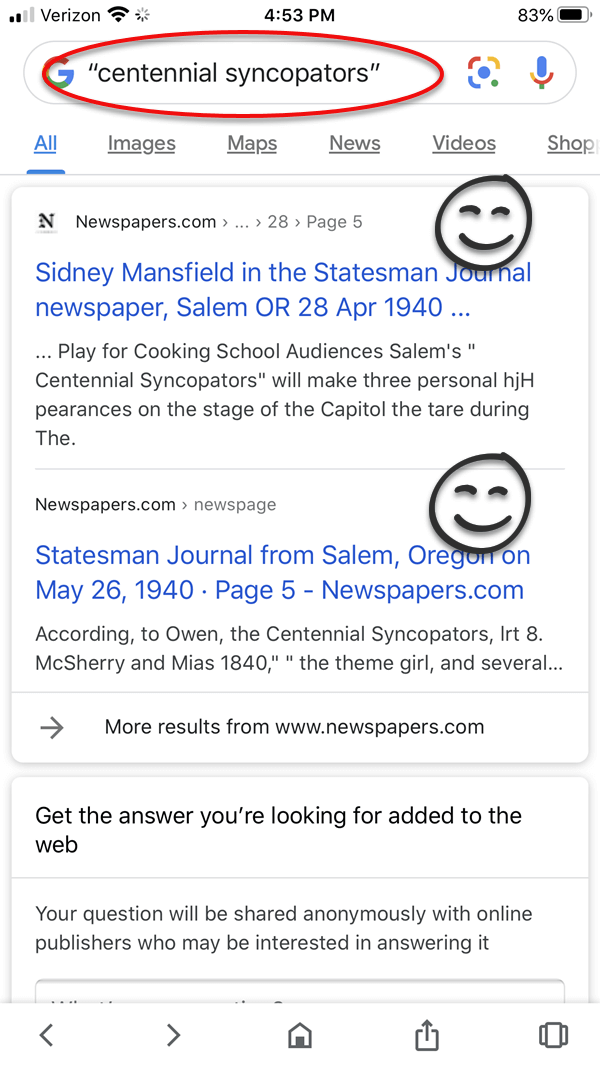
improving the search with the quotation marks search operator.
There, in the first two results, was grandpa’s name: Sydney Mansfield.
There is another strategy from my book that I like to use as well. Instead of digging straight into these Web results, I take just a moment to tap Images to see what my results look like visually. Image results give you a quick visual overview that can help you spot gems that might not be obvious from the snippets appearing in the Web view.

Google Image results.
Tapping the first result yielded a wealth of information.
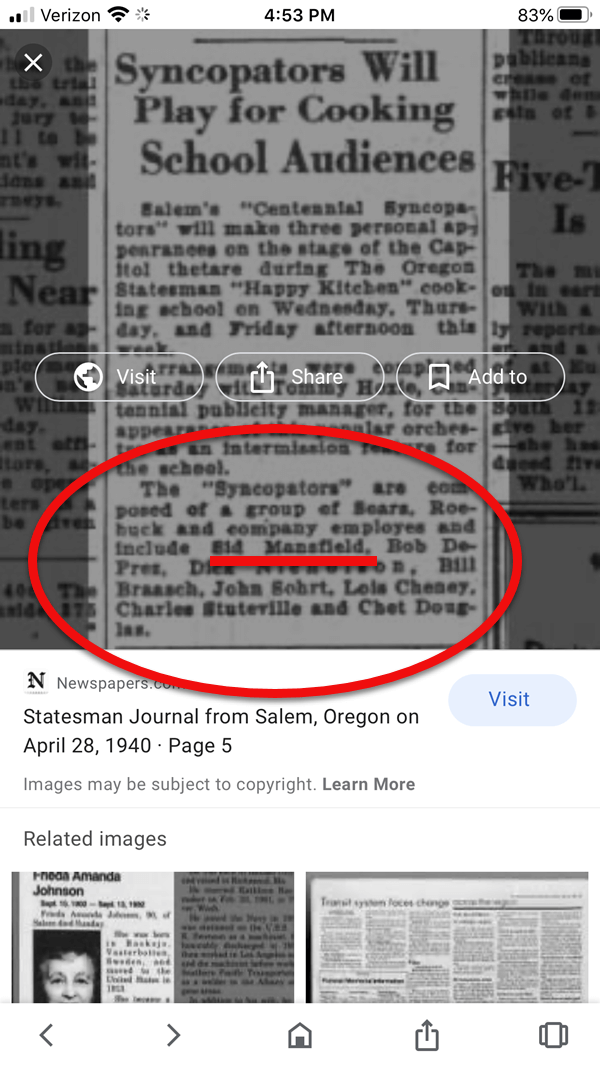
Sidney Mansfield and the Centennial Syncopators named in an old newspaper.
Not only is Sidney Mansfield listed in the preview of the article (image above), but all of his band mates are too!
Resource:
The Genealogist’s Google Toolbox, 3rd Edition (2020)
New book for 2020 by Lisa Louise Cooke
GEM: DIY Family History Art Project
I’ve been redecorating my family room. this room is really the equivalent of a junk drawer, but MUCH bigger.
Family history and music are central themes in the Cooke household, so I was keen to incorporate both into this room. Below is a photo of my hubby playing the bass in the family room. This was about half way through the project, so things were still a bit jumbled.
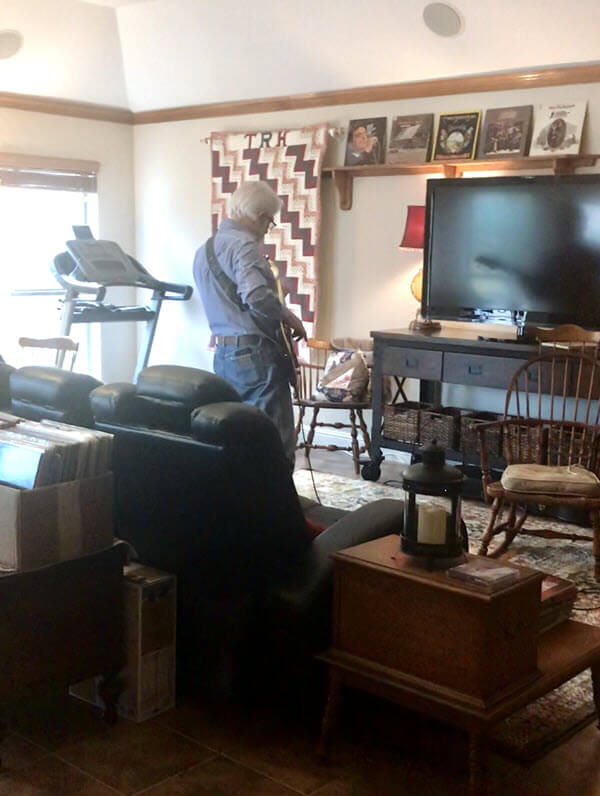
The family room “before”
After seeing an episode of Restaurant Impossible where they used an old family photo as artwork in the redesign of a restaurant, I was inspired to do the same.
I started with the 2 ½” x 3 ½” photograph of Bill’s maternal grandpa, Sydney Mansfield, with the Centennial Syncopators of Salem, Oregon (circa 1940). Sid was an accomplished musician, playing the violin and the organ. (Bill was blessed with the musical DNA on both sides of his family. His paternal grandpa started his career playing in a theater orchestra in England at the age of thirteen, was a high school orchestra leader, and music teacher his entire life.)The next step was to scan and dramatically enlarge the photo.
My scanner: The Epson Perfection V550 Photo flatbed scanner. (I LOVE this scanner! It can do the high resolution I need for all my projects. If you decide to buy online, I appreciate it when you use my links because we will be compensated at no additional cost to you. This helps support this free show.)
I set the scanner to Professional mode which provides much higher resolution scanning options.
Scanning resolution: 1200 dpi.
My goal was a very large piece of artwork: 71” x 51” in a matte canvas, preferably mounted.
Printer: PosterPrintShop.com – After seeing the show, the folks at PosterPrintShop.com emailed me and offered a 10% discount promo code for for Genealogy Gems / Elevenses with Lisa viewers. Use coupon code: courtesy10x2020va
I did a lot of research and it was a challenge to find an online service that could meet my project needs. The most important thing to me was the size, so I decided on PosterPrintShop.com. They were able to produce huge custom sizes in the matte canvas. However, they didn’t offer frame mounting. That was fine though, my hubby is very handy and agreed to build the frame.
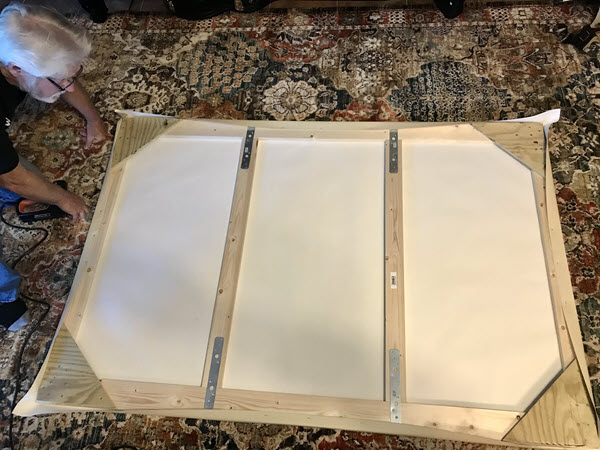
Wood frame for family history artwork
I uploaded my digital image, and I was happy to see that the printer immediately confirmed it was excellent quality for the enlargement. This gave me confidence that the finished poster would not be blurry or grainy.
In just three days it was up on my wall, sure to inspire many future evenings of music!
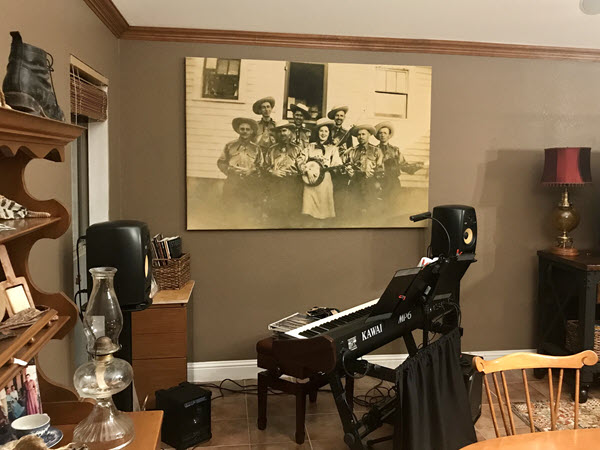
Completed project: family history art.
How to Organize All This Genealogy Stuff!
Save yourself future frustration and disappointment by putting a solid plan in place for all the types of genealogical items that will be coming your way: paper, digital files, data, and notes.
I personally use all of the organizational systems that I am sharing with you in this series on the show. They have proven to be reliable and efficient, and I can honestly say I have never lost a piece of paper. All my archival paper is off my desk, within easy arm’s reach.
But don’t take my word for it. Test drive these methods and feel free to adjust to suit your individual needs. Consistent yet flexible implementation is the key to success. Every family is different (and a bit messy) so it’s understandable that you may implement this system with some minor alterations to suit your particular needs.
The most important piece of the organizational puzzle is in your court. Your system will only succeed if you stick to it!
In this episode we discussed:
Organizing All This Paper! The Physical Items Organization System
We begin our genealogical research by pulling together information that we already have around our home. A lot of that information will be on paper in all shapes and sizes. The sooner you establish a place to store it, the sooner you will become more productive.
Genealogy research is becoming more and more digital, but there will always be paper. Typically, the paper worth keeping will be precious items like original documents, postcards, letters, etc.
When you first acquire an item, you will “process” it, as I like to call it. This entails, reviewing it carefully, extracting all pertinent information and adding that information to a variety of locations (your personal genealogy database on your computer, your online family tree, transcription into another format, etc.)
After completely processing the information, you have a decision to make:
- Do you archive this piece of paper? (possibly also digitizing it)
- Do you digitize it and toss it?
- Do you toss it?
If you determine the paper is precious and worth archiving, you will archive it in my 3 ring notebook system. Be absolutely sure that this paper is worth the precious real estate available on your office shelf.
My Genealogy Notebook System
This system organizes your paper to mirror the organization of your computer files (which we will cover in Elevenses with Lisa episode 7.) It is also based on your pedigree chart, meaning that it concentrates on your direct line of parents and grandparents, etc.
Since we can’t realistically keep every scrap of paper, typically the most important will be paper that relates to those ancestors you directly descend from. Whenever possible, opt to digitize (scan, photograph) paper, file it on your hard drive (backed up of course. I use Backblaze available here – we’ll be talking more about data in Episode 8), and toss the paper. Paper saved should be considered archival worthy. All other paper can ultimately be digitized (if desired) and tossed when you’re done working with it.
There are many advantages to my 3 ring notebook organizational system:
- 3 ring binders keep paper items secure, clean and protected.
- They can be stacked neatly on shelves.
- Binders allow you to easily retrieve items for a family.
- When you remove a binder from the shelf, it is obvious where it should be returned.
- Binders are flexible – allowing you to add and remove items easily without disturbing other items.
I have found that organizational systems that are complicated and completely unique are difficult to stick with. My simple binder system is organized under the same logic as the census. This makes it easier to follow and it dovetails nicely with your digital organization (which I’ll be discussing in Episode 7) and your genealogy research.
The census is organized by households (typically families) with a designated head of household (typically the father.) Of course, this isn’t always the case. There are always exceptions. But we are focused on a big-picture over-arching principle that will guide our organization.
Start with the ancestors closest to you. In my example, I began with my grandparents. Each direct line in your tree gets a 3-ring “surname” binder.
Tabs within the binder are organized by the head of household, just like the census. Again, typically, this is the man of the house.
Items are placed in acid-free sheet protectors and filed behind the appropriate head of household tab, in reverse chronological order, beginning with death records.
This process may take a while depending on how much you have already collected. Don’t worry about organizing everything in one sitting. If you have amassed a lot of paper, there is no need to stop all research until everything you have is organized. It’s just not realistic. All you need to do is get the supplies, set up your first generation of notebooks, and any notebooks for the lines you are currently researching. Use this method and file as you research and come across new paper. Schedule blocks of organization time and use that time to go back and process and file your existing paper. By doing this you can continue the fun of genealogy while continually making progress organizing and archiving your paper backlog.
Organizational success also depends on having the material you need on hand. Below is my shopping list, including what I generally think is the minimum number of items to start with. If you decide to buy online, I appreciate it when you use my links because Genealogy Gems will be compensated at no additional cost to you. This helps support this free show.
Shopping List:
- (2) packages of Avery Durable View Binder, 3″ EZD Rings. (They come in packages of four. I find these are high-quality and hold up to constant use.)
- (2) packages of Avery Durable View 3 Ring Binders, 1″ Slant Ring. (they come in packages of four also.)
- (1) package (200 count) Avery Heavyweight Diamond Clear Sheet Protectors, 8.5″ x 11″, Acid-Free, Archival Safe, Easy Load. (My faves! Great quality and safe.)
- (1) set of 3-ring binder tab dividers (Regular or extra-large as you prefer. You can also buy clear tabs for direct line ancestors, and colored for others lines if you wish.)
Setting Up Your First Notebook
Create a cover and spine for your notebook in a simple Word document or other program. Save it as a template so that you can quickly generate covers and spines as needed.
Add the tabbed dividers to the notebook.
Label the first tab as Pending. This is where you will place items for that family line that you have not yet finished processing. Think of this tab as a staging area for paper you acquire throughout your research before they have been entered into your database.
Dividing Tabs: Label the second tab with the head of the family for the generation closest to you. Each generational head of household (Father, Grandfather, etc.) gets a tab. Label the remaining tabs as far back as you can. (Click here to jump to the spot in the episode on YouTube where I show the tabs.)
Generally, I organize the items behind the tabs in chronological order no matter who they pertain to within his family. This creates a sort of timeline. However, for a large volume of documents you could use colored dividing tabs to divide items by each person in his family while that person is in his household. If you do want to break things up a bit, you don’t have to have a colored tab for every family member. You could have one for the wife, and one for all the children. You could even have one for all the kids but break out just your direct ancestor and give him or her their own. Do what works for you, and then stick to it!
How to File Paper in the Notebooks
Filing Records for Women
Documents for female children are filed under their father prior to marriage, and then all documents generated after their marriage are filed under their husband.
A widowed woman has a married name, and her items are filed under her husband’s tab. If she remarries, all her items generated from that point forward are filed under her new husband unless you think you’ll have enough paper to warrant a new book. Otherwise, you can certainly just continue filing paperwork for her and her new husband under that tab. The choice is yours. Feel free to add cross-referencing notes.
Filing Collateral Lines:
Collateral relatives are the ones that descend from the brothers or sisters of your direct ancestors (i.e. nieces, nephews, cousins). File paperwork for collateral relatives under the direct ancestor they are most closely related to, or in a tab at the end of the family binder called Collateral Relatives. (That’s what I do.) Strive to digitize as much as possible. Chances are, you won’t have a lot of paperwork to archive for collateral relatives. If you do, ask yourself if you really need all of it!
Eventually your families will branch out into other surnames, and you will need to start new binders. Use the smaller 1″ 3-ring binder for this purpose.
As your research progresses, you may need to move the family from a 1″ binder to a 3″ binder. But some families, particularly those farther back in your family tree (where there is less original archive-worthy paperwork) will be adequately accommodated by 1″ binders. Save space by not automatically moving families into 3″ binders.
Organizing Heirlooms
My system includes a Family Heirloom Tracking binder and digital file folder. Each page features one heirloom and includes:
- a photograph,
- brief history of the item,
- current location,
- and who will inherit the item.
Free downloads:
Example page from the Heirloom Tracking binder: Click here to download.
Blank Heirloom Tracking worksheet: Click here to download.
Premium Member Downloads:
Notebook cover and spine template Word documents (Log In required) Click here to download.
Why Do You Do Genealogy?
I don’t know about you, but I get asked a lot by people who aren’t into genealogy, “Why do you do it?”
I’ve given this a lot of thought over the years, and I’ve come to an important conclusion:
Quote by Lisa Louise Cooke
Please take a moment to share in the comments as to why you do genealogy. I’d love to hear your personal reasons.
Did you like this episode? What resonated with you? What goals are you setting this week? Do you have a questions for me? Please leave your comments and questions below. I can’t wait to hear from you, and I look forward to seeing you next week on Elevenses with Lisa.
Click the image below to set your reminder for the live episode of Elevenses with Lisa (Thursday, May 7, 2020 at 11:00 am Central.) If you’re reading these show notes after that date, click here to get all the episodes and show notes, starting with the most recent.
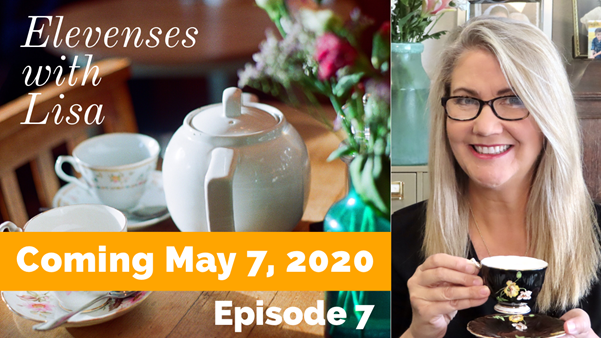
Click here to set your reminder for Episode 7 of Elevenses with Lisa.
I love doing genealogy but everything is a mess. I am working on making a notebook up of a special person on my tree.
I have loved watching your Elevenses with Lisa since discovering it last week. I was pleased to find out you have gone to YouTube, as I do not have a facebook account. I am looking forward to joining you live tomorrow, but my computer says 2 pm (my FireStick YouTube says 6 pm), yet verbally you said 11 am Central Time. I am in Maine, which is Eastern Time, so I assumed 12 noon. This will be my first YouTube Live, so am I missing something??
I’m so happy to hear you found the show and are enjoying it! The show will be live at 11:00 AM Central, which is 12 noon on the East coast your time. (Sounds like your FireStick might be set to UK time.) Go to this page at my Genealogy Gems YouTube channel and click the “Set Reminder” button on the video screen. Return to that page on Thursday at noon Eastern and you will see the live show.
I have a diary written by my ggg grandmother – it begins “I was born June 20, 1798.” THAT got my attention and I immediately started my genealogy research, to find out more about her. Luckily, her husband also wrote a journal, and I was blessed to get a copy of it.
Hey Lisa. I’ve been researching for 20+ years. My mom had asked me to find out about her Mom’s family and I’ve been at it ever since. I am always looking for more organizing tips. Went to folders but they aren’t easy to pull and use. May try those notebooks. Question: Beginning with “the 4 ancestral lines”…don’t those notebooks become extremely large? Have you gone from a 3” on a name and then added a second for same line? Wondering what your thinking process is.. Betty in Alabama
Hi Betty, yes for some of the more recent lines that have more paper (although I try to keep it to a minimum) I do have multiple 3″ binders. That’s perfectly fine. I typically make the break between generations, and I add the time frame that the binder covers to the spine. I’ll be talking more about this in Episode 7.
I was jumping around on your website and I came across a video of you talking about US News Map. You demonstrated how to use the site. Before I could bookmark it, I lost the page. I have searched for that vedio and could not find it. Would you please direct me to that vedio. I would appreciate it very much.
Thanks Mary
Hi Mary: You’ll find US News Map in Genealogy Gems Podcast episode 209. If you want to go straight to the video tutorial, you’ll find it here on my Genealogy Gems YouTube channel.
Hi Lisa,
Tell Margaret that the tea cups were probably engagement gifts – it’s a Bay Area thing. Don’t know the origin, but all my peers who married in the 1970’s and 80’s got them. My best friend’s mom gave me one when I married waaaaaay later.
Yes, as you heard in the video, that’s what her friends in the writing group told her. What a delightful tradition – I think we should bring it back, don’t you?
Thanks so much for the binder templates. SO generous!!
I can’t seem to find the link for the show notes. Can you point me in the correct direction?
Your comment appears here on the episode show notes. You can find all of them in the menu under Video > Elevenses with Lisa or click this link https://test.lisalouisecooke.com/category/elevenses-with-lisa/