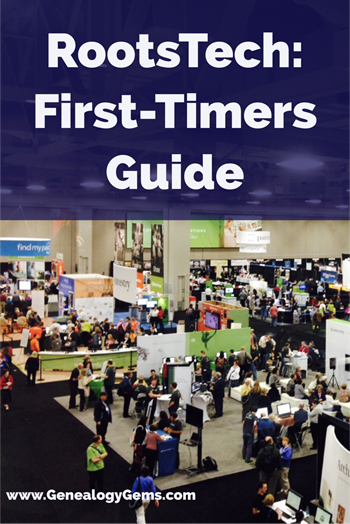
RootsTech questions: Tips for attending world’s biggest genealogy event

Your RootsTech questions answered here! Attending RootsTech 2018 in Salt Lake City, Utah for the largest genealogy conference in the world can be a bit overwhelming. First-time attendees have questions and we have answers. Learn what to expect, where to go, and other must-know details to make the most of this extraordinary family history event.

RootsTech questions from a first-time attendee

I recently received some RootsTech questions via Facebook from a Genealogy Gems listener in Melbourne, Australia. Lesley-Anne has decided to make the overseas trip to attend RootsTech 2018 in Salt Lake City, Utah. How exciting–and a little daunting! She says:

Morning Lisa, As a result of the many years of listening [to your podcast], my husband and I have decided to attend the Rootstech conference this year. I am wondering if you can advise this first time-attendee on any tips on how to get the most out of this conference? I have been trying to find a list of keynote and breakout sessions available but haven’t had much luck. I know there are huge numbers that attend the Rootstech conference so would prefer not to be queuing on the day for sessions. I’m hoping there will be pre-booking for the sessions?? Keep up your great work. I don’t know how you do all the work that you do plus be a Nanna, mother and wife and also research your own tree. Kind regards, Lesley-Anne

I’m sure Lesley-Anne and her husband won’t be the only newbies at RootsTech 2018. And they’ll all have similar questions on their minds. Here we answer FAQs for her and other first-time RootsTech attendees.

RootsTech 2018 Answers from Lisa Louise Cooke

What’s happening this year at RootsTech?

RootsTech 2018 offers four jam-packed days of fun and learning: Wednesday, February 28 to Saturday, March 3, 2018. Don’t miss the first day! Wednesday is all about technology. There will be classes for all audiences, whether you’re a tech expert or newbie or (like most people) somewhere in-between. At 4:30 pm, FamilySearch CEO Steve Rockwoodl will give a keynote, followed by a new event called Innovation Showcase. Prepare for a high-tech “show and tell” of what’s new–and what’s coming–in genealogy technology.

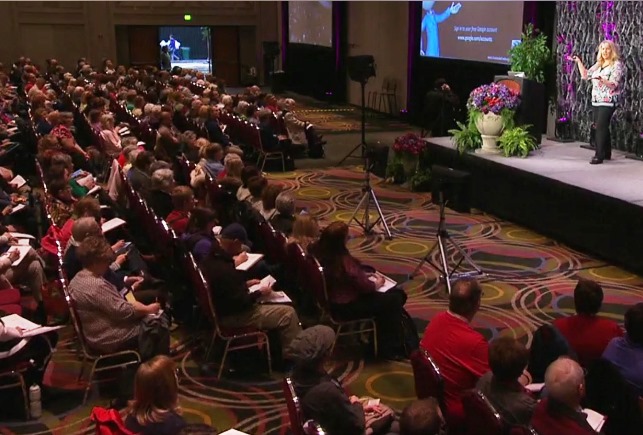
As soon as that’s over, the Expo Hall opens (6:00 – 8:00 pm) for a special Preview, and then remains open all week. At the Expo Hall, meet the biggest names in the genealogy industry and hundreds of other vendors, societies, and services. It’s a stunning, not-to-miss experience, whether you love the energy of the crowd, the glamorous displays, or the chance to talk one-on-one with people from your favorite genealogy companies and services.


The Genealogy Gems booth is known for hosting the ultimate Expo Hall experience! We have our own free class lineup all week long from your favorite presenters. We host great giveaways with valuable prizes you can put right to work for your family history. Click here for the latest updates on our classes, book signings and giveaways. And come by our booth to take advantage of RootsTech specials on our most popular products, including the Genealogy Gems Premium membership (our on-demand Premium video lineup is like having a year’s access to your very own private RootsTech event!).

Throughout the rest of the week, you can expect:

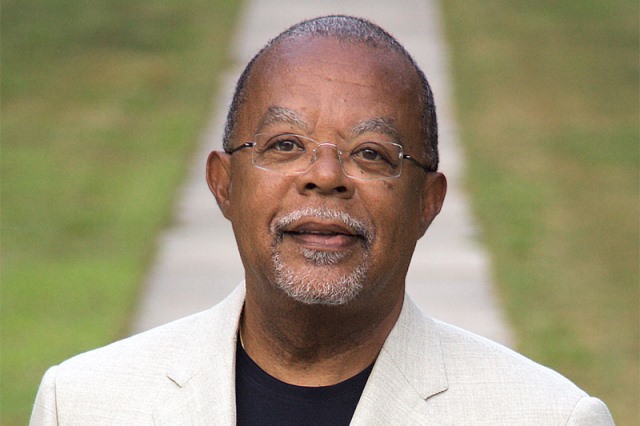
  • World-class keynote speakers: Olympic figure skater Scott Hamilton; famed scholar and PBS family history documentary host Henry Louis Gates, Jr; “Humans of New York” writer Brandon Stanton and Grammy-winning singer and songwriter Natalia Lafourcade. (Click here to watch a 2017 keynote by LaVar Burton.)
  • Over 300 RootsTech classes: Classes at all skill levels are offered on traditional family history research skills, DNA, tech tools for genealogy, photos, stories, organizing and more. (Click here to view a fantastic class you missed from 2017: Genealogy Gems Contributing Editor Sunny Morton’s “Genealogy Giants” class comparing Ancestry.com, FamilySearch, Findmypast.com and MyHeritage.
  • Free things to do at night, from dazzling entertainment sponsored by RootsTech to late-night research sessions at the Family History Library—the world’s biggest genealogy library is just down the street. (On Wednesday, Thursday and Friday during RootsTech, the library will stay open until 9:00 pm.)

What are the RootsTech 2018 registration details?

You have lots of registration options–from a free Family Discovery Day experience on Saturday to a budget-friendly “Getting Started” four-day pass ($69 promotional price) to the full RootsTech Pass ($199). Click here for a description of all your options.

How do I get the most out of my RootsTech experience?

Best tip from a conference veteran: plan ahead! If you haven’t made your hotel reservation yet, do it right away. The official RootsTech hotels have all sold out, so you’ll need to look a little further afield. Salt Lake City offers excellent public transportation to the downtown RootsTech location at the Salt Palace.

The Salt Palace does have a concession area with several affordable meal options. There are also a few small vendors with sandwiches, coffee, and candy, just outside the hall. You might also like to know that there are several nice restaurants just across the street or within minimal walking distance. The lines are a bit long at times; consider eating a little early or late, so you’re not caught in a “rush hour” for your meal.

Once your basic needs are met, plan your genealogy learning and fun! An online master schedule makes it easy to browse all the official RootsTech sessions and plan the ones you most want to attend. Classes are typically one hour, with a 30-minute break in-between. Don’t forget to include the Genealogy Gems Expo Hall classes in your lineup. An important tip for newbies: at some point, your brain will need a little rest from all the learning. Give yourself breaks to walk around the Expo Hall and visit with new friends you meet.

What about pre-registering for classes?

Lesley-Anne asked about pre-registering for specific classes to avoid long lines and disappointment for filled-up sessions. You must pre-register for any labs you want to take when you register for RootsTech. These are smaller, hands-on classes. If this is your first year, I think you will be more than busy (and happy) with all the sessions included in the regular registration and the exhibit hall. Personally, I would save the extra cost of labs for a return visit. One exception: I definitely recommend Diahan Southard’s lab: “From Click to DNA Connection” (Fri 1:30 pm, taught with Angie Bush).

Unfortunately, you can’t pre-register for the general sessions (keynotes) or regular classes. Seating is first-come, first-served. Classes that are expected to have high demand generally have hundreds of seats available. But if there’s a class or presenter you must see, get to the classroom as early as possible, go right to a seat and stay in it. Since some classes will fill up, have a back-up plan for each hour.

Another helpful tip when deciding what to do: you will receive a digital syllabus with your RootsTech registration. It has all the handouts for the classes that are part of your registration package. So even if the class you want is full—or you’re ready to take a break and tour the Expo Hall—you can still learn from RootsTech presenters. You may wish to print your desired class handouts before coming so that you can take notes on them. Come by the Genealogy Gems booth (#1203) to get the handouts for all our lectures, too!

As Lesley-Anne mentioned, the RootsTech venue is huge. It’s easy to get lost. They do post tons of signs. As the event draws nearer, we will post a map of the Expo Hall to help you navigate to your favorite vendors and societies. Additionally, you will have a map provided to you when you pick up your things at registration.

We hope this has given Lesley-Anne (and you) a better picture of what it will be like to attend RootsTech 2018. It really is an amazing experience! For even more information about RootsTech, view their website and our Genealogy Gems RootsTech page. While you wait, here’s a link to several video interviews I have done over the years at RootsTech. See you there, friends!

About the Author

About the Author

Lisa Louise Cooke is the Producer and Host of the Genealogy Gems Podcast, an online genealogy audio show and app. She is the author of the books The Genealogist’s Google Toolbox, Mobile Genealogy, How to Find Your Family History in Newspapers, and the Google Earth for Genealogy video series, an international keynote speaker, and producer of the Family Tree Magazine Podcast.

Understanding Genealogy Sources: Why “Provenance” Matters

Before you rely on any genealogical sources for your family history research, you should know their provenance. Ask these questions about the records you find—and you’ll better understand the source and what it may (or may not) be telling you.

In the art world, knowing the provenance of a piece is crucial to understanding its value. Provenance looks at an object’s origins, history, and ownership. These can shed light on whether the piece is authentic. In other words, it tells us whether it truly was created by the attributed artist in the stated timeframe. It also provides insight into the value of the item.

Genealogical sources: Why provenance matters

The principle of provenance is true for genealogical sources, too. Records created at the time of an event by eyewitnesses are generally much more credible. Documents created in places associated with your relatives, by people who knew them, are much more likely to pertain to them (rather than to other folks by the same name). The same holds true for objects that are passed down through the family. Therefore, whether you’re looking at a family Bible or a typescript of a reminiscence you find online, it’s important to learn as much as you can about it so you know how much to trust it.


Questions to ask about your genealogical sources


What type of document or item is it? When was it created?

The nature of an object or record can often tell you something about its history or credibility. In the case of a photograph, we might ask these questions:

  • What type of photograph is it? (tintype, carte de visite, Polaroid, etc.)
  • Is there printing or writing on the back of the photo?
  • If it’s a studio portrait, is the studio’s name and location identified?

For example, this photograph is a daguerreotype. It is a type of image taken on a silver-coated copper plate. Photo expert Maureen Taylor says these types of photos were in most use from 1839 to about 1865. You can learn additional clues from Maureen about using hairstyles, fashions, and other clues in the actual image in her book, Family Photo Detective.

Perhaps you have a manuscript in your grandma’s handwriting. Is it a diary or an autobiographical sketch? Is it dated or signed? Is it an original or a photocopy?

You will likely date these items, associate them with specific relatives, and judge the reliability of their contents based on answers to questions like these.

If a document isn’t identified, study it closely for clues as to what it is. Contributing Editor Sunny Morton has spent a lot of time studying old diaries and life story writings. Here are some tips from her on understanding them:

  • Diaries and journals were created gradually over time. You may see date headers before some entries and changes in the handwriting or ink. Entries often focus more on the present or immediate past than the deep past and they wouldn’t reveal future events because they hadn’t happened yet.
  • Autobiographical sketches or reminiscences may or may not be labeled and dated as such. These were usually written much later in someone’s life, often over a short period of time. The writer’s tone may be more formal, introspective, defensive, or self-conscious as she reflects on the past.

Look at all other documents and items that are associated with the source in question. For example, not long ago I received a box of old family items from my sister-in-law. The box originally belonged to my mother-in-law (Pat) and held an eclectic mix of mementos. One item of particular interest was a Guest Book sporting a cover made of wood. I immediately understood the significance of the cover because my father-in-law (Bill) had worked his entire career in the forest products industry. But that didn’t mean that the book actually belonged to my in-laws. Further examination was required.

Before removing the book from the box, I made note of what was tucked in around it. Perhaps all of these items were unrelated, or perhaps they had all come out of the same closet. Slow and careful examination is key identifying all the potential clues about the item.

It took several hours of reading through the various entries to determine that the Book was given to Pat and Bill as a gift by Pat’s parents. It contained many original signatures acquired over many years from a wide range of friends and family.

If you’re looking at digitized records online, read the description of the record collection. If you’re in an archive, read the finding aid or other collection description. (Genealogy Gems Premium subscribers can learn more about using finding aids in Genealogy Gems Premium Podcast episode #149.)

Records or artifacts may come with dates or timeframes associated with them. Sometimes there is no date or only a rough range of possibilities. You may have to rely on clues from several sources to date the item and match it up with your family history timeline. For example, this quilt was found in a suitcase in my Grandmother Pauline Moore’s closet after her death with this note pinned to it.

She says in the note that it was made by her mother before her stroke, which occurred in the 1960s. Based on the flour sack fabrics, I would date it more in the range of 1925-1945. It’s possible that she may have hung on to all these scraps and made it later in life. But I know from past conversations with my grandmother that most of her mother’s quilting was done in the earlier timeframe. Adding strength to my theory is a dress that hangs in my laundry room. I inherited the dress from my grandmother years ago. I have photos of her wearing it in the pre-World War II era. It contains some of the exact same fabric that makes up the quilt.

Finally, with documents especially, consider whether you’re looking at the original version, meaning the first format it ever took. Whenever possible, consult the original. Indexes, typed-up copies, or abstracts are convenient reference tools. In some cases, they are the only versions you’ll be able to access. However, they may not be as complete or accurate. Handwritten copies of older originals may have been made in the days before photocopying technology.

Here’s a digital copy of a 4-page family history written by Sunny’s great-aunt Lena Hall (1903-1981). Sunny received this copy from her mother. The title “as told by” at the beginning hints that this is a typed version of an oral history. If an original audio taped version still exists, Sunny doesn’t have it. So in this case, this is the best version she can get.

When was it written? A note at the end simply says the document was “copied by a niece” in 1987. It was created after 1950 because Aunt Lena names that as the year her father died. Aunt Lena states that her parents now had “25 grandchildren, 58 great-grandchildren, and 4 great-great-grandchildren.” Studying a complete family tree in descendancy view would likely reveal when her parents had only four great-great grandchildren—perhaps the best way to date this document.

If you can’t identify or assign a rough date to an artifact, consult a professional historian, genealogist, appraiser, or others with knowledge of particular documents or objects.

Where was it created and where has it been kept over the years?

Sometimes, family history sources are labeled with place names, like the city stamped on the front of an old photographic studio portrait. These can help you connect them with your family—or confirm that they don’t pertain to your family.

Where the source has been kept over time, and who has kept it, is an important part of provenance. For example, last summer, I was given this camera by my uncle.

He said it was originally owned by my grandma, Alfreda Louise Burkett. Much to our delight, we discovered that the camera had unexposed film inside! I scurried off to a few local stores, and quickly learned that the film pre-dated the current standard 35mm film, and they couldn’t process it. As I mentioned before, there are times when you will need to consult an expert, and this was one of them. Google led me to a specialty photography store about an hour from my home. It also served up this website which revealed that the camera type (Kodak Senior Six-20) was produced from 1932-1937.


The knowledgeable folks at the photography store connected me with a highly specialized film developer in Colorado. I’ve sent the film for processing. They told me the film type (C-22) can be dated to pre-1970s. This time frame makes sense: my grandma passed away in 1986.

As long as it has taken for this camera to make its way to me, I’m going to have to wait a little longer to see what the roll of film reveals. There is so little of this film still in existence that it can take up to 18 months for the developer to collect enough of it to warrant a processing run. When the happy day arrives that the photos appear in my mailbox, I’m optimistic that the images will further help me narrow down the timeframe between the 1930s and the 1970s when they were taken.

This chain of ownership—from my grandma to her son to me—is strong and reliable, based on my confidence in my uncle’s memory and honesty. This makes me more confident that the pictures inside that camera will be of my family. Stay tuned, because I will surely share the outcome here on the blog.

Why was it created?

The original purpose of a source is highly relevant to how much faith you put in its contents. For example, a woman might have altered her testimony in divorce proceedings in an effort to minimize damage to her own reputation and future. A man filling out his draft registration paperwork may have lied about his age or citizenship, either to avoid military service or in order to be included despite being under age. And most certainly newspaper articles may be filled with a variety of biases by the author, publisher, or those being interviewed. Give careful thought to these possible motivations when evaluating the contents of records.

Does it appear to be complete?

Whenever possible, consider a source as a whole. It’s tempting to want to zero in on the paragraphs or photos that interest you most, but you may miss out on important information that changes what this source has to tell you. The specific placement of a photo in an album can be as significant as the printed photographic image. A photo’s position can indicate the relationship of the people in the photo to others on the same page, or the timeline of events.

Take note if any part of the source appears to be missing or illegible, especially if it appears that some of it has been deliberately removed, erased, or crossed out. You may be able to make more sense of the partial information—or take a guess at why it was removed—as you learn more about the family. (My grandma’s diaries from the 1930s gave me insight into this photo!)

There may be a perfectly innocent reason for the change. But you may also be seeing evidence that someone who wanted to erase unpleasant memories or conceal a scandal.

Who was the informant?

The informant in any record is the person who supplied the information. Sometimes this is the same person who created a record, such as the writer of a diary. In the case of a U.S. census, the informant is the person in a household who told the census enumerator about the people who lived there. In most cases, it’s impossible to know who the informant was. Thankfully in 1940, census enumerators were instructed to mark the informant with a circled “X,” as shown in these two households.

Remember that a source may have multiple informants, who would have been in the best position to provide certain kinds of information. Below is the death certificate for Mary Mollie Overbay, beloved grandma and hero of Genealogy Gems contributing writer Margaret Linford. (Read more about her here.) In this death certificate, Informant #1 reported the deceased’s personal information, and would typically have been a close relative. Informant #2 provided the medical particulars relating to the death, and would typically have been the attending physician.


What primary and secondary information is revealed in this record?

Historical evidence can either be considered primary or secondary information. Genealogical scholar Thomas W. Jones defines these terms in his book, Mastering Genealogical Proof:

  • Primary information is that reported by an eyewitness. Primary information often was recorded soon after the event, but it may be reported or recorded years or decades later.
  • Secondary information is reported by someone who obtained it from someone else. It is hearsay.”

The same document can include both primary and secondary information (which is why we now talk less about primary and secondary sources and more about information). On the death certificate above, Informant #1 shares the deceased’s last name, so was likely a relative. He likely had first-hand knowledge of the deceased’s marital status, spouse’s name, and occupation. If Informant #1 was the deceased’s father, he would also likely have provided primary information relating to the deceased’s birth, place of residence, and parents’ names. Secondary information he reported would include his own birthplace (as father) and that of his wife (since he presumably wasn’t present for it). If Informant #2 was the deceased’s attending physician, he would have provided primary information about the deceased’s immediate and contributing causes of death.

How do all these clues add up?

It’s clear that as genealogists our goal is not only to evaluate each family history source, but also each piece of information it provides. We need to scrutinize it from many angles and make some judgments. Asking the right questions helps us ultimately answer the all-important question: how much do you trust what this record is telling you?

Next steps: Keep learning

Is there more to do after you review a family history artifact or record and extract every piece of information from it? You bet! Create a research plan that will help you find other records to verify or shed additional light on the information in the document. For example:

  • If you’ve got a death certificate, look for other death-related records, such as an obituary, tombstone inscription, and funeral home records.
  • Follow up on additional leads provided in the source. A death certificate sometimes mentions a Social Security number or military service, both of which have their own paper trails.

If you’re new to research plans or looking for a way to take them paperless, you’ll find detailed answers in my video class “Using Evernote to Create a Research Plan.” The video and handout download are available to Genealogy Gems Premium Members.

About the Author

About the Author

Lisa Louise Cooke is the Producer and Host of the Genealogy Gems Podcast, an online genealogy audio show and app. She is the author of the books The Genealogist’s Google Toolbox, Mobile Genealogy, How to Find Your Family History in Newspapers, and the Google Earth for Genealogy video series, an international keynote speaker, and producer of the Family Tree Magazine Podcast.

Disclosure: This article contains affiliate links and Genealogy Gems will be compensated if you make a purchase after clicking on these links (at no additional cost to you). Thank you for supporting Genealogy Gems!

Genealogy Gems Podcast Episode 213

In this episode, I’ll share a moving family history video, inspired by a listener’s Where I’m From poem. We’ll also discuss RootsTech news, talk to author Sylvia Brown, and Michael Strauss will explain the difference between different kinds of military service: regulars, volunteers and militia in Military Minutes. Listen here or through the Genealogy Gems app.

The Genealogy Gems Podcast
Episode #213
with Lisa Louise Cooke

NEWS: HENRY LOUIS GATES, JR TO KEYNOTE ROOTSTECH

Click here to read about all RootsTech keynote speakers

Click here to read about the Genealogy Gems experience at RootsTech 2018

Click here to hear Lisa Louise Cooke’s conversation with Henry Louis Gates, Jr. in the Genealogy Gems Podcast episode 133

GEMS NEWS: UPDATED PREMIUM VIDEO

Genealogy Gems Premium subscribers can now enjoy an updated version of Lisa’s Premium video, “Making Evernote Effortless.” You’ll learn how to use Evernote’s:

  • Quick Keys: Help you get things done faster
  • Search Operators: Digging deeper and faster into your notes
  • Shortcuts: Learn how to set them up to accomplish repetitive tasks faster
  • Reminders: Help you track and meet deadlines
  • Note Sharing: Collaboration just got easier
  • Source Citation: Merging notes to include sources; Source Citation with “Info” feature
  • Web Clipper Bookmarklet: a hack for adding it to your mobile tablet’s browser

Lisa Louise Cooke uses and recommends RootsMagic family history software.

Keep your family history research safely backed up with Backblaze, the official cloud-based computer backup system for Lisa Louise Cooke’s Genealogy Gems. Learn more at https://www.backblaze.com/Lisa.

Animoto.com.

BONUS CONTENT for Genealogy Gems App Users

If you’re listening through the Genealogy Gems app, your bonus content for this episode is a lightning-quick tech tip from Lisa Louise Cooke on how to undo that last browser you just closed and didn’t mean to! The Genealogy Gems app is FREE in Google Play and is only $2.99 for Windows, iPhone and iPad users

MILITARY MINUTES: REGULAR, VOLUNTEER OR MILITIA?

To gain a better understanding of what life in the military was like for your ancestors, it is essential to know in what capacity someone may have served. Did your ancestor serve in the regulars, or was he a volunteer soldier, or did he have service with the local militia?

These terms are generally associated with the records of the United States Army. The other branches enlisted men using different terminology.

Free download: Military Service Records at the National Archives by Trevor K. Plante (Reference Information Paper 109)

Click here for National Archives reference materials for military acronyms, abbreviations, and dictionaries that will aid genealogists when researching how exactly their ancestors served

Journal of the American Revolution: Explaining Pennsylvania’s militia: One of the best examples of how colonial militias operated (laws, rules, and regulations, and parent organizations). Pennsylvania followed very closely the doings of other colonies during the same period.

Samuel Howard in the Civil War

Because of his age he wasn’t able to enlist until 1865 when he turned 18. He was a volunteer soldier who served as a substitute for another man who was drafted.

After his discharge, he again enlisted in the Regular Army in 1866. He was assigned to the 13th U.S. Infantry, where he served one month before deserting at Jefferson Barracks, Missouri.

Samuel was married in 1867 (this may have some relevance to his decision to leave the military). He lived in Pennsylvania from the end of the war until his death in 1913. Shown here in 1876, Lebanon, PA.

Both his Regular and Volunteer Army enlistment forms are included here, along with the above photograph of Samuel with his wife circa 1876 from an early tintype. The forms look very similar, as each contains common information asked of a typical recruit. However they are decidedly different as the one covers his Civil War service and the other his post war service when he joined the regular Army after the men who served during the war would have been discharged.

MyHeritage.com is the place to make connections with relatives overseas, particularly with those who may still live in your ancestral homeland. Click here to see what MyHeritage can do for you: it’s free to get started.


GEM: AN INSPIRING FAMILY HISTORY VIDEO


Hannah’s Animoto Advice:

You’ll find when using the video templates, timing the photos to the narration can pose some challenges. Originally, when she put the photos in place and “previewed” the video, the narration didn’t line up at all with the images. Hannah explains: “When I was in “creator” mode, I selected a picture that I wanted to appear on the screen for a longer duration then I clicked the “spotlight” button that is on the left-hand side in the editor column. Or If you double click the image, it will open into a larger single view and you can select the “star” button which will do the same thing. I applied this spotlight option to several photos within my gallery. I knew which photos to do this to by previewing the video several times to make sure I liked the timing of it all.

Now if your problem is not with just a few photos but the overall timing, then try editing the pace of your photos.  In the top right-hand corner, click the “edit song/trim and pacing” button. Here you can trim you uploaded mp3 audio as well as the pace to which your photos appear. My photos appeared too fast on the screen in comparison to the narration I had, so I moved the pace button to left by one notch and previewed the video. This did the trick and the result was a heart-warming poem, turned into a visually beautiful story.”

Do you have a darn good reason to take action right now to get your family history in front of your family? Perhaps:

  • a video of the loving couples in your family tree for Valentine’s Day
  • a video of your family’s traditional Easter Egg hunt through the years
  • a tribute to the mom’s young and old in your family on Mother’s Day
  • your child’s or grandchild’s graduation
  • a video to promote your upcoming family reunion to get folks really visualizing the fun they are going to have
  • Or perhaps it’s the story of a genealogy journey you’ve been on where you finally busted a brick wall and retrieved an ancestor’s memory from being lost forever.

5 Steps to Jump-Starting Your Video Project

  1. Pick one family history topic
  2. Write the topic in one brief sentence ? the title of your video
  3. Select 12 photos that represent that topic.
  4. On a piece of paper, number it 1 ? 12 and write one brief sentence about each photo that convey your message. You don’t have to have one for every photo, but it doesn’t hurt to try.
  5. Scan the photos if they aren’t already and save them to one folder on your hard drive.

And now you are in great shape to take the next step and get your video made in a way that suits your interest, skill, and time.

4 Easy Methods for Creating Video

  1. Got an iPhone? iOS 10 now has “Memories” a feature of your Photos app that can instantly create a video of a group of related photos.
  2. There’s the free Adobe Spark Video app which can you can add photos, video clips and text to, pick a theme and a music track from their collection, and whip up something pretty impressive in a very short time. Visit your device’s app store or https://spark.adobe.com/about/video
  3. There’s Animoto which does everything that Spark does, but gives you even more control over the content, and most importantly the ability to download your video in HD quality. You can even add a button to the end that the viewer can tap and it will take them to a website, like your genealogy society website, a Facebook group for your family reunion or even a document on FamilySearch.
  4. And finally, if you have the idea, and pull together the photos, you can book Hannah at Genealogy Gems to create a video with your content. Go to GenealogyGems.com and scroll to the Contact form at the bottom of the home page to request ordering information.

The most important thing is that your family history can be treasured and shared so that it brings joy to your life today, and also, to future generations. The thing is, if your kids and grandkids can see the value of your genealogy research, they will be more motivated to preserve and protect it.


PREMIUM INTERVIEW: SYLVIA BROWN

In Genealogy Gems Premium Podcast episode #155, publishing later this month, Sylvia Brown (of the family connected to Brown University) will join Lisa Louise Cooke to talk about researching her new book, Grappling with Legacy, which traces her family’s involvement in philanthropy, Rhode Island history and the institution of slavery hundreds of years. A Kirkus review of this book calls it “an often riveting history of a family that left an indelible impact on the nation.”


PRODUCTION CREDITS

Lisa Louise Cooke, Host and Producer

Sunny Morton, Editor

Vienna Thomas, Associate Producer

Hannah Fullerton, Production Assistant

Lacey Cooke, Service Manager

Disclosure: These show notes contain affiliate links and Genealogy Gems will be compensated if you make a purchase after clicking on these links (at no additional cost to you). Thank you for supporting this free podcast and blog!


FREE NEWSLETTER:

Subscribe to the Genealogy Gems newsletter to receive a free weekly e-mail newsletter, with tips, inspiration and money-saving deals.


Check out this new episode!

How to find the full text of a book in Google Books

I love Google Books research tips for genealogists–and this researcher sent me a fabulous one! Here’s what she did when Google Books didn’t give her everything she’d hoped for. And here’s where she finally found the full text of a book that wasn’t on Google Books. 

Google Books is a vast and free virtual library that’s literally available at our fingertips–but it’s greatly underused. So I love teaching Google Books research tips for family history, and then hearing success stories from listeners and readers. Here’s one I think you’ll love, with a great message about following through after “partial” discoveries.

Google Books vs. a genealogy brick wall

Was Jesse Purdy a longtime Loyalist or Revolutionary War veteran? Marci wrote in about a mysterious ancestor whose political loyalties seemed conflicted. She’d found a man by his name who was a Revolutionary War soldier and then another who appears in records as a Loyalist (a British subject who remained loyal to the Crown when the American colonies rebelled).

“I knew my Jesse also went by Justus and I found his Revolutionary War pension records, learned he died in 1840 in Bovina, New York and was a patriot,” she wrote. She had identified him as the son of Thomas Purdy and Rachael Odgen, but that particular Jesse “was listed as a Loyalist and…died in Ontario in 1819….It never made sense that he lived out his life (and all his children were born) in New York state.”

When she looked on Google Books for ‘Justus Purdy,’ she found a tantalizing “snippet view” of a book called The Purdy Family in New Brunswick and Elizabethtown, Ontario:
Google Books research tips
She thought the book might go on to mention his parents, but in this case, the full text of the book is not available on Google Books, so she could only see the snippet.

Google Books research tip: Follow all leads!

As you can imagine, Marci really wanted to see this book. She says, “I am retired, living in Mexico, so I don’t have InterLibrary Loan (click here to read more about using this with WorldCat). I was about to email a…cousin to see it they would order it when I thought, “NO, Lisa would look for other sources on Google search first. So I did, and found the full text on FamilySearch. And (drum roll please) here it is! Lots on Jesse the Loyalist (nothing more on Justus the Patriot):”
Google Books research tips
“So it goes,” she concludes. “I have another source and I’m still looking for parents.”
Good for her for persevering until she found the full text of the book! I love how she widened her search past Google Books to a more universal Google search (click here to learn free Google search tips). That led her to another vast, free online library, FamilySearch.org’s free Family History Books search page, a search portal for more than 350,000 digitized family history-related books. Here’s the Purdy family history book on that site:
Google Books research tips

More Google Books research tips

Click here to read another inspiring success story with several Google Books research tips. Genealogy Gems Premium subscribers can take their Google Books searches to the next level after watching my full-length tutorial video, “Google Books for Genealogy.” Discover the best techniques for finding fully digitized books FAST, and search secrets for locating genealogical data. Learn to translate foreign language volumes from your ancestor’s homeland and even track down maps, images, photos and more.
About the Author

About the Author

Lisa Louise Cooke is the Producer and Host of the Genealogy Gems Podcast, an online genealogy audio show and app. She is the author of the books The Genealogist’s Google Toolbox, Mobile Genealogy, How to Find Your Family History in Newspapers, and the Google Earth for Genealogy video series, an international keynote speaker, and producer of the Family Tree Magazine Podcast.

6 Tips to Create Family History Books They Can’t Put Down

I started creating family history books a decade ago. These 6 strategies helped me share my genealogy research findings in books that made fascinating, affordable and easy-to-mail gifts.

cant put down family history books

My Dilemma: How to Share My Family History

Several years ago, I began sharing my family history research with my relatives. We don’t live close to them, so I had to mail whatever I shared.

Initially, I sent CDs full of digitized photos and documents, but they just didn’t get looked at like I had hoped. Individual items on CDs didn’t easily or smoothly tell a story.

Also, I think some of my relatives found the technology a bit intimidating back then. And many people just don’t care for viewing photos, documents or stories on a computer screen.

The Solution

I found that the solution to sharing with all family members was a good old fashioned book!

Books are still hard to beat for telling a story in words and pictures in an extremely easy to use way. Self-publishing little hardbound family history books helped me break up my research sharing into digestible chunks. And the best part? My family actually opened and read them them cover to cover.

 family history book I created about my Grandma.

Cover of the family history book I created about my Grandma.

But where to begin the family story, and where to end it? It’s tempting to tell the story of one generation in each book. But even this can become an overwhelming project, with an end product that is not as meaningful for your readers (lots of dates and names, without a lot of room for stories or photos).

I wanted my family to get to know our ancestors intimately. For me, that meant focusing on one person or one event instead of entire generations or families.

Where to Start

I started with my favorite ancestor: my grandmother.

I’ve transcribed many years of her diaries, which are full of her stories about years spent in nurse’s training. Those journal entries taught me so much and led me to some great discoveries about her life. They also dovetail beautifully with my collection of photos from that period. 

So I decided that my starting point would be her graduation from high school and her decision to enter the nursing field.

Photo from my family history book

Grandma was proud to be a nurse and I’m proud to tell her story.

By the time I had pulled everything together from 1930 to 1933, I had more than enough for a nice size book: “A Nurse in Training.”

Tips to Create Family History Books

It’s really important to create your book with your “customer” in mind: your family member who will be reading the book. So here are my top tips for making your book fascinating to your reader:

#1. Convey an overall theme

Review all the available material that you have. That will give you a sense of what stories you can tell and, hopefully, a sense of your ancestors’ goals, experiences and emotions.

In the case of “A Nurse In Training,” I wanted to communicate my grandmother as a young woman, taking on a new adventure away from home. Both funny times and deeply challenging times formed the foundation of this warm, caring woman’s successful career. And she just happened to meet her husband at the same time!

Tips for how to create a family history book

A page from “A Nurse in Training.”

You don’t need every scrap of research and every photo to get this theme across. It’s your job to be a sharp editor to pick out the critical pieces.

#2. Make it readable in one sitting.

Like it or not, if the book takes too long read, your relatives won’t. Strive to create a book that doesn’t look intimidating.

I create books that are 20 double-sided pages. People will be willing to pick up a thinner book off the coffee table. And if it’s well done, they’ll find that they’ve suddenly finished the entire book without once thinking of putting it down! Hopefully they’ll walk away with a real sense of having gotten to know that ancestor.

#3. Fill it with the best of what you have.

This goes back to conveying the theme and being a tough editor.

My grandma had many funny stories, but there just wasn’t room for all of them. I picked only the best of the best. Anyone who reads the book should hopefully come away with the fact that my grandma had a sense of humor and could laugh at herself.

Photo from my book: Grandma as a nurse in the TB ward

Grandma working the TB ward at San Francisco Hospital in 1933

I made sure some of the most compelling stories were at the beginning: if you can capture their interest in the first three pages, you’ll have them hooked for the entire book.

#4. Pack it with photos and graphics. 

A picture is definitely worth a thousand words. And since words in a small book will be limited, photographs will be your best friend.

If you’re lacking in family photos, consult my Genealogy Gems Podcast episodes for countless ideas for finding appropriate images.

In A Nurse In Training, I included scanned images of skating rink tickets, programs and announcements from my grandma’s scrapbook and journal pages in my grandmother’s own hand. These types of items really add texture and interest to a book, and help the reader to see that you’ve really done your homework.

#5. Keep it in chronological order. 

This seems obvious, but it’s easy to get side-tracked and start going back and forth in time. Believe me, for the reader’s sake, use dates and keep things in chronological order.

You as the researcher know this information backwards and forwards, but this is probably your reader’s first exposure to it. Be gentle with them and keep it straightforward and simple. Your reader will thank you.

#6. Choose quality! 

High-quality glossy pages, good image quality and a hard cover binding all shout to the reader, “I’m worth your time! Read me!”

For example, I found a drawing of Dameron Hospital, which was part of my grandma’s story, but it was a low quality image and didn’t look good in the book. As much as I wanted to include it, I ended up leaving it out, and I’m glad I did. It wasn’t critical to my theme, and there were other ways to illustrate the hospital setting for the reader.

From Book to Movie: Create Your Own Family History Videos

My “Nurse in Training” book eventually became the basis for my very first family history videos. Watch them here–and see how I turned her own words into an illustrated narrative:

animoto how a genealogy society can grow membershipNext Step: Turn Your Family History Book Into a Movie

I created these before do-it-yourself video services like Animoto made it so easy. (And I think that’s why I appreciate them so much!)

If you’d like to put an ancestor’s story into video format but you’re not sure how, try writing it up as a short book first. By the time you’re finished, you’ll have an excellent start on your “screenplay.” You’ll also have a great little book to send loved ones as a gift. (If you do eventually turn that story into a short video, they’ll love it even more, because they’ll already know the story that they will see come alive on the screen.)

Click here to learn step-by-step how to create your own family history video.

Pin It on Pinterest

MENU