I started creating family history books a decade ago. These 6 strategies helped me share my genealogy research findings in books that made fascinating, affordable and easy-to-mail gifts.
My Dilemma: How to Share My Family History
Several years ago, I began sharing my family history research with my relatives. We don’t live close to them, so I had to mail whatever I shared.
Initially, I sent CDs full of digitized photos and documents, but they just didn’t get looked at like I had hoped. Individual items on CDs didn’t easily or smoothly tell a story.
Also, I think some of my relatives found the technology a bit intimidating back then. And many people just don’t care for viewing photos, documents or stories on a computer screen.
The Solution
I found that the solution to sharing with all family members was a good old fashioned book!
Books are still hard to beat for telling a story in words and pictures in an extremely easy to use way. Self-publishing little hardbound family history books helped me break up my research sharing into digestible chunks. And the best part? My family actually opened and read them them cover to cover.
Cover of the family history book I created about my Grandma.
But where to begin the family story, and where to end it? It’s tempting to tell the story of one generation in each book. But even this can become an overwhelming project, with an end product that is not as meaningful for your readers (lots of dates and names, without a lot of room for stories or photos).
I wanted my family to get to know our ancestors intimately. For me, that meant focusing on one person or one event instead of entire generations or families.
Where to Start
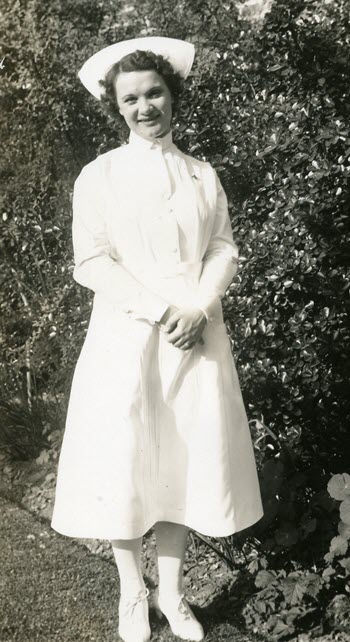
I started with my favorite ancestor: my grandmother.
I’ve transcribed many years of her diaries, which are full of her stories about years spent in nurse’s training. Those journal entries taught me so much and led me to some great discoveries about her life. They also dovetail beautifully with my collection of photos from that period.
So I decided that my starting point would be her graduation from high school and her decision to enter the nursing field.
Grandma was proud to be a nurse and I’m proud to tell her story.
By the time I had pulled everything together from 1930 to 1933, I had more than enough for a nice size book: “A Nurse in Training.”
Tips to Create Family History Books
It’s really important to create your book with your “customer” in mind: your family member who will be reading the book. So here are my top tips for making your book fascinating to your reader:
#1. Convey an overall theme
Review all the available material that you have. That will give you a sense of what stories you can tell and, hopefully, a sense of your ancestors’ goals, experiences and emotions.
In the case of “A Nurse In Training,” I wanted to communicate my grandmother as a young woman, taking on a new adventure away from home. Both funny times and deeply challenging times formed the foundation of this warm, caring woman’s successful career. And she just happened to meet her husband at the same time!
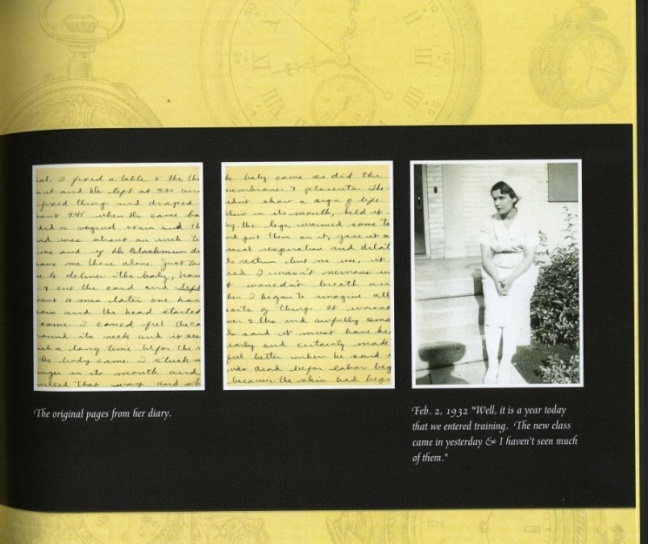
A page from “A Nurse in Training.”
You don’t need every scrap of research and every photo to get this theme across. It’s your job to be a sharp editor to pick out the critical pieces.
#2. Make it readable in one sitting.
Like it or not, if the book takes too long read, your relatives won’t. Strive to create a book that doesn’t look intimidating.
I create books that are 20 double-sided pages. People will be willing to pick up a thinner book off the coffee table. And if it’s well done, they’ll find that they’ve suddenly finished the entire book without once thinking of putting it down! Hopefully they’ll walk away with a real sense of having gotten to know that ancestor.
#3. Fill it with the best of what you have.
This goes back to conveying the theme and being a tough editor.
My grandma had many funny stories, but there just wasn’t room for all of them. I picked only the best of the best. Anyone who reads the book should hopefully come away with the fact that my grandma had a sense of humor and could laugh at herself.
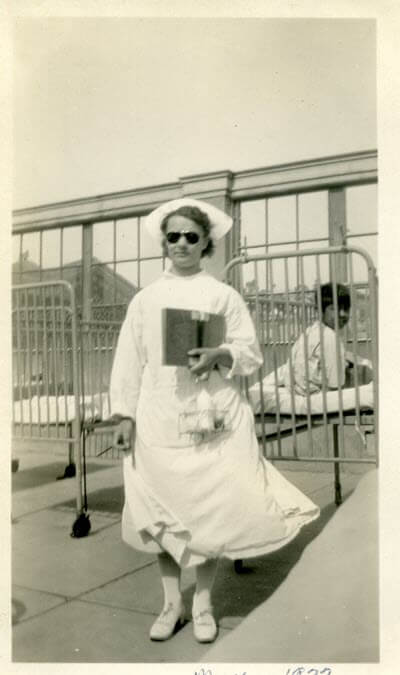
Grandma working the TB ward at San Francisco Hospital in 1933
I made sure some of the most compelling stories were at the beginning: if you can capture their interest in the first three pages, you’ll have them hooked for the entire book.
#4. Pack it with photos and graphics.
A picture is definitely worth a thousand words. And since words in a small book will be limited, photographs will be your best friend.
If you’re lacking in family photos, consult my Genealogy Gems Podcast episodes for countless ideas for finding appropriate images.
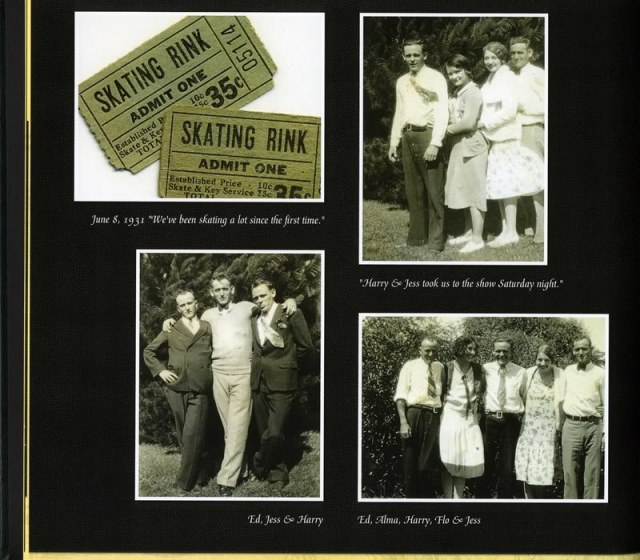
In A Nurse In Training, I included scanned images of skating rink tickets, programs and announcements from my grandma’s scrapbook and journal pages in my grandmother’s own hand. These types of items really add texture and interest to a book, and help the reader to see that you’ve really done your homework.
#5. Keep it in chronological order.
This seems obvious, but it’s easy to get side-tracked and start going back and forth in time. Believe me, for the reader’s sake, use dates and keep things in chronological order.
You as the researcher know this information backwards and forwards, but this is probably your reader’s first exposure to it. Be gentle with them and keep it straightforward and simple. Your reader will thank you.
#6. Choose quality!
High-quality glossy pages, good image quality and a hard cover binding all shout to the reader, “I’m worth your time! Read me!”
For example, I found a drawing of Dameron Hospital, which was part of my grandma’s story, but it was a low quality image and didn’t look good in the book. As much as I wanted to include it, I ended up leaving it out, and I’m glad I did. It wasn’t critical to my theme, and there were other ways to illustrate the hospital setting for the reader.
From Book to Movie: Create Your Own Family History Videos
My “Nurse in Training” book eventually became the basis for my very first family history videos. Watch them here–and see how I turned her own words into an illustrated narrative:
Next Step: Turn Your Family History Book Into a Movie
I created these before do-it-yourself video services like Animoto made it so easy. (And I think that’s why I appreciate them so much!)
If you’d like to put an ancestor’s story into video format but you’re not sure how, try writing it up as a short book first. By the time you’re finished, you’ll have an excellent start on your “screenplay.” You’ll also have a great little book to send loved ones as a gift. (If you do eventually turn that story into a short video, they’ll love it even more, because they’ll already know the story that they will see come alive on the screen.)
Click here to learn step-by-step how to create your own family history video.
You probably have more families than you think. I know I do.
I’m a pretty lucky lady. My business is a family business. All three of my daughters and my husband work with me to create Genealogy Gems. But our company family also includes Sunny Morton, our Editor and Book Club Guru, and Your DNA Guide Diahan Southard. As we capture memories throughout the year for generations to come, it makes sense to capture all the families we a part of: businesses, teams, churches, and yes, even genealogy societies.
This year has been an important one for the Genealogy Gems family. It’s our 10th year serving people around the world who yearn to learn more about their family history. So, I temporarily set aside my workload this last weekend and devoted some important time to recording our history.
I turned to my favorite video tool, Animoto, to pull it all together. It took some time to sift through all the photos and notes I’ve collected over the years, but I loved the nostalgia of seeing it all again and looking back on how far we’ve come. It still blows me away how much easier it is to make a video these days with this new technology. A video like this would have taken me 8-10 hours just ten years ago. But Animoto literally took minutes, and automatically applies the transitions, music, background, and makes sure it all times out together perfectly.
Here’s what I came up with:
There’s no better use of your time than telling the story of the families that mean most to you. Every single one has a story, and I can’t think of a better person to tell that story than you! You can get a free trial of Animoto here, and get started right away. There doesn’t even have to be a reason or an occasion – these videos can be treasured and enjoyed anytime. Show your families how much you care. And when you do, share the link in the comments, won’t you?
(Full disclosure: This post contains affiliate links and I will be compensated if you make a purchase after clicking on my links. Thank you for supporting the free Genealogy Gems blog and podcast!)
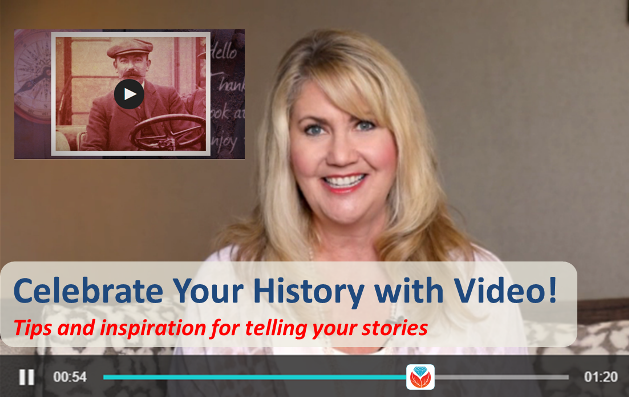
Celebrate your stories with video–whether it’s your family history, the story of your business, or an event or pastime you want to share. Check out 5 weeks of great video ideas from Animoto, including my own family history video on an ancestor’s immigration story.
This year marks a big milestone for Genealogy Gems: we turned 10 years old! My favorite video creation tool, Animoto, also marks a decade this summer. We’re celebrating with them–and what better way than with video?
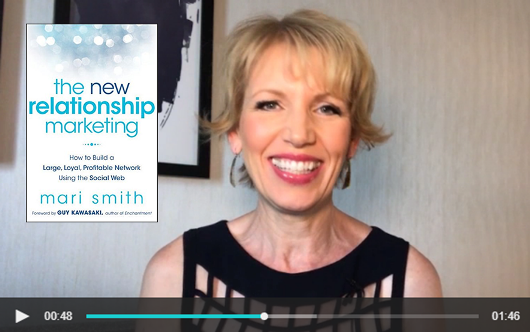
Last week Animoto celebrated relationships with Facebook expert and author of Relationship Marketing, Mari Smith. She inspired everyone to create a video celebrating relationships — whether it’s a video about your family or friends, a video showing appreciation for a client, or a video celebrating another bond that’s important to you.
This week, I’m honored to have been invited by the good folks at Animoto to share why our histories are so important and offer up the video I created that I hope will inspire others. Click here to watch that short can you buy medication online video (it’s the first one). Of course they also asked me to share a celebratory video of my own! On the same page, check out a short video I created about the Cooke family coming to Canada. You’ll also find other videos celebrating the story of a business, birth of a child, history of a product and a photographer’s love of his craft. It’s amazing how many topics we can celebrate powerfully with a short video!
Which family history story will you tell with video and Animoto? Join the party and show your Genealogy Gems pride by sharing them on Facebook, Instagram, or Twitter using the hashtags #CelebrateWithVideo and #GenealogyGemsPodcast.
Let us help you make a family history video with these detailed how-tos:
Thanks for clicking here to check out Animoto’s subscription service for creating professional-quality videos. When you use this affiliate link and make a purchase, I will be compensated. I appreciate you using these links because that compensation helps make the Genealogy Gems blog possible.
Here’s how to make a family history interview video. We’ll walk you through an easy and quick process that will result in a professional quality video that you’ll be proud to share with your family and generations to come.
My husband Bill does not enjoy being on camera, and if I add an interview to the scenario, I have an even bigger challenge on my hands. Does that sound like anyone in your family?
Getting a family member to sit down and answer questions about their life or an ancestor they remember can be an uphill battle, but the climb is worth it. Each one of us has a very unique view of the world. Even though we may remember the same person, our memories and feelings will be distinctly individual, and therefore are worth capturing.
Father’s Day is just around the corner, and we have a new granddaughter joining our family next month. Now seemed like the perfect time to quickly cobble together an interview video with Bill sharing his memories about his dad. I shared some old photos with him and captured his memories. Take a look:
Maybe you’ve been thinking to yourself, ‘Right now just isn’t a good time.’ But guess what! ‘Right now’ is always the ideal time to capture the memories of living relatives. Don’t wait for the opportune moment to present itself, because it might never come. Right now is the perfect time for you to ask questions and record memories that might otherwise have been lost forever.
If you’ve got a few extra minutes to prep for a more polished interview, follow my recipe for creating a video your family will savor for generations to come.
Even though we may remember the same person, our memories and feelings will be distinctly individual, and therefore are worth capturing.
Ingredients for a Family History Interview Video
(Note: I only endorse products that I love and that’s why I’ve accepted Animoto as a sponsor. That means I was compensated for this post. This post also contains affiliate links and I will be compensated if you make a purchase after clicking on my links. Thank you, because they help support the free Genealogy Gems Podcast.)
To create a video like mine, which in total took me about 1 hour from start to finish to create, you’ll need:
a smart phone or tablet (I used my iPhone 7 Plus to capture video of Bill answering my questions. The iPhone has a terrific camera built in, but any mobile device with a camera will do.)
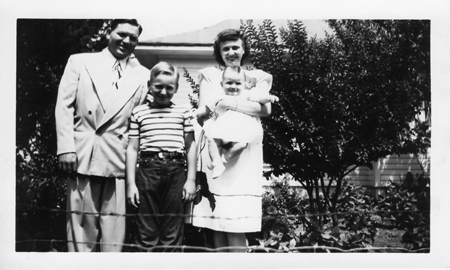
old family photos (I saved mine to a Dropbox folder that I could access on my iPad)
an Animoto slideshow subscription (test drive Animoto with a free trial if you want to get the feel of it before subscribing.)
a short list of questions pertaining to the photos
a willing interviewee (that was my hubby, although I use the term “willing” loosely here)
Pull together everything before you bring in your interviewee. That way, they won’t start off the interview bored or frustrated while you get things ready. We definitely want to get this off on the right foot!
Setting the Stage
Find a comfortable chair for your interviewee and then place it in front of an attractive background in the room. To get a feeling of depth and a nice focus on my subject, I placed my chair in the center of the room so that the background was in the distance. This setup puts the focus on the person you are interviewing and not the items right behind him.
Lighting can make a big difference in the feel of your video, but it doesn’t have to be fancy. Notice that I kept the background fairly unlit, and then turned on a nice soft lamp on one side of Bill. On the other side, out of camera view, I brought in a second light so that both sides of his face would be lit.
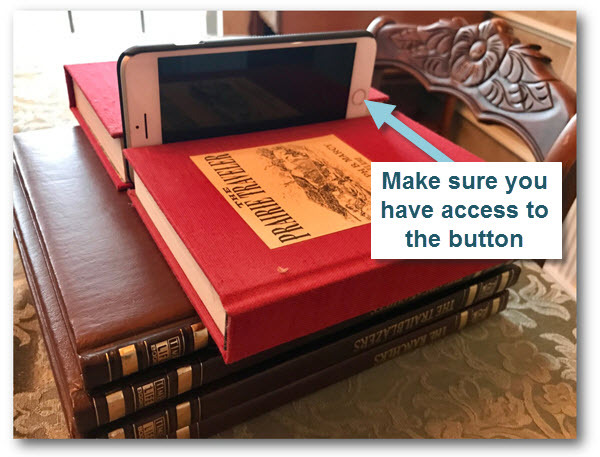
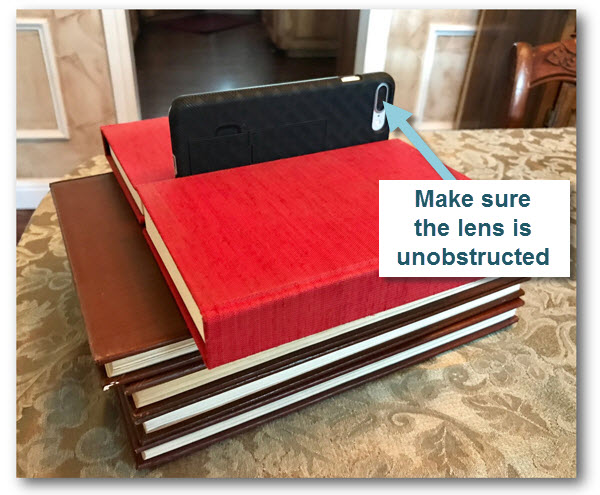
Set up a small, portable tripod on our coffee table in front of my subject and mounted my smartphone (I like this one, which was less than $12). If you don’t have a tripod, just stack up a couple of books on the table to get to the right height, and then use a book on either side of the camera to keep it stable.
The video viewer side facing you as the interviewer
The lens side facing your interviewee
Position a chair for yourself behind the camera, and off to one side. Stay within reaching distance of your camera so that you can turn it on and off between questions. You will want to be off to one side so that your subject is looking at you and not the camera when they answer your questions during filming.
‘Right now’ is always the ideal time
to capture the memories of living relatives.
Start the Interview
Bring your subject in, and get them comfortable in their chair. Have a glass of water nearby for them. Chat with them for a moment about how they are doing, the weather, or whatever else comes to mind (except family history – save that for the video) to sort of warm them up. Explain that they don’t need to worry about the camera, but instead should just focus on talking to you.
To ensure an easy to understand video, encourage them to repeat back the question in their answer because your audio won’t be part of the interview. For example:
You: “What was your mom like when you were a child?” (showing a photo of them and their mom)
Them (OK) : “She took great pride in her home, and she insisted we take our shoes off before entering.”
Them (BETTER) : “When I was young, my mom took great pride in her home, and she insisted that we take our shoes off before entering.”
Folks usually get the hang of it after a couple of tries. Finally, ask them to wait just a beat before they begin talking and to avoid talking over you. Again, the goal is to only capture the audio of the interviewee.
Armed with your list of questions, bring out the first family photo (I did this on an iPad where I had the photos saved in my Dropbox app). On your phone, tap the Camera app to open it, set it to Video, and pressed the big round record button. Move back to your off camera position, and show the first photo and ask your question. Don’t worry about the beginning or the end of the Q&A being messy with getting situated because you will trim that off later in Animoto. After they complete their answer, press the button on the screen to stop recording. It is much easier to work with short video clips rather than one long continuous recording for a number of reasons:
It’s easier to move small video clips from your phone to your computer
Video clips up to 450 MB can be uploaded to Animoto (that’s typically just a little over 4 continuous minutes of video)
One question per clip makes it much easier to move them around in your project to get the exact order you want
It’s easier to interject photos between clips when the questions are individual video clips
Pull up the next photo, press Record, and ask your second question. Repeat for each question and answer. If you go longer than about 20 minutes total, it’s a good idea to stop and ask them how they are doing. Ask if they are agreeable to continuing. Be sensitive to their time and comfort. Remember, people before genealogy.
Post Production of Your Family History Interview Video
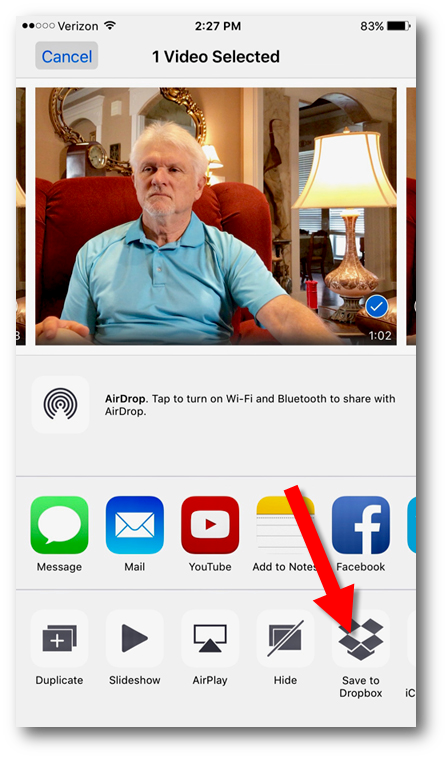
Step 1: In the Camera app, tap Share and Save to Dropbox
As a podcaster, pre- and post-production takes up much more of my time than recording. But with Animoto, your post-production time will be really quick. Here are the steps to creating your finished video:
Step 1: In the Camera app, Share your videos to your computer via a cloud sharing service.
Step 2: On your computer go here to Animoto, sign in and click the Create button to start a new Slideshow video project. (For 10 seconds or shorter video clips you can create your video right on your phone in the Animoto app. But in the case of this type of interview, answers will be longer and you’ll want to use the website.)
Step 3: Select a Style and the Song that will play in the background.
Step 4: On the project page, click Add pics & videos, and upload the video clips and photos. Adjust the length of each video clip as desired, eliminating unwanted portions.
Step 5: Arrange the content in the desired order. I chose to show the answer first, and follow it up with the photo.
Step 6: Add Text if desired. You can add text to photos, or individual ‘title cards’ at the beginning, middle, and end of your video.
Step 7: Click Preview to review your video and make any needed adjustments.
Step 7: Preview one last time and click Produce to render your finished video.
Step 8: Download a copy of the video to your computer, and make sure your computer is backed up! (I use Backblaze.) The ability to download HD quality videos from Animoto for archiving is a HUGE reason why I love it so much.
I’ve got three quick tutorial videos here for you to watch if you feel like you need some help with your first project.
Remember, people before genealogy.
Need more inspiration?
I’ve been having a blast creating Animoto videos about my husband’s family. It’s been a great way to get my non-genealogist husband involved and really interested in family history. Here are two more videos I created about his family:

 Next Step: Turn Your Family History Book Into a Movie
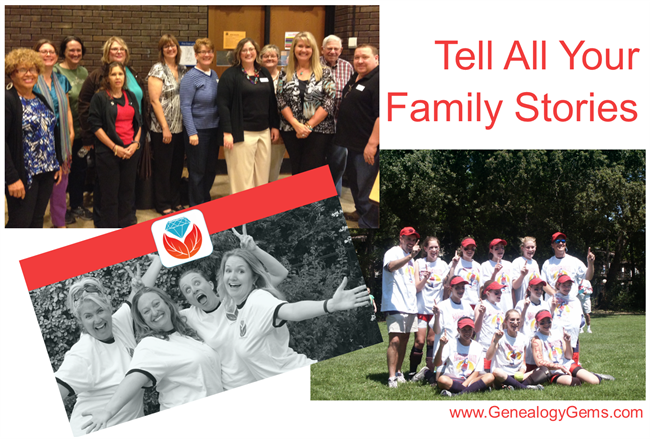

 (Note: I only endorse products that I love and that’s why I’ve accepted Animoto as a sponsor. That means I was compensated for this post. This post also contains affiliate links and I will be compensated if you make a purchase after clicking on my links. Thank you, because they help support the free Genealogy Gems Podcast.)
 Find a comfortable chair for your interviewee and then place it in front of an attractive background in the room. To get a feeling of depth and a nice focus on my subject, I placed my chair in the center of the room so that the background was in the distance. This setup puts the focus on the person you are interviewing and not the items right behind him.